Seasonal Woven Trees - a Tutorial
/Spring brings a variety of colors to the trees. From colorful blossoms to the bright green of emerging leaves, colors are everywhere. This craft is a simple way to capture the beauty of spring in a natural way. It would also be perfect to celebrate autumn's colors. We did this project in a class with students spanning kindergarten to 5th grade and all enjoyed it!
Supplies:
willow branches, other flexible branches or any store-bought wreath or hoop
brown yarn
roving or yarn in spring colors as well as brown for the trunk. Strips of fabric would work well too. Or make it super-nature-style and weave real branches and flowers into it!
You can purchase roving (unspun wool) in a variety of colors but we found multicolored options especially fun to use. Check your local yarn shop or look online. This Etsy search brings up a lot of hand-dyed options! Yarn can be used instead but is probably best for older students with the patience to complete a longer project. The fluffy roving is very forgiving for little hands and fills up the tree quickly.
We began by twisting willow branches* into small wreaths. Ours are about 8 inches in diameter. The ends are overlapped several inches to hold it in place. We found that some needed a little piece of tape to keep the ends in place. The tape was removed after the project was completed and everything help together just fine.
*If you don't have willow, any flexible branch will work, or you can use a purchased wreath or embroidery hoop.
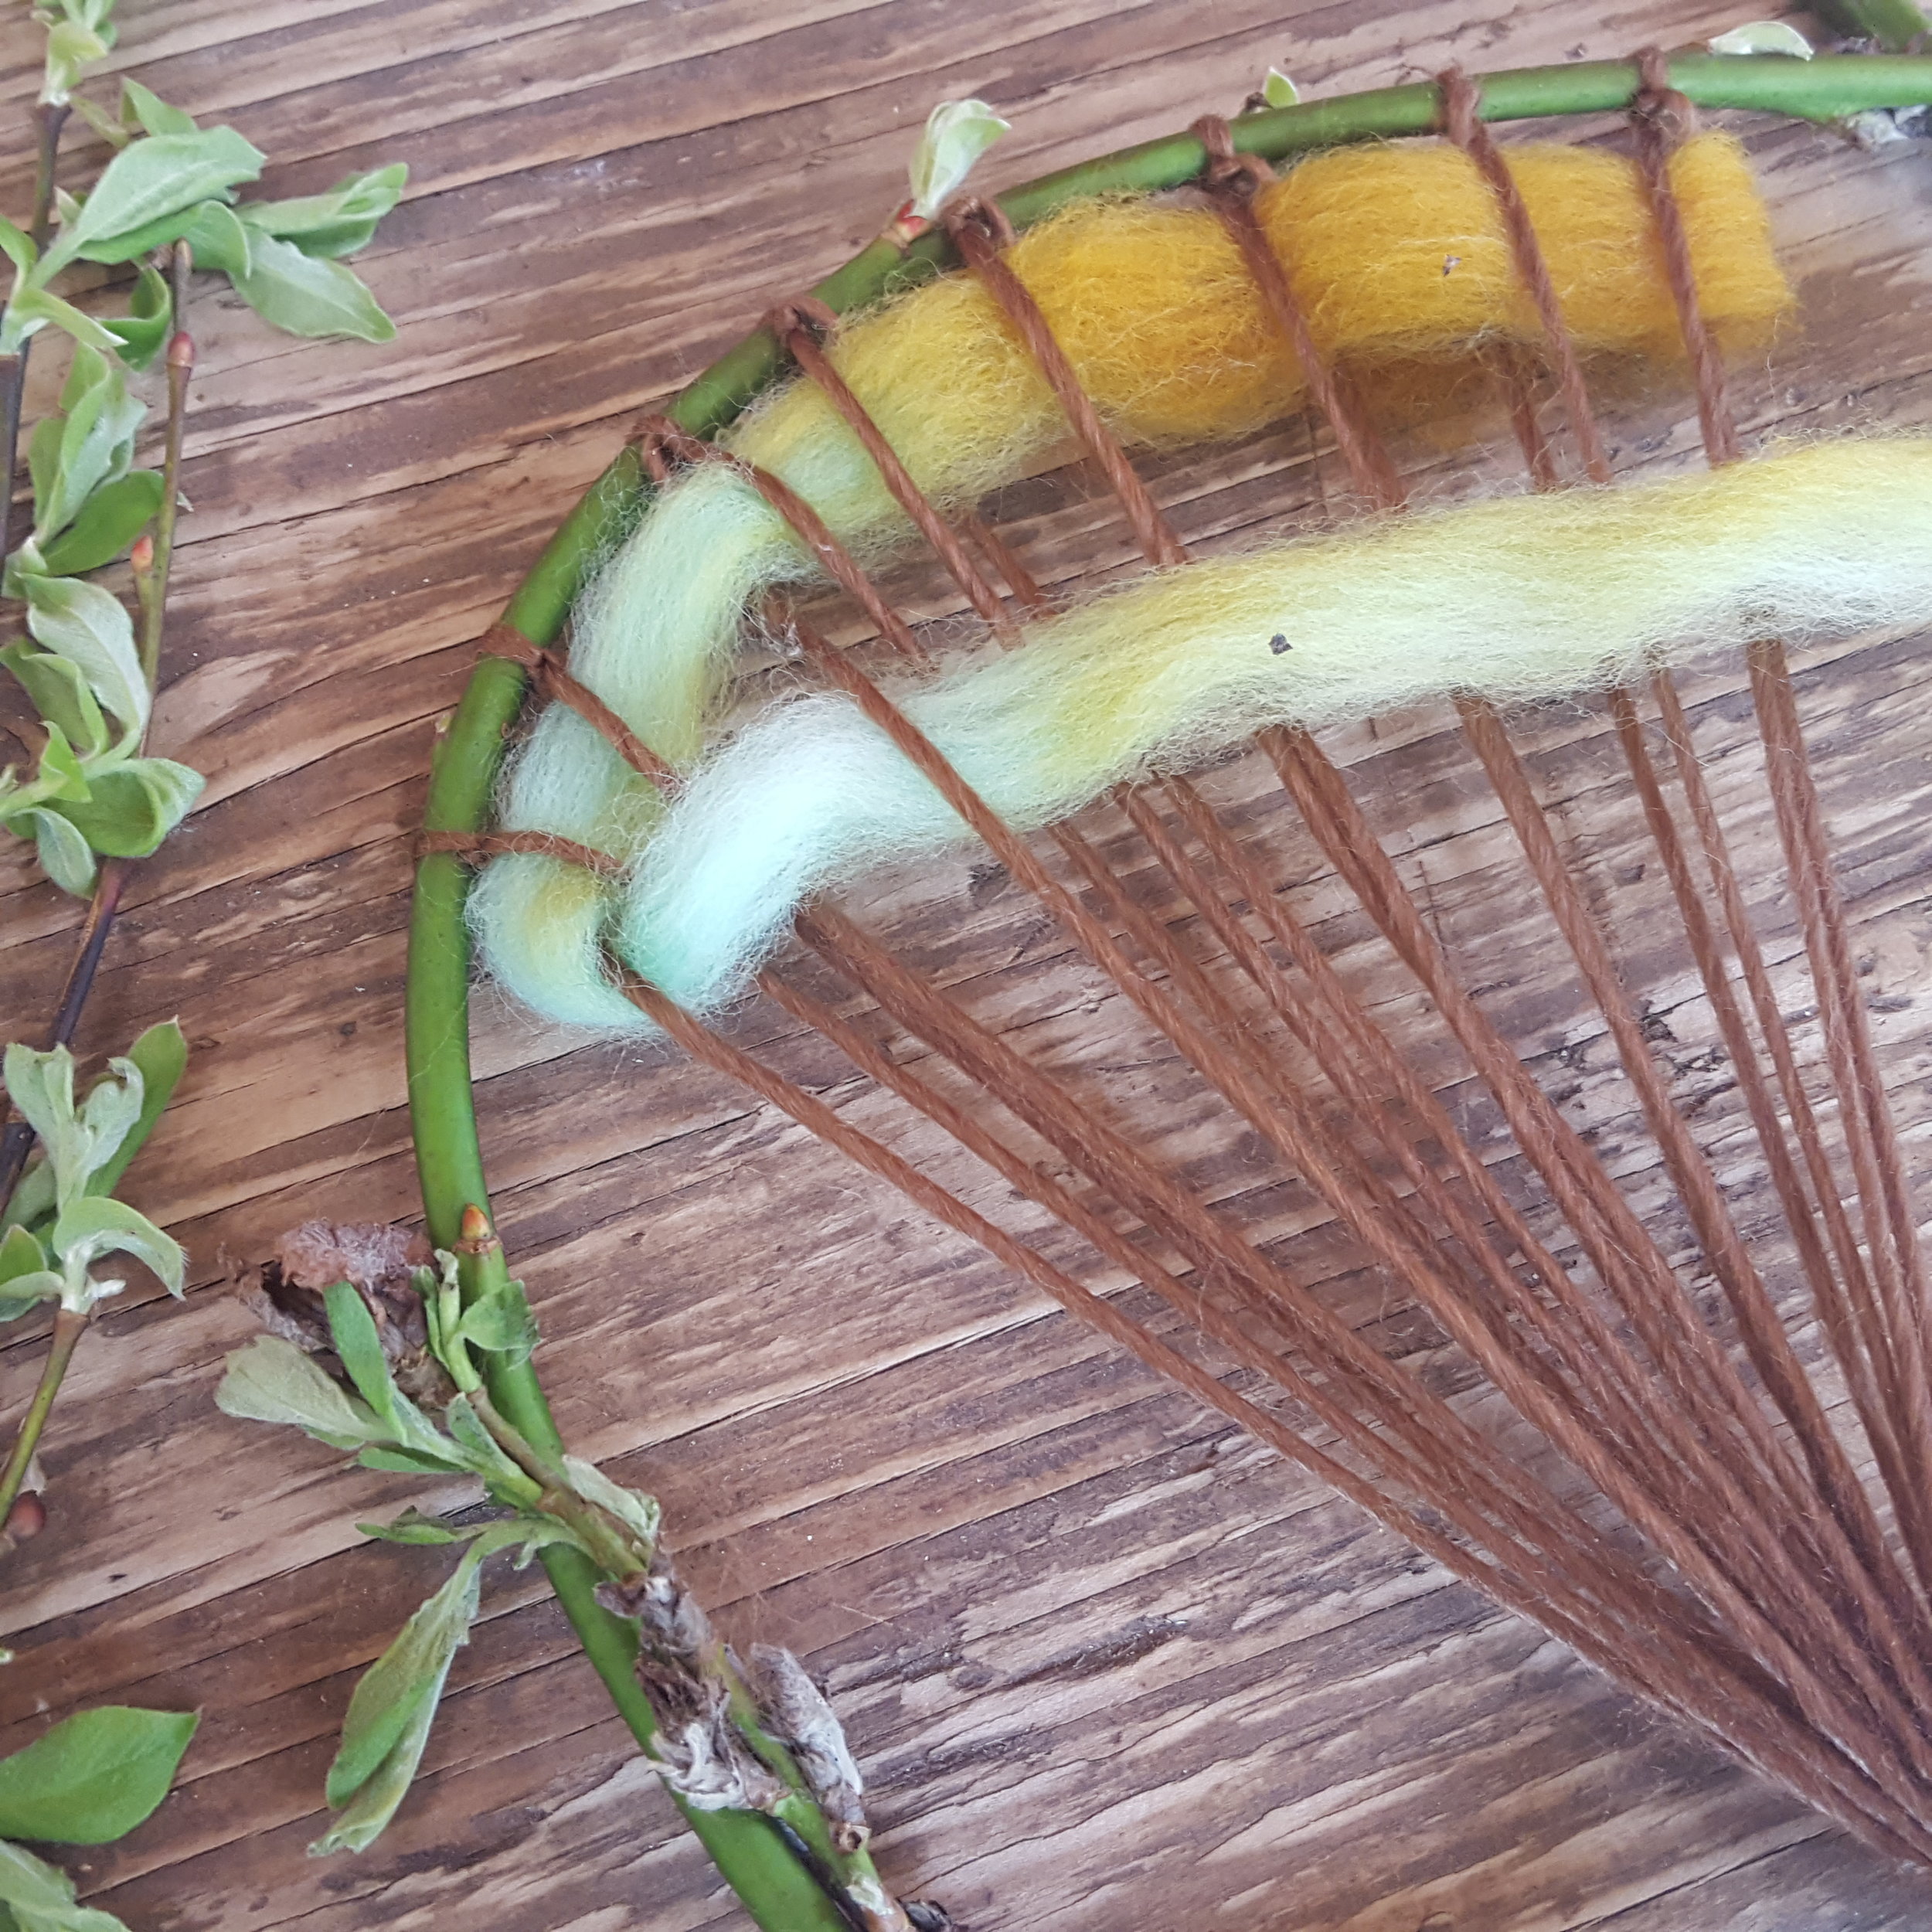
Lengths of brown yarn were used as the warp - the strands that the tree would be woven onto. For each tree we cut 8 lengths of yarn about 2 1/2 times the diameter of the wreath. (if your wreath is much larger, you will likely need more.) Tie them evenly across about a quarter of the wreath, knotting them in the middle. If they're close together the tree will be narrow, while spacing them apart more creates a tree with a wider canopy.
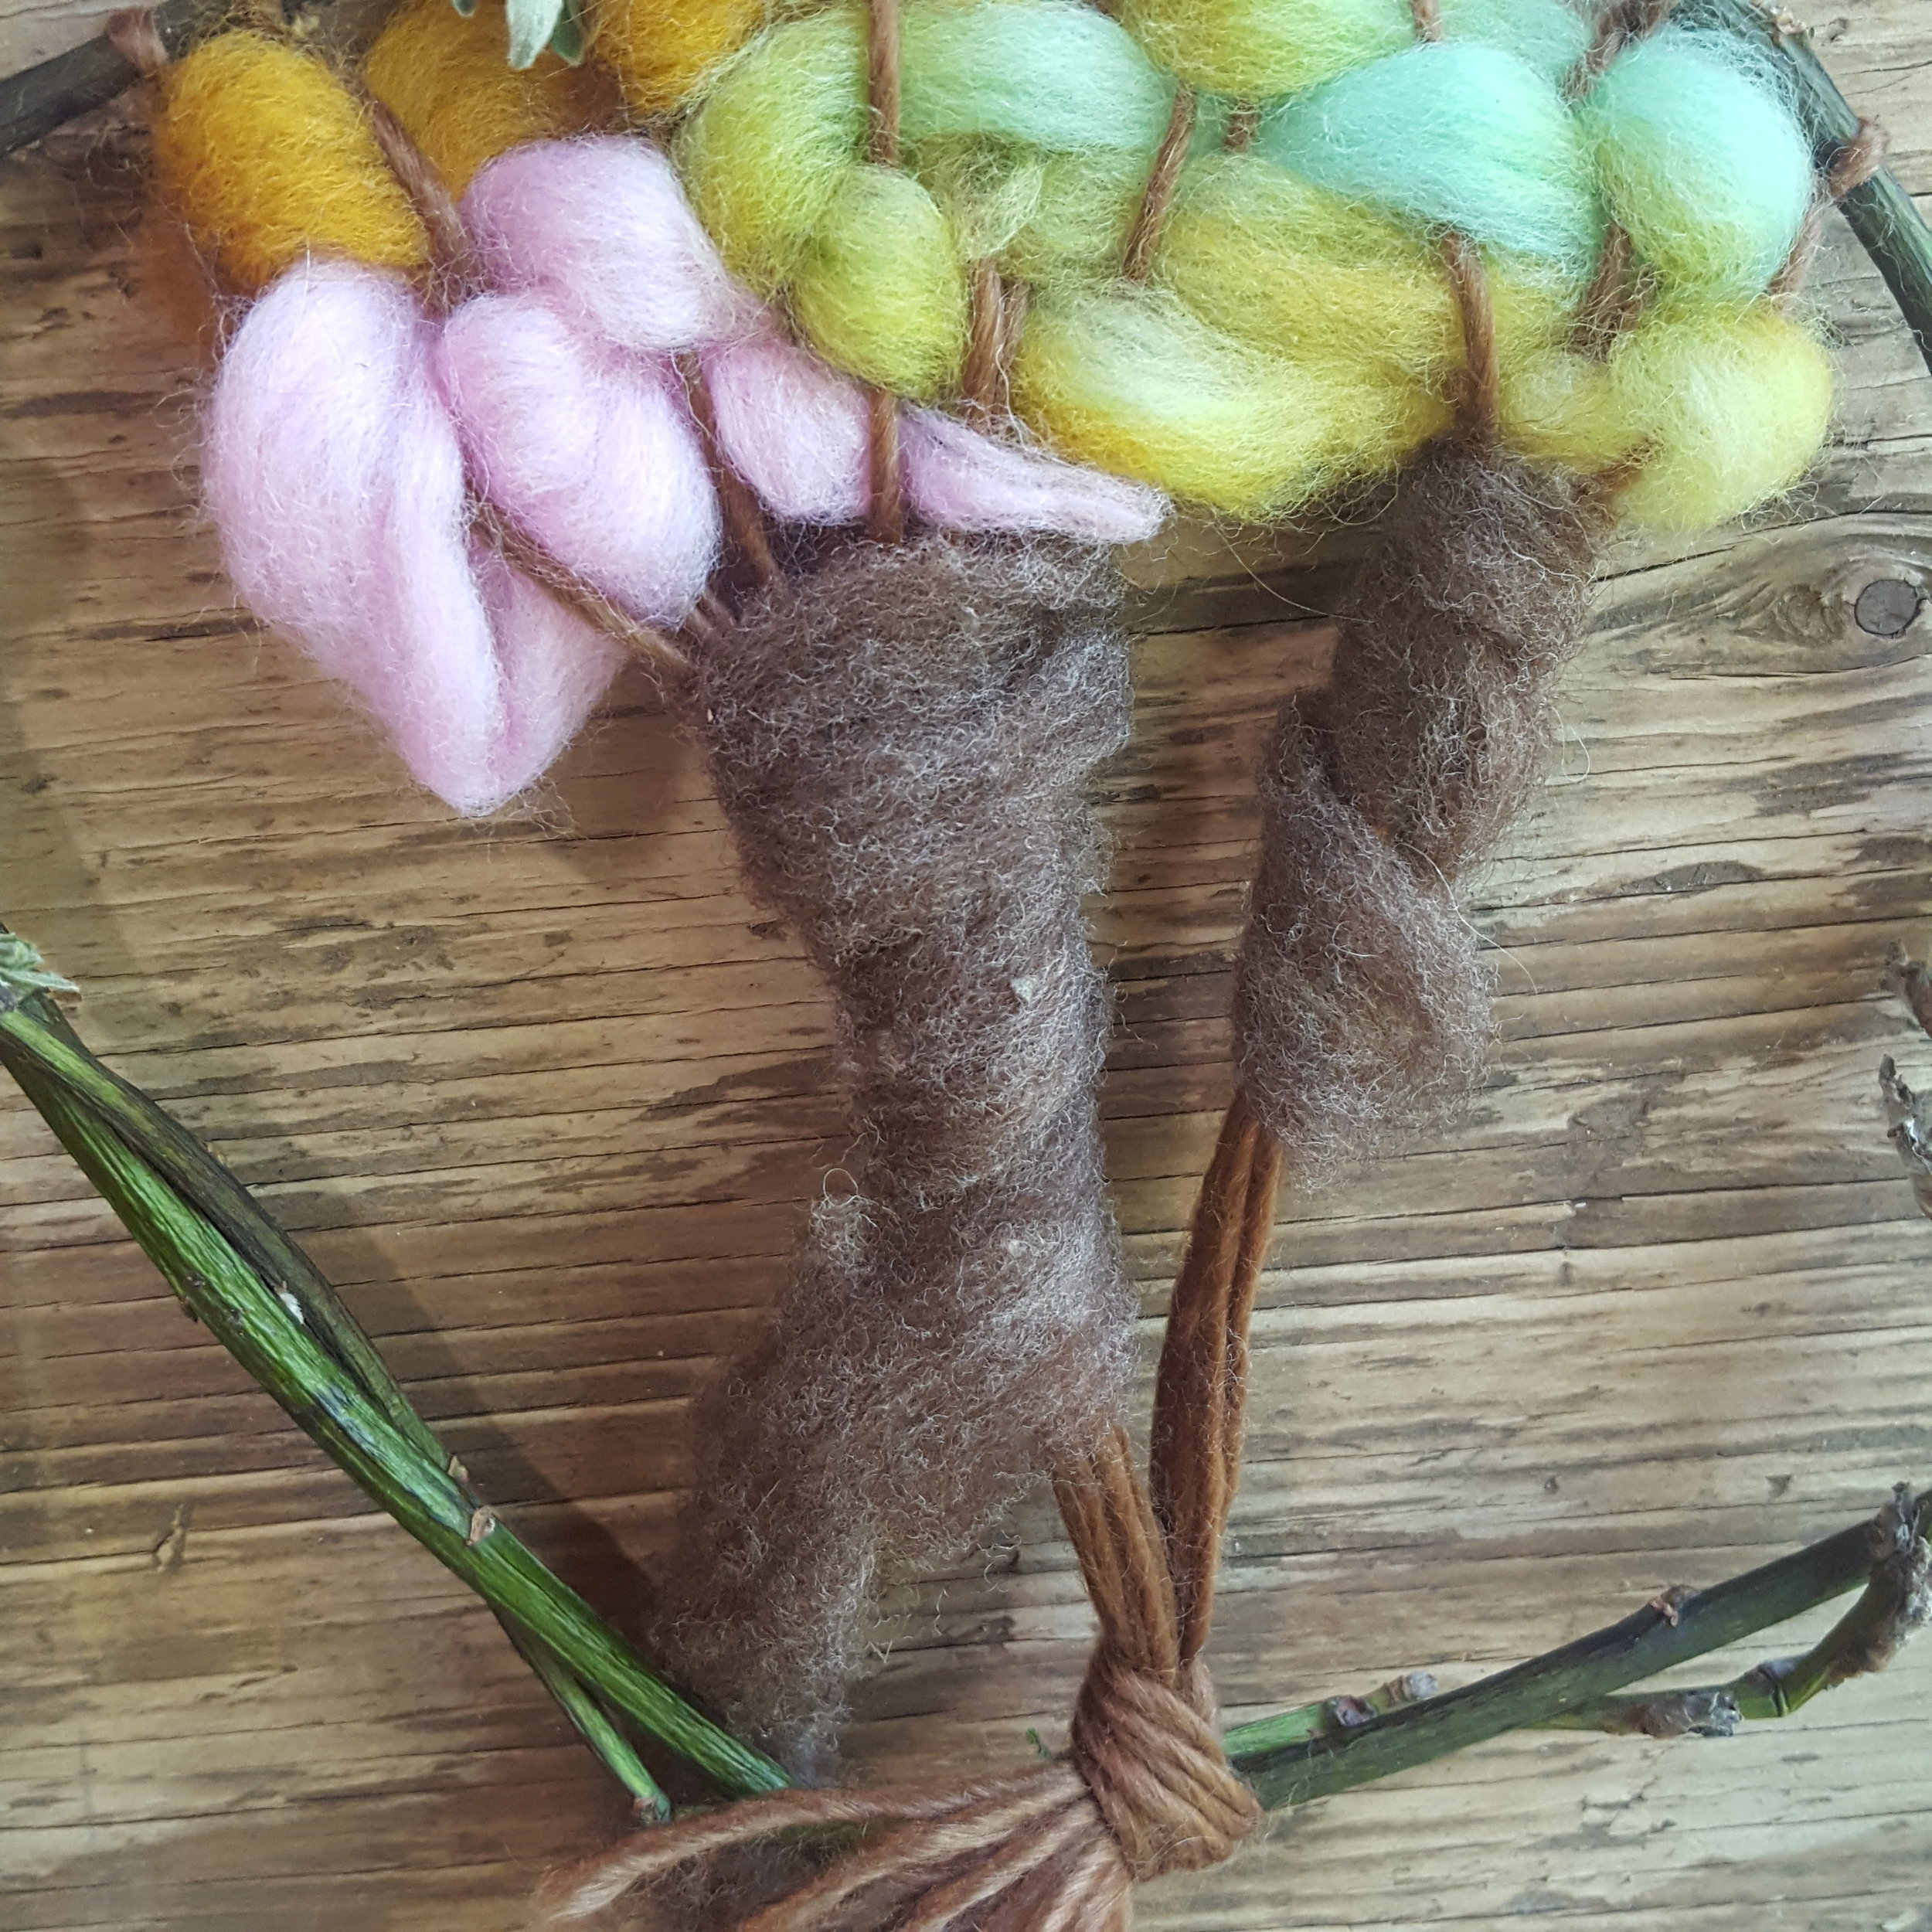
Bring the ends of the yarn together at the bottom of the wreath and tie them, all together, in a knot around the wreath. Be careful not to pull too tight or you may change the shape of the wreath.
Now comes the fun part! The elementary school students who made the trees pictured at the top of this tutorial had a discussion about the colors they see in the trees. After naming such lovely colors as chartreuse green, bubblegum pink, and pale pinkish-white, they pulled off bits of roving and started weaving them in and out of the strands of yarn. Over, under, over, under. The beauty of this project is that it doesn't matter if you weave over and under each strand, or skip several. Some will show through and appear as branches.
Change colors as desired to create a colorful tree canopy. When you are ready to begin the trunk, use brown roving and wrap it around several strands of the yarn for about an inch. Repeat with remaining strands of yarn then join all strands together and continue wrapping until you reach the bottom of the wreath.
The nice thing about wool is that is sticks to itself so the ends mostly stay in place. Any stray ends can be tucked under strands of yarn in the back, creating a lovely, neat tree from the front!
Attach a loop of yarn to hang it, if desired, and enjoy your pop of seasonal colors!


