The Forest Path - February 2021

February was when our “mild winter” was no more. Freezing rain and snow and ice and wind - we got hit with some of everything. We were prepared for it and were okay being snowed in for several days but many in our community were without electricity for quite a few days. It was a brutal storm.

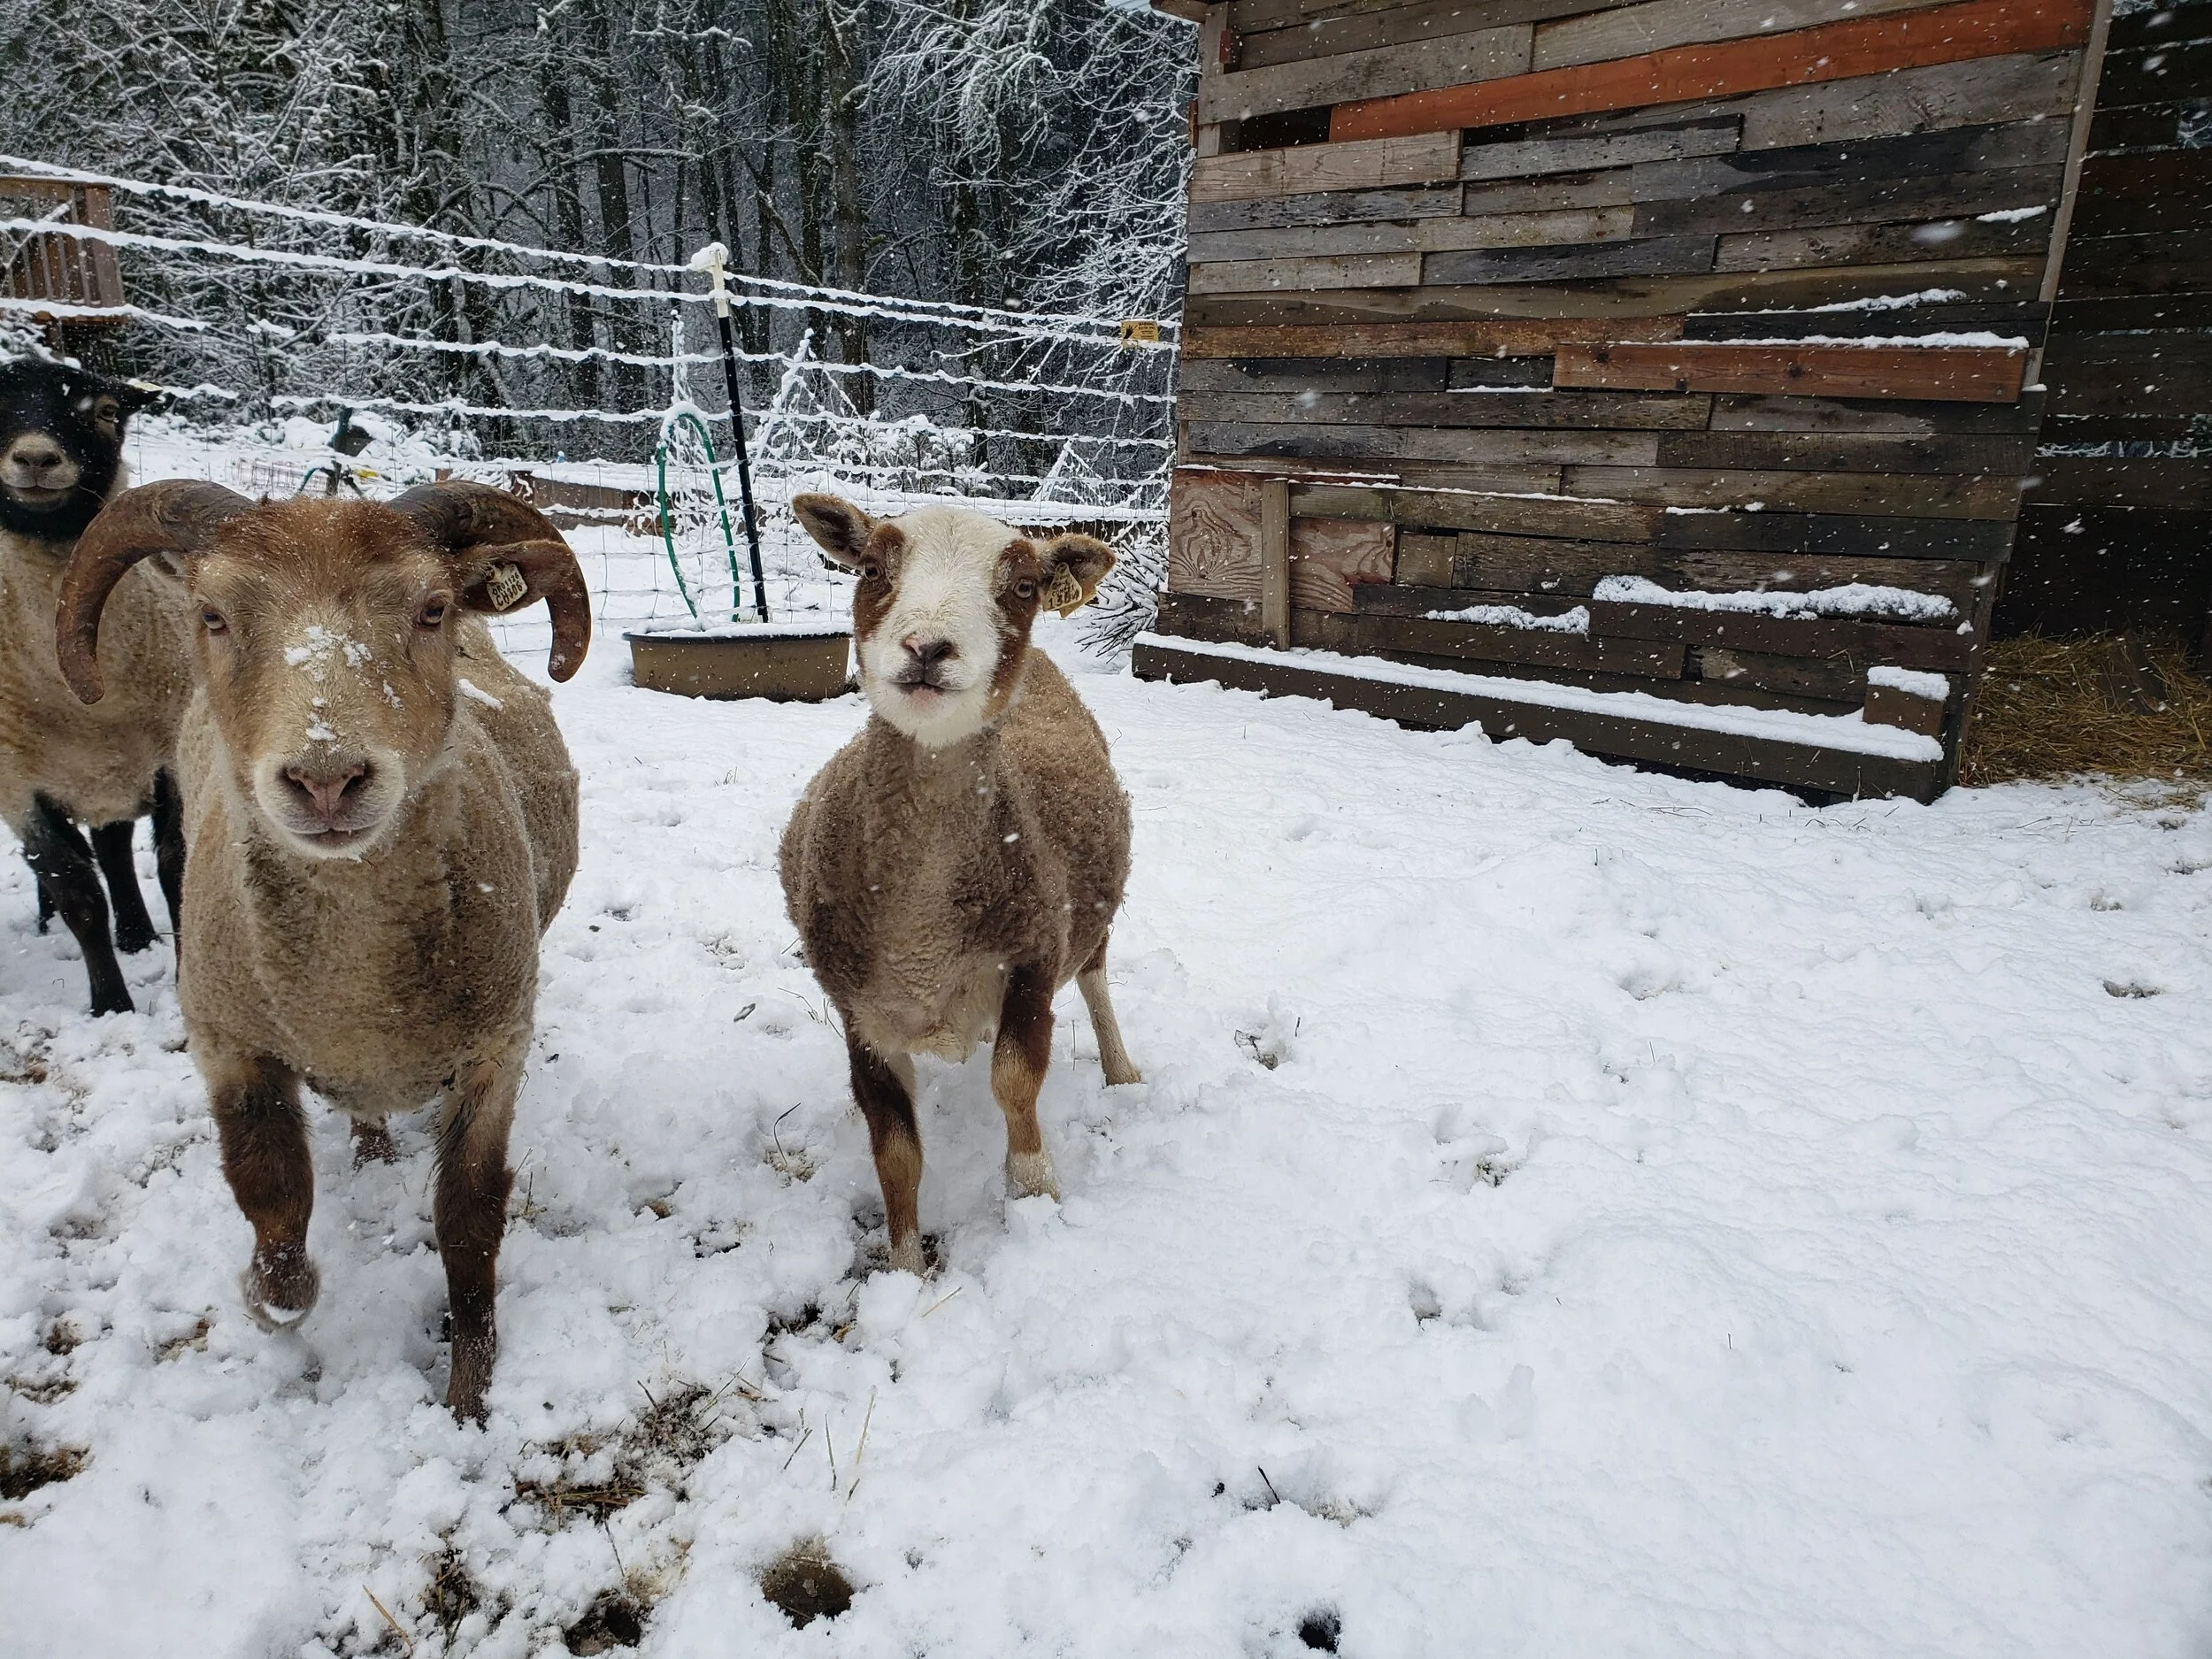
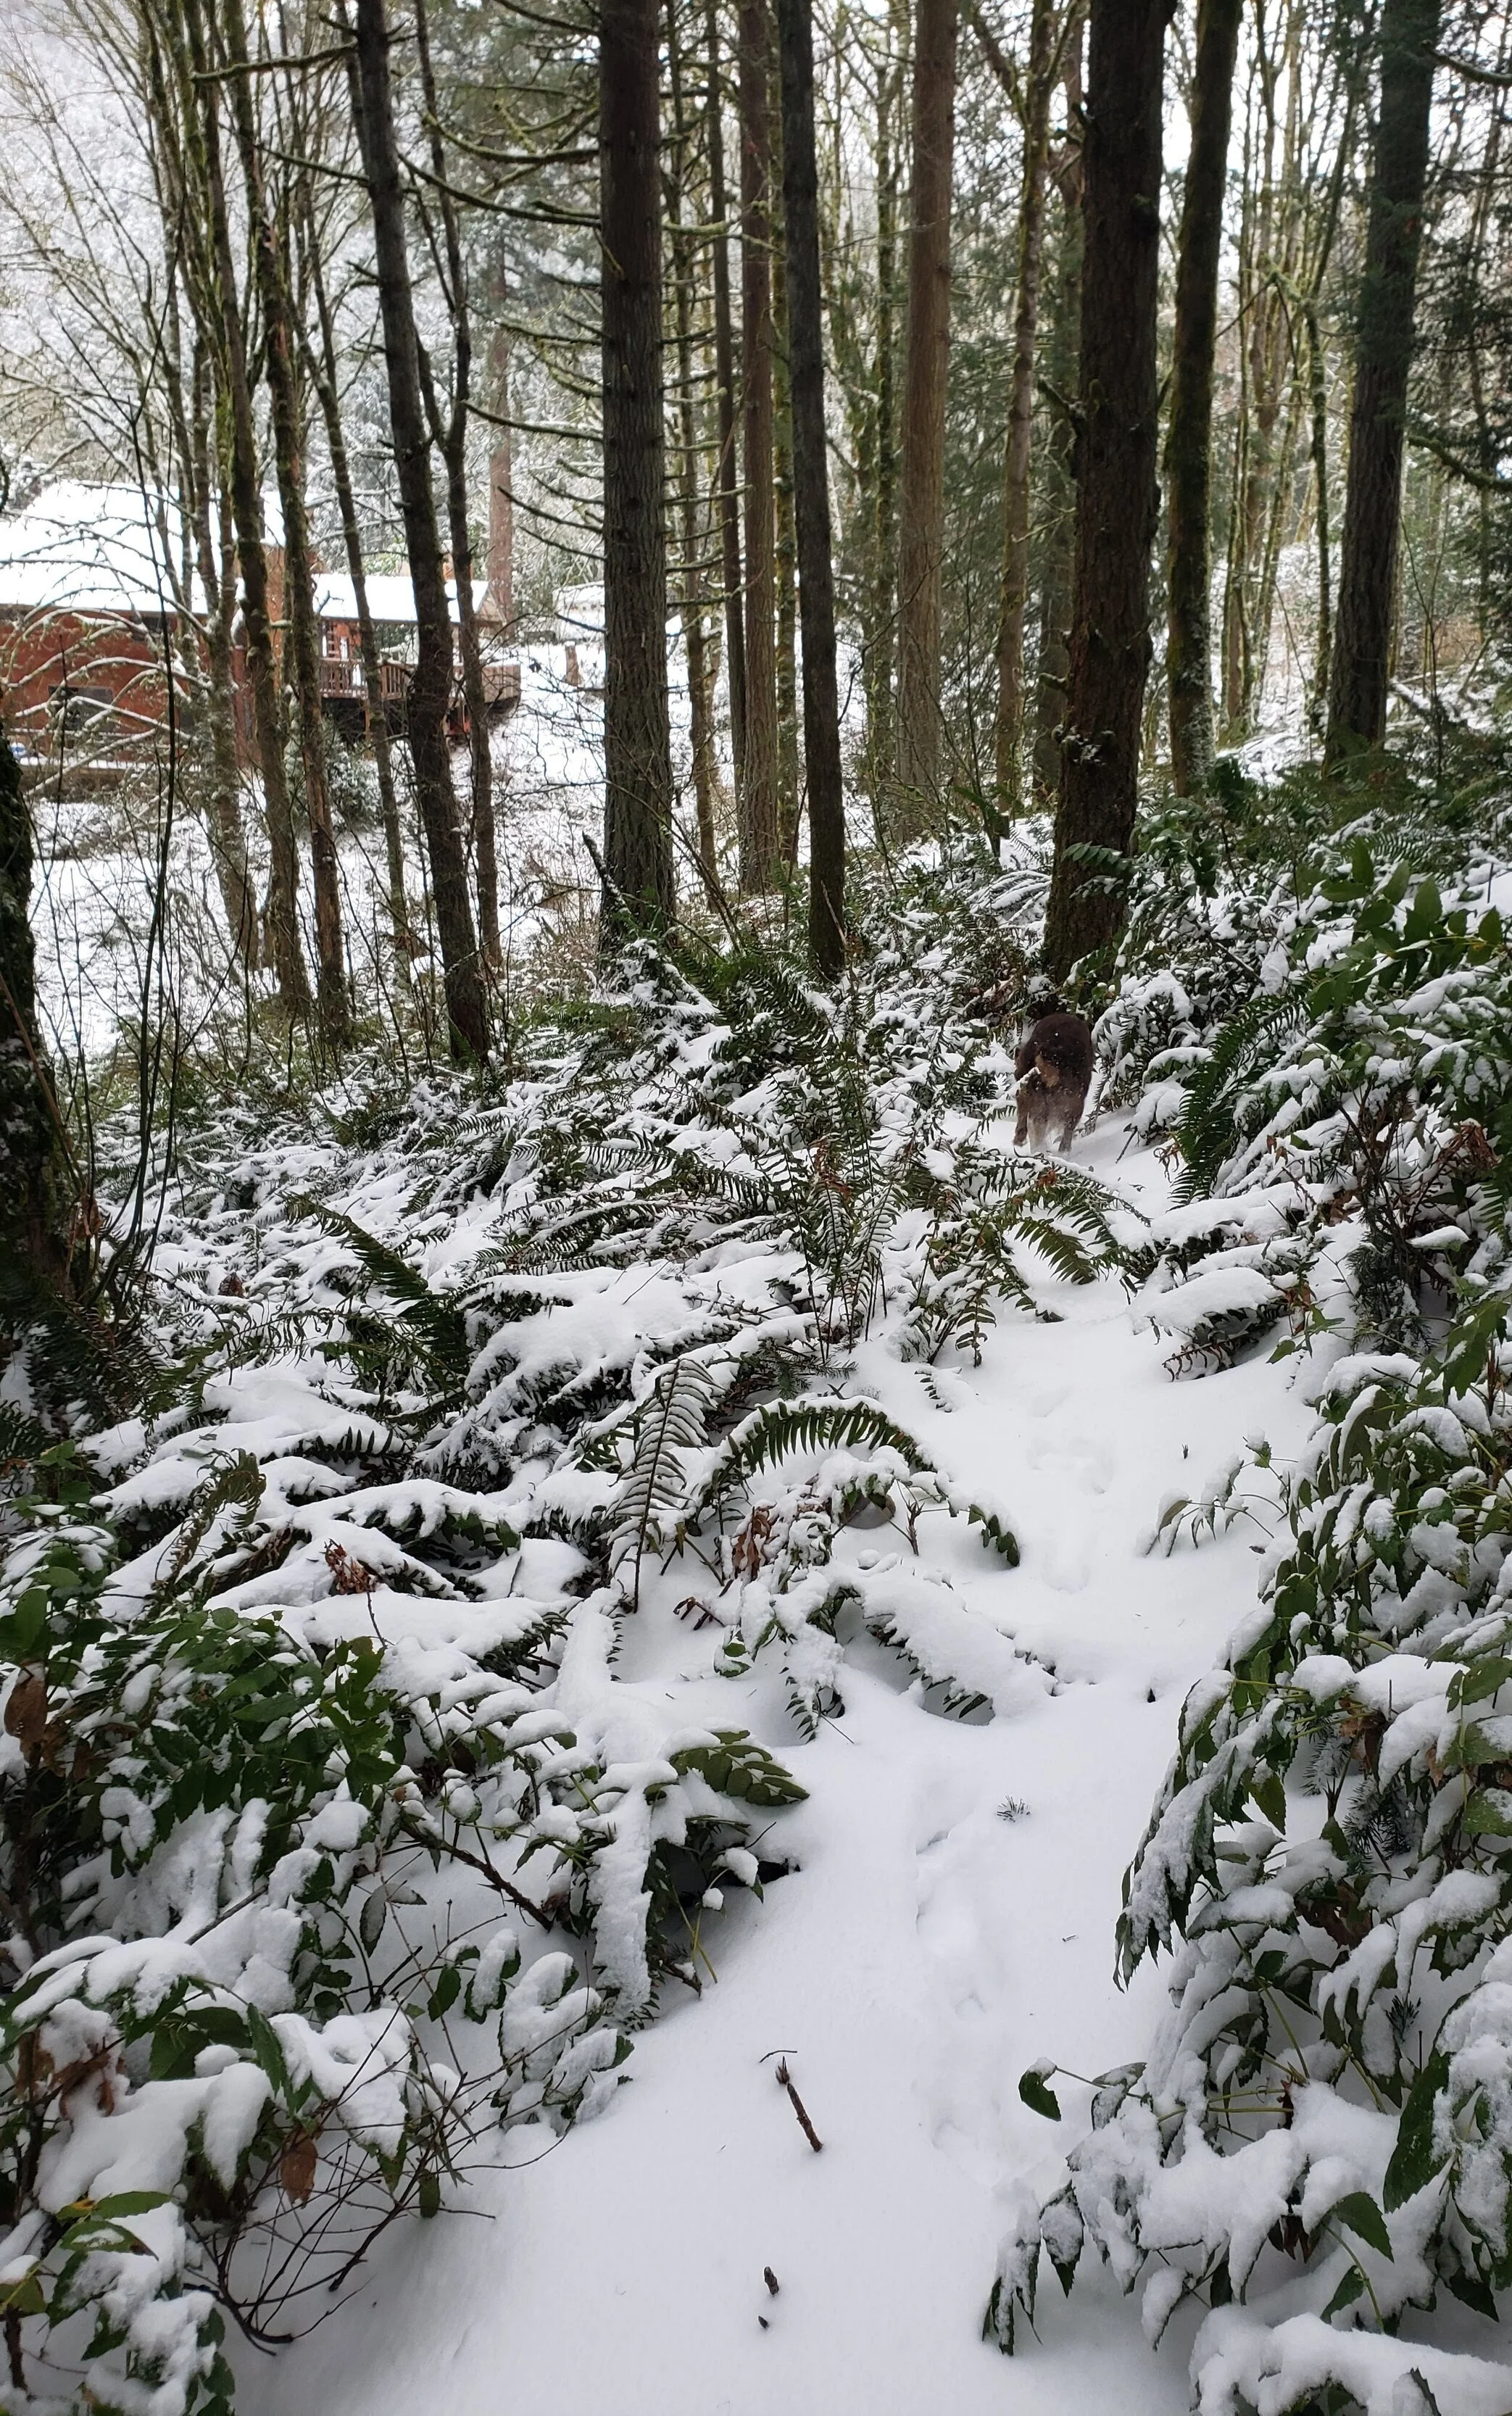
In between keeping the animals fed and dealing with frozen water buckets, we found some time and energy to play in the snow.

20210212_215406.jpg
20210212_171412.jpg

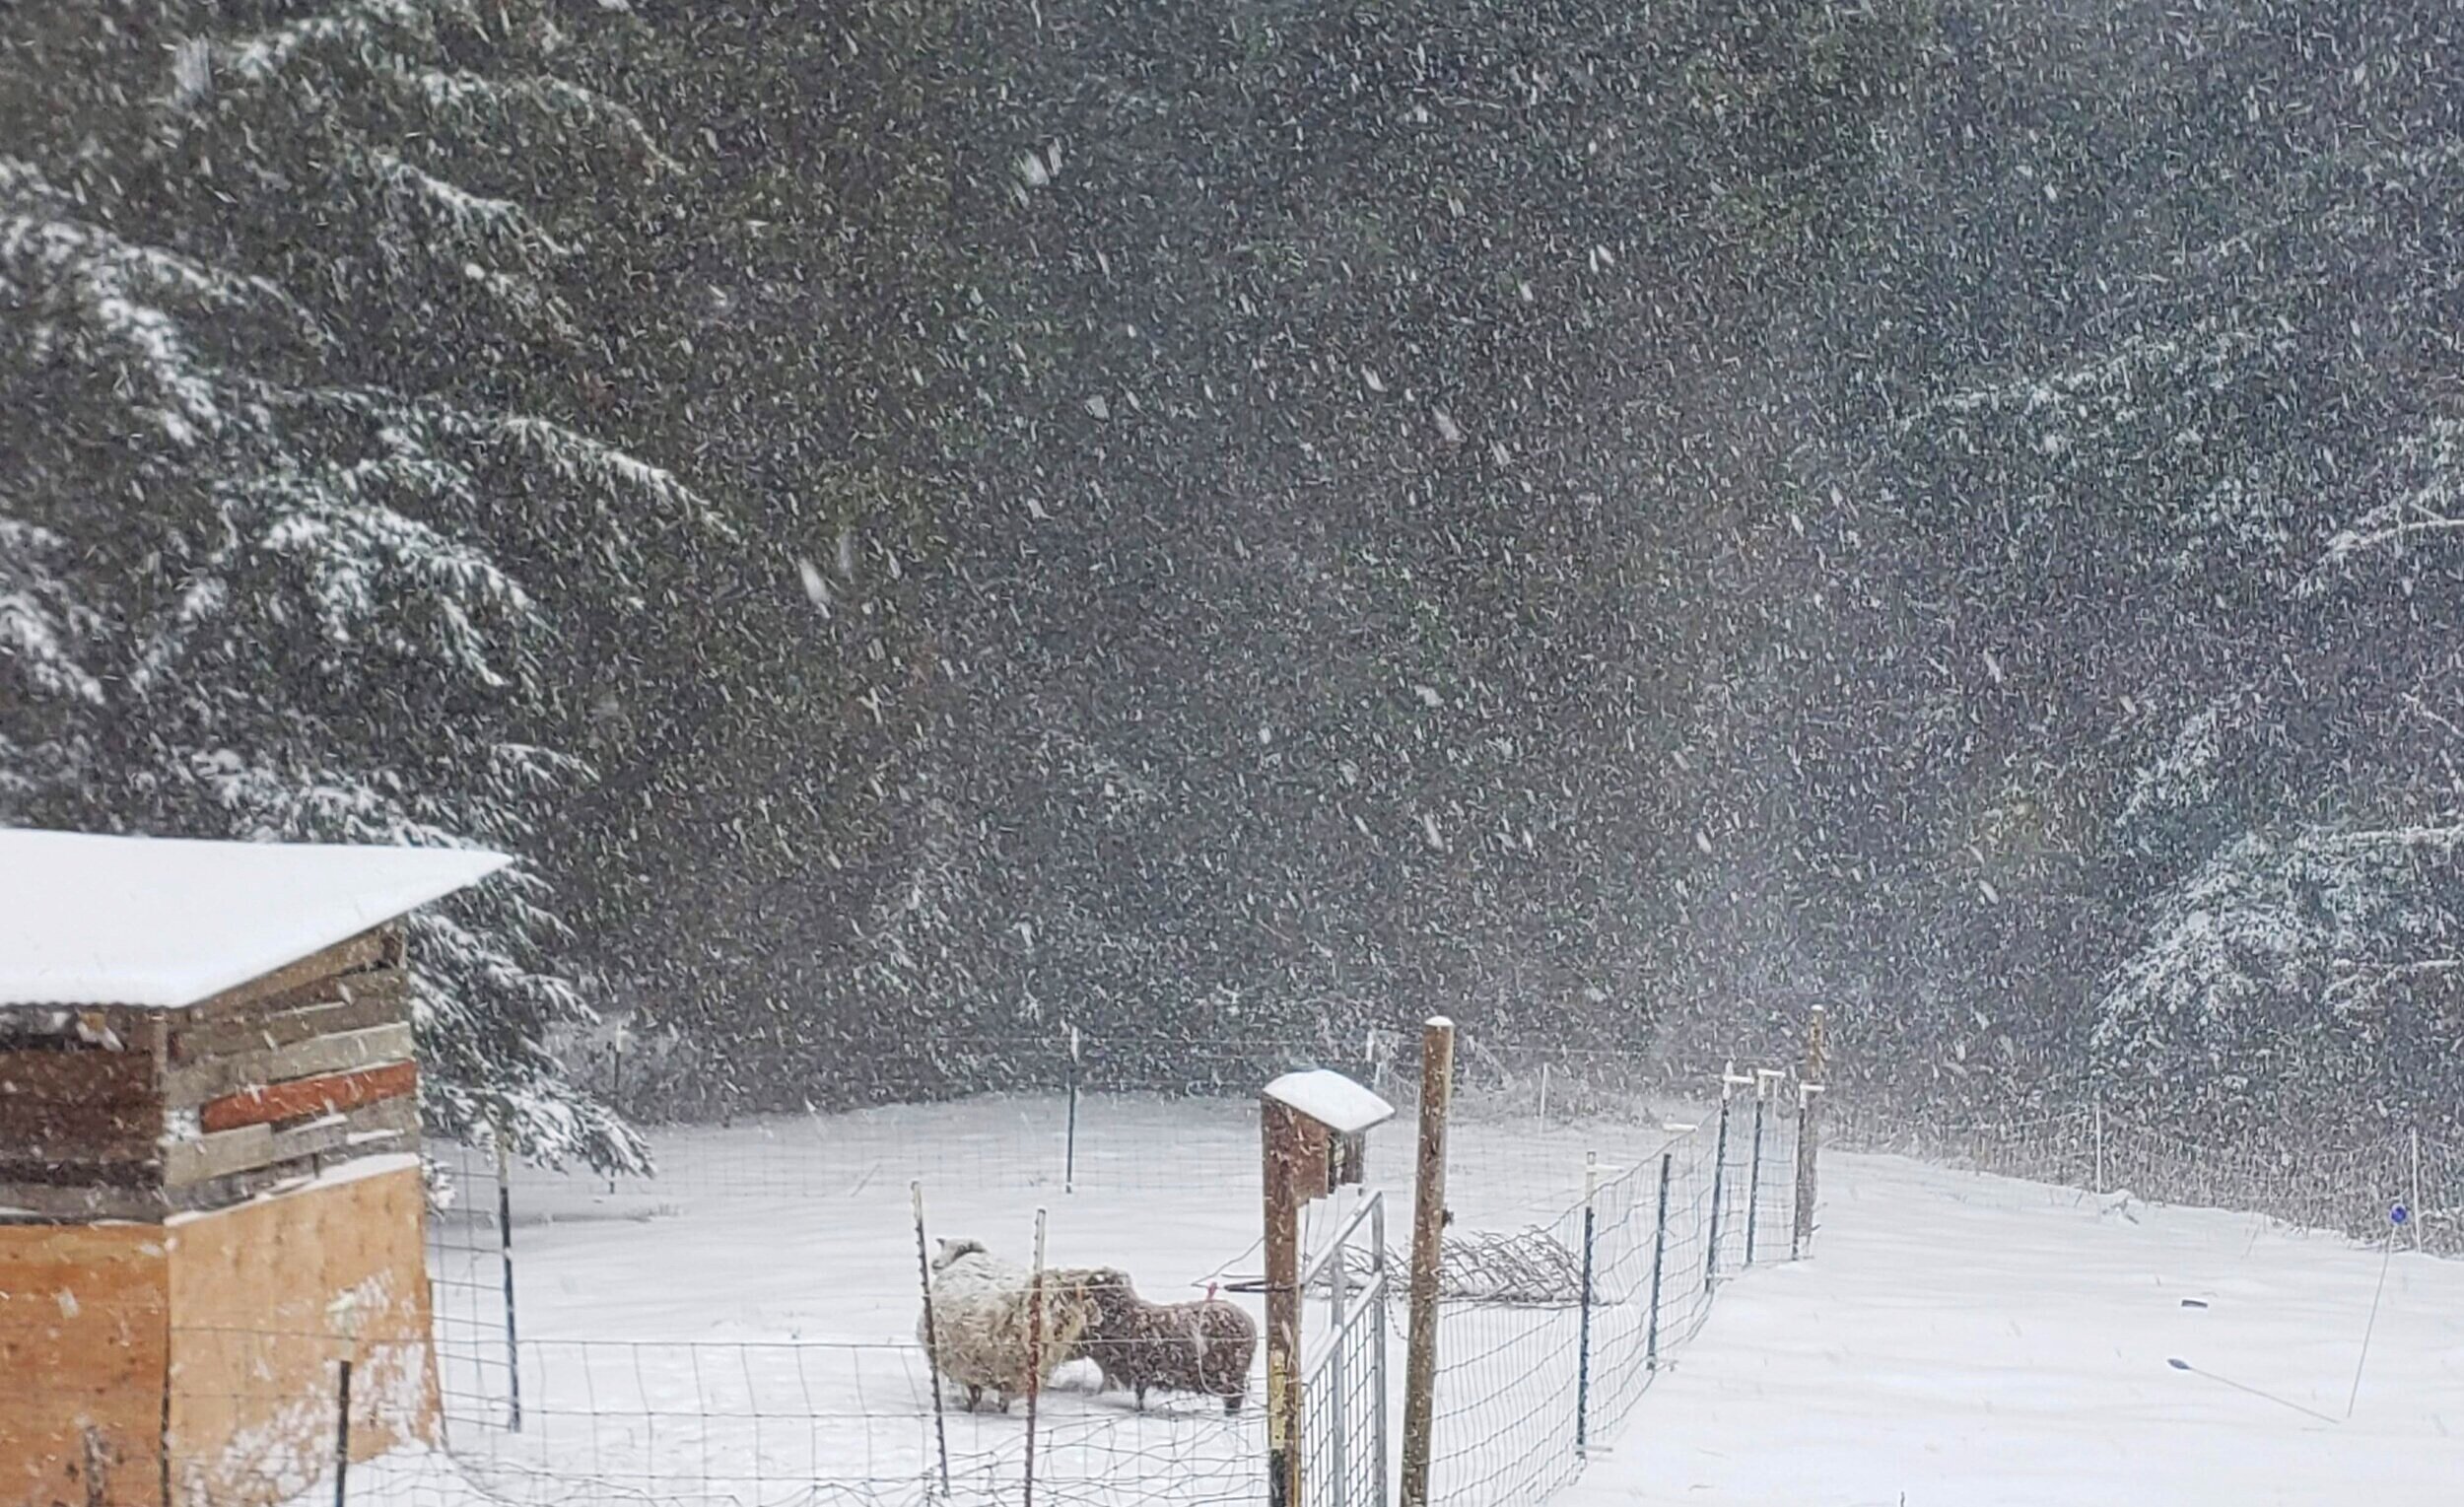
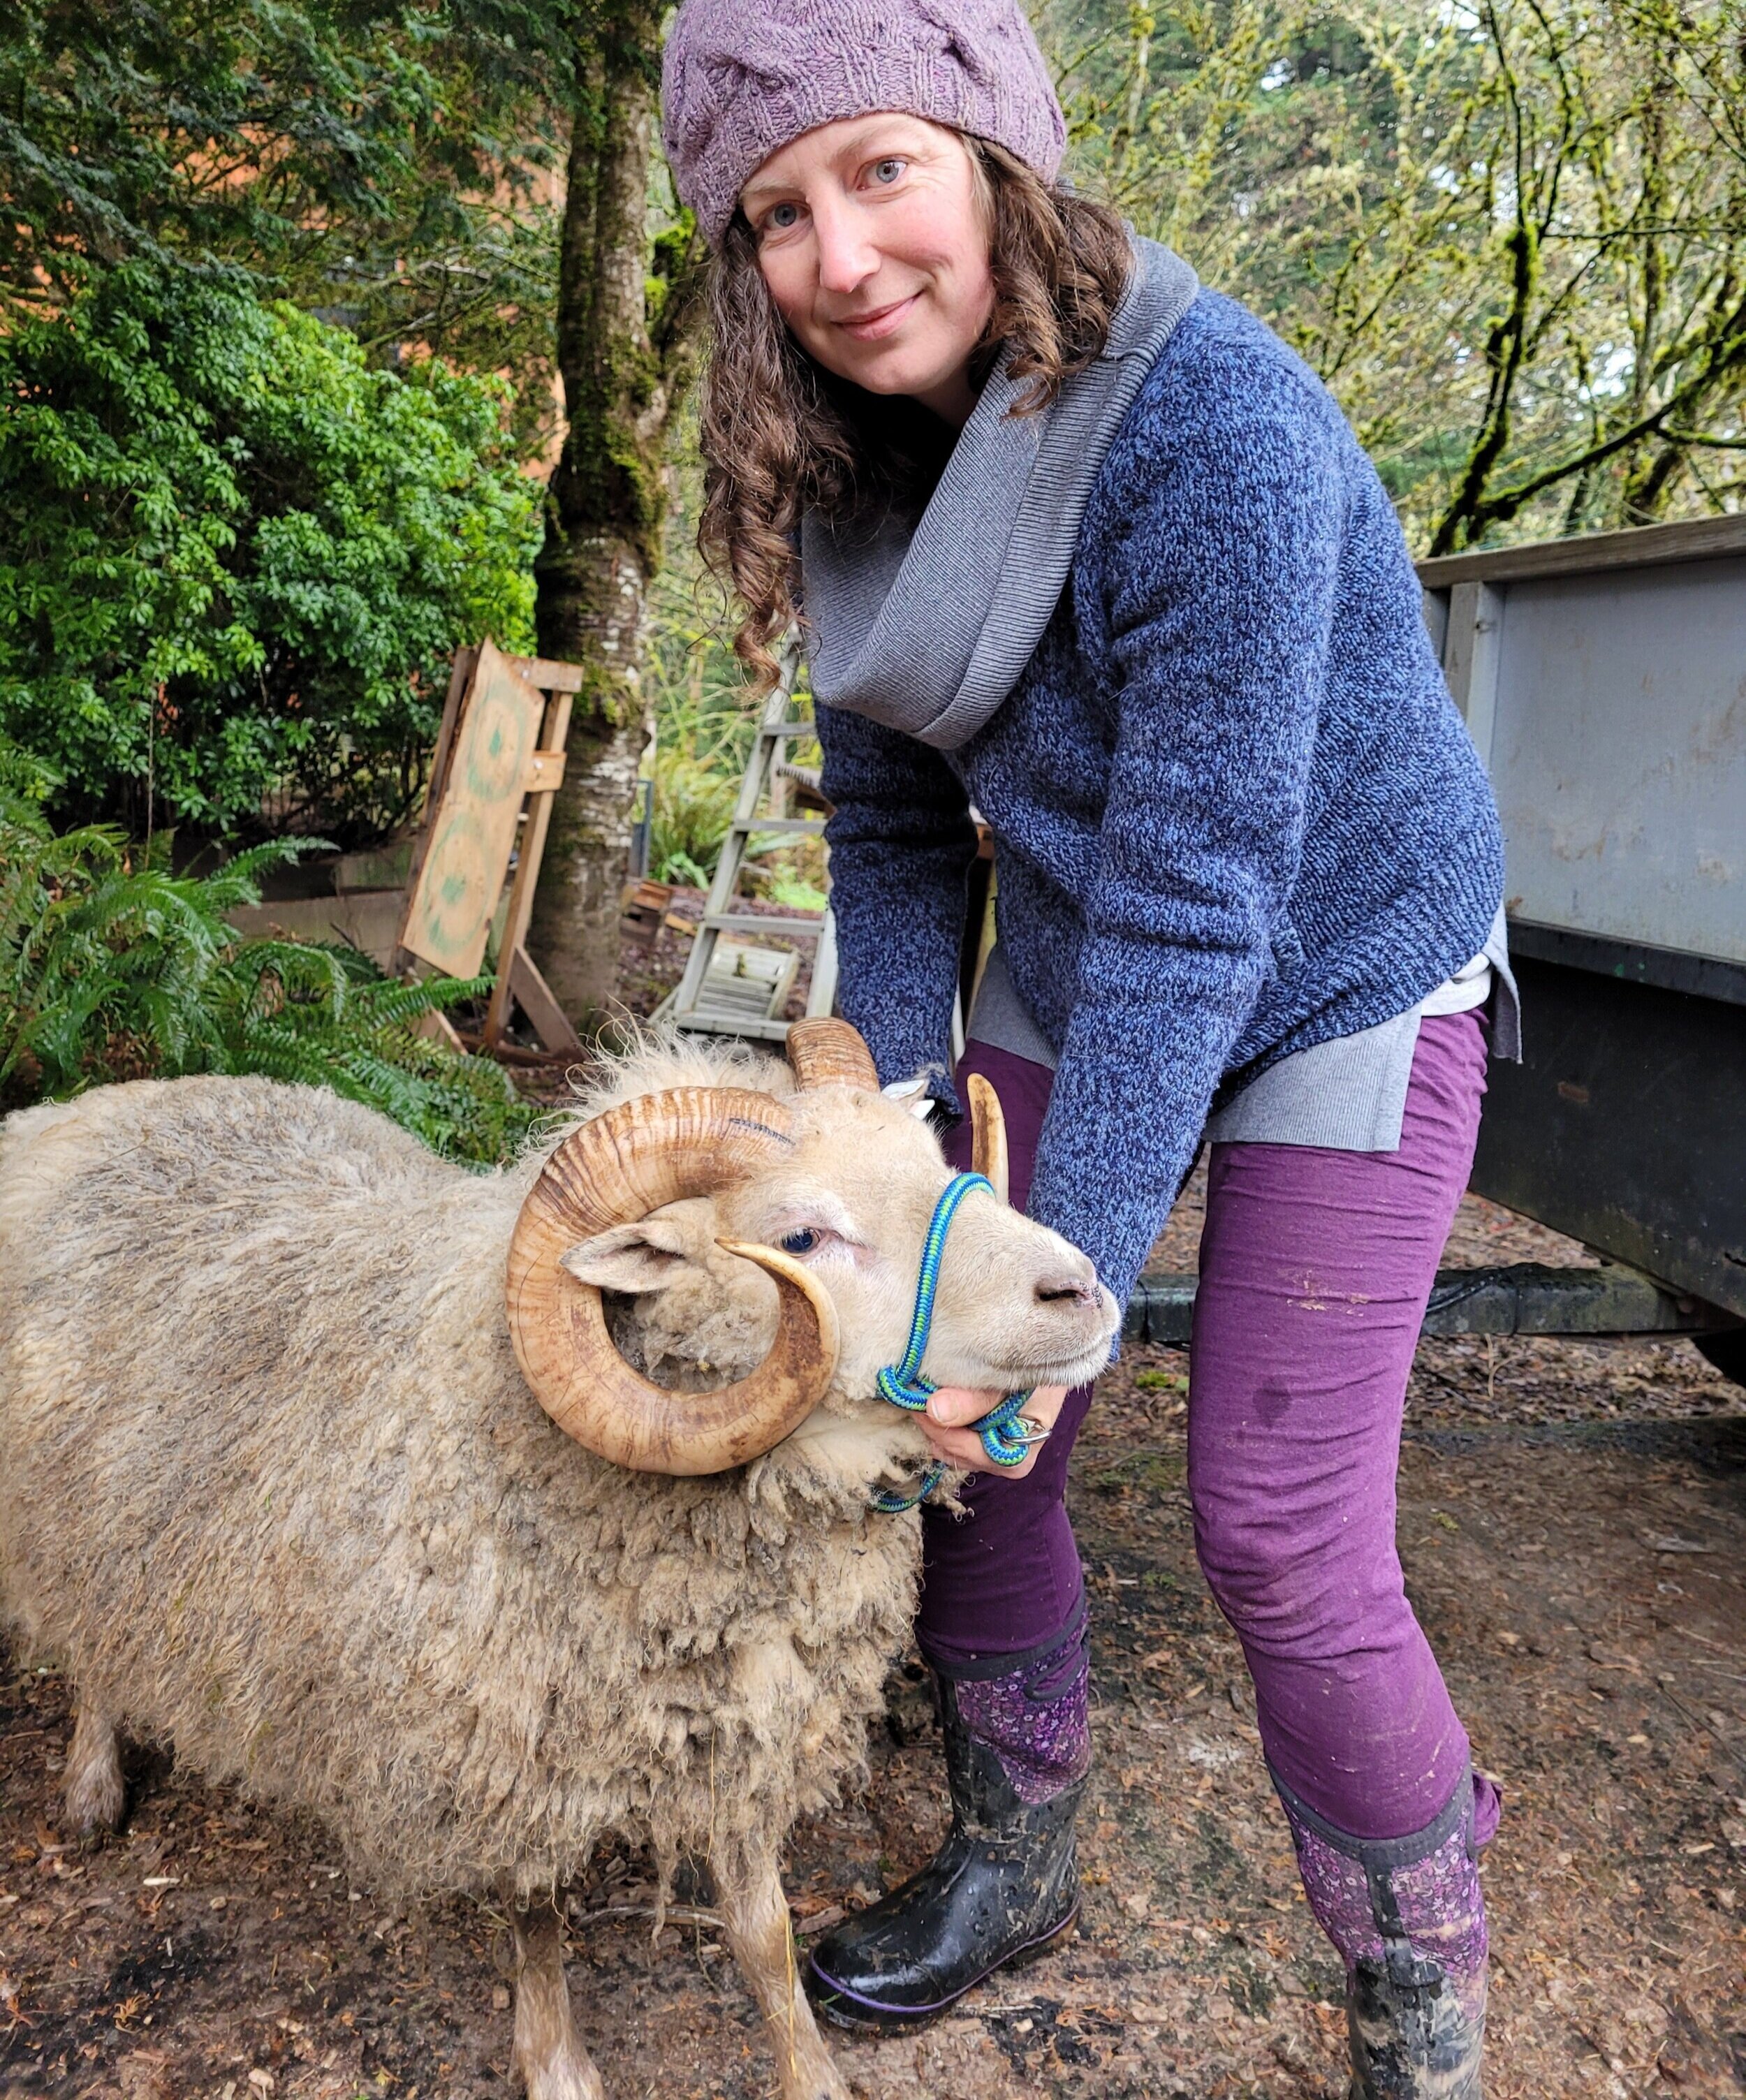
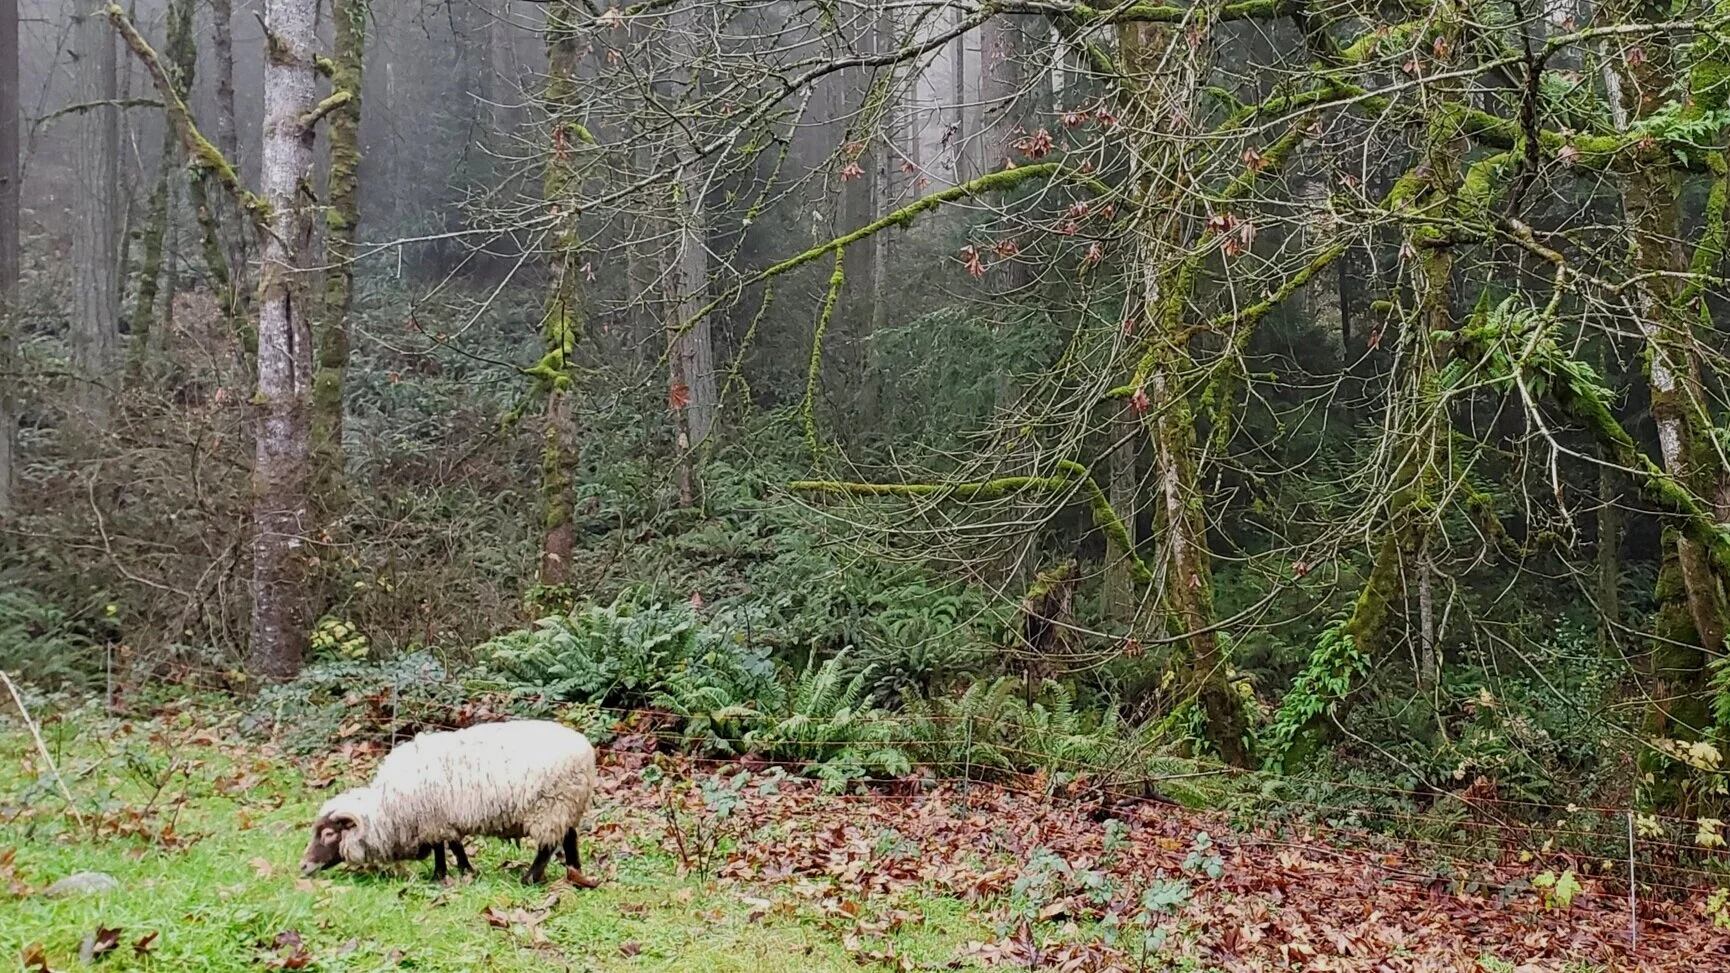
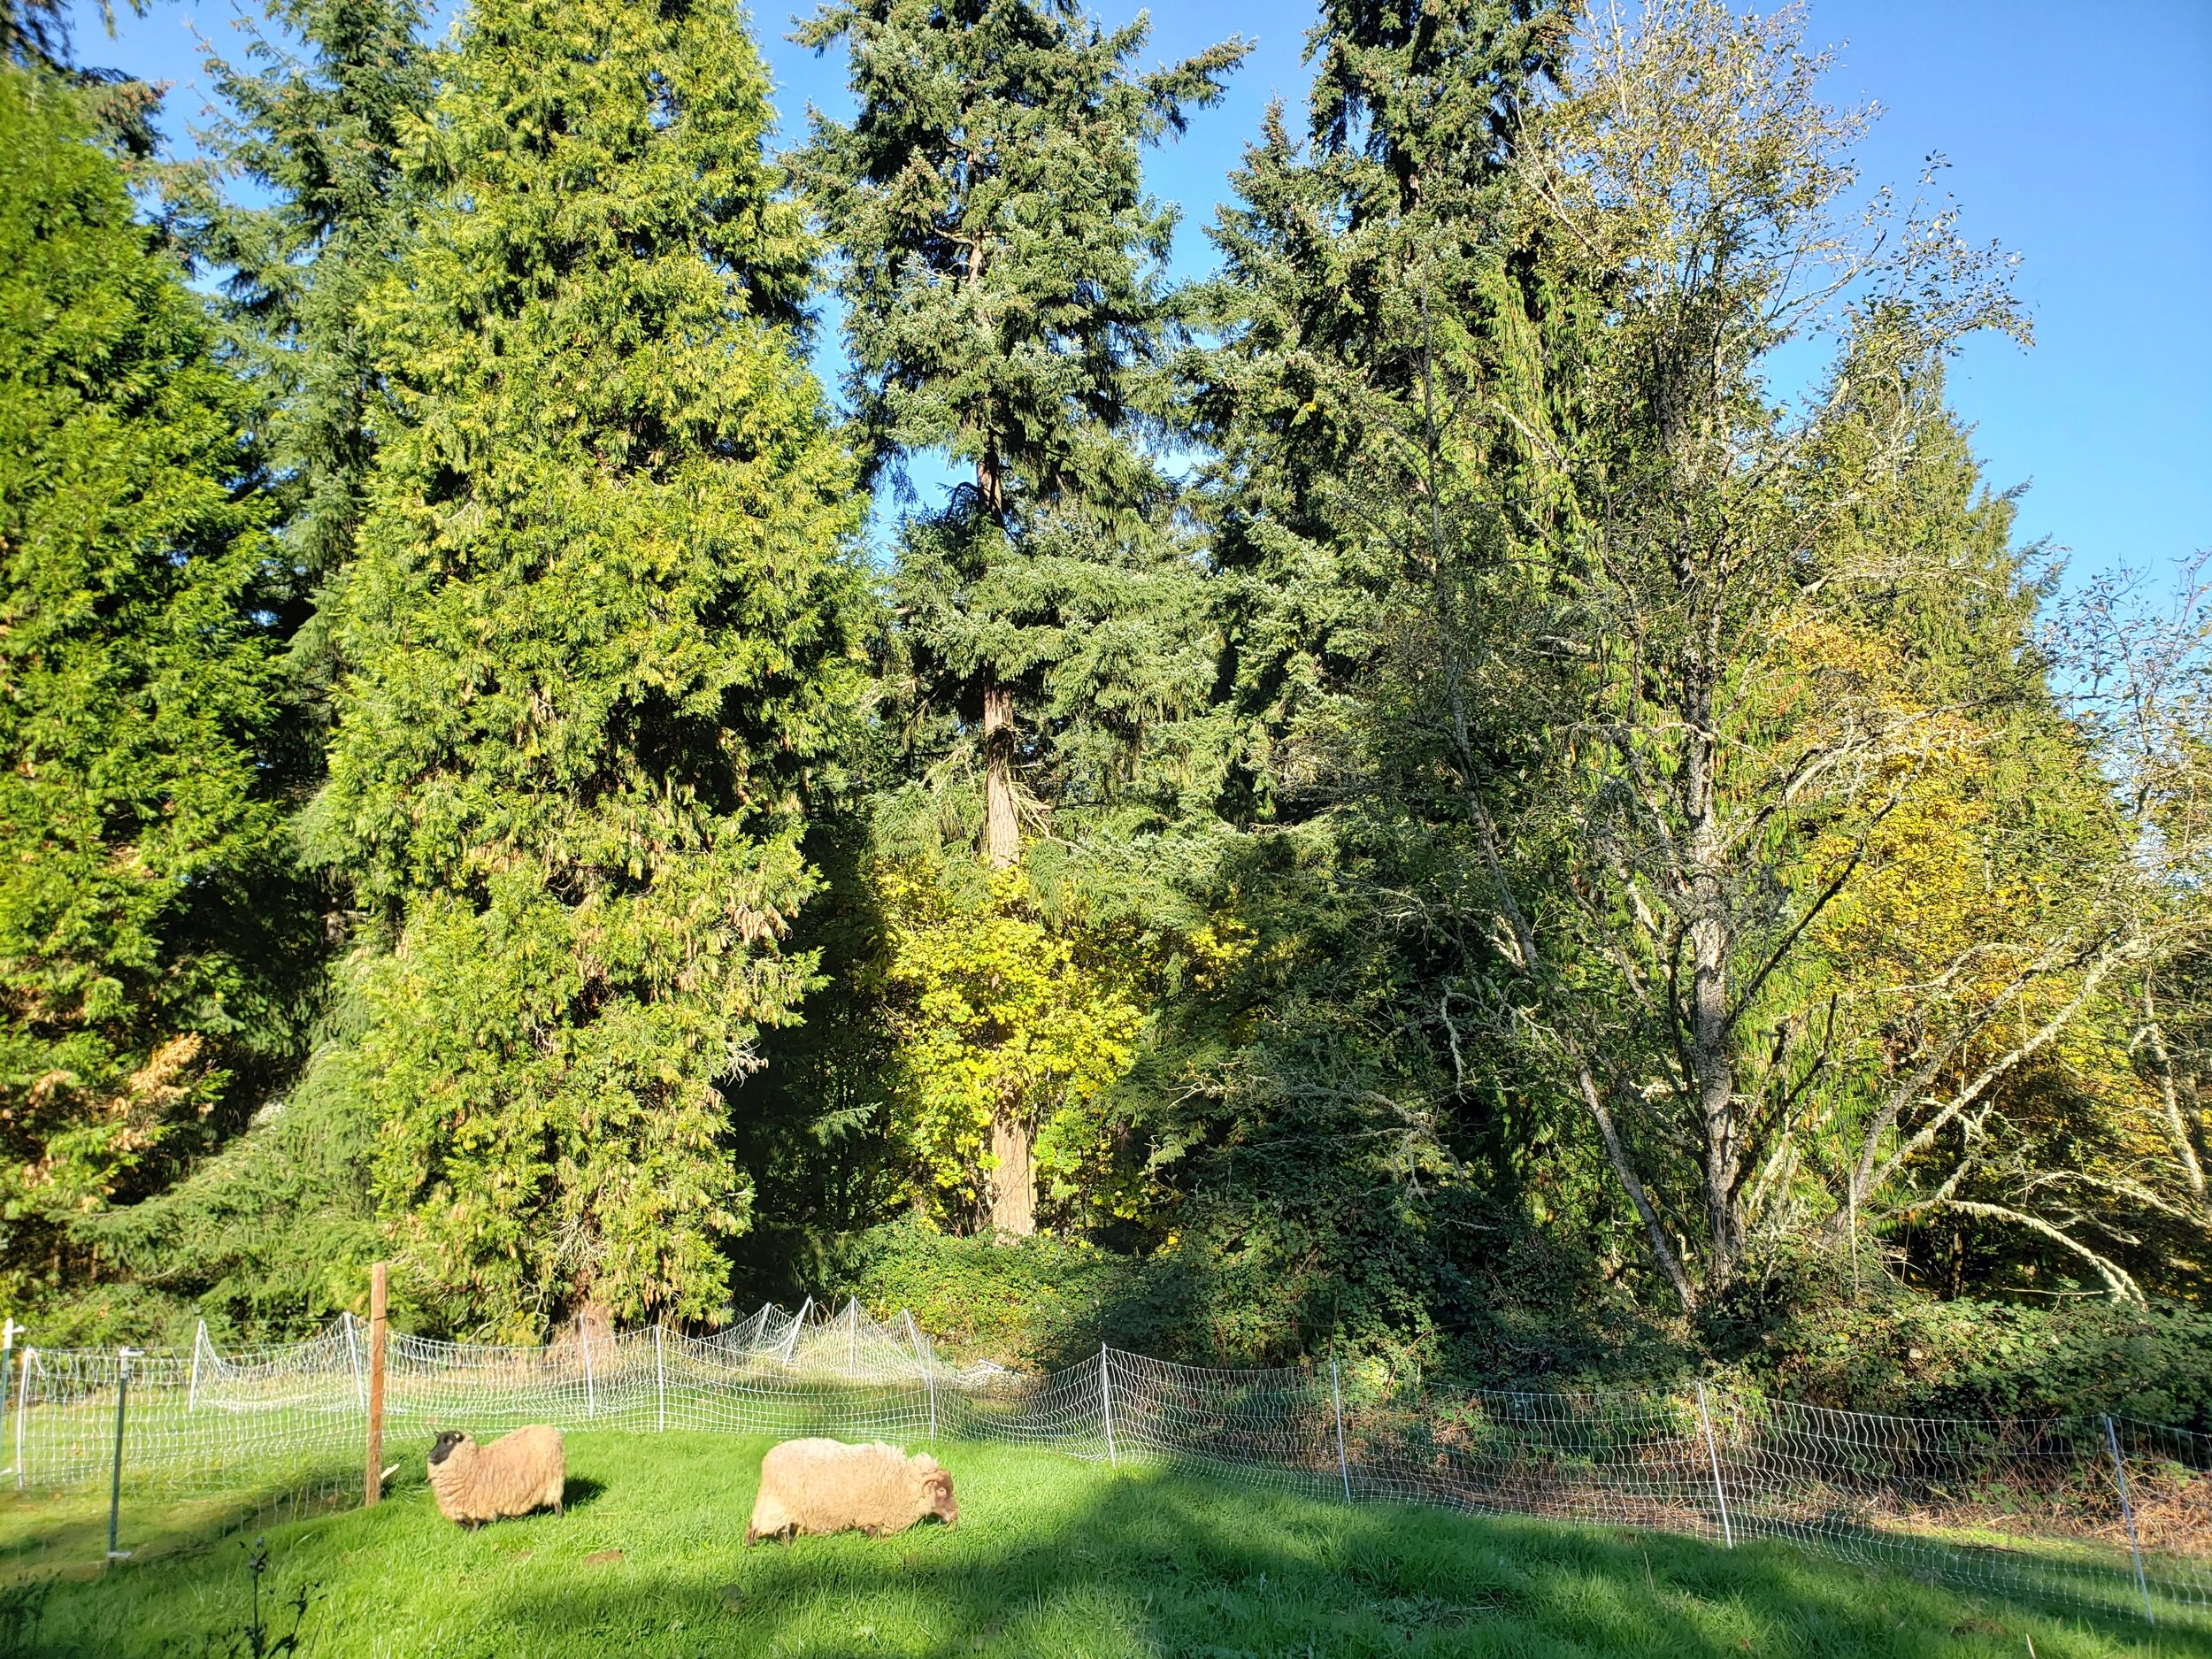
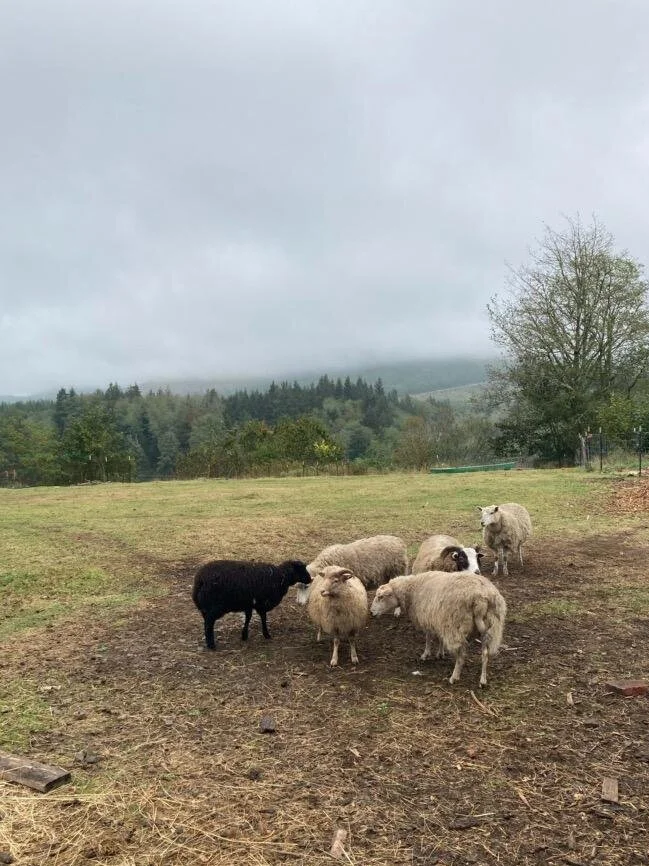
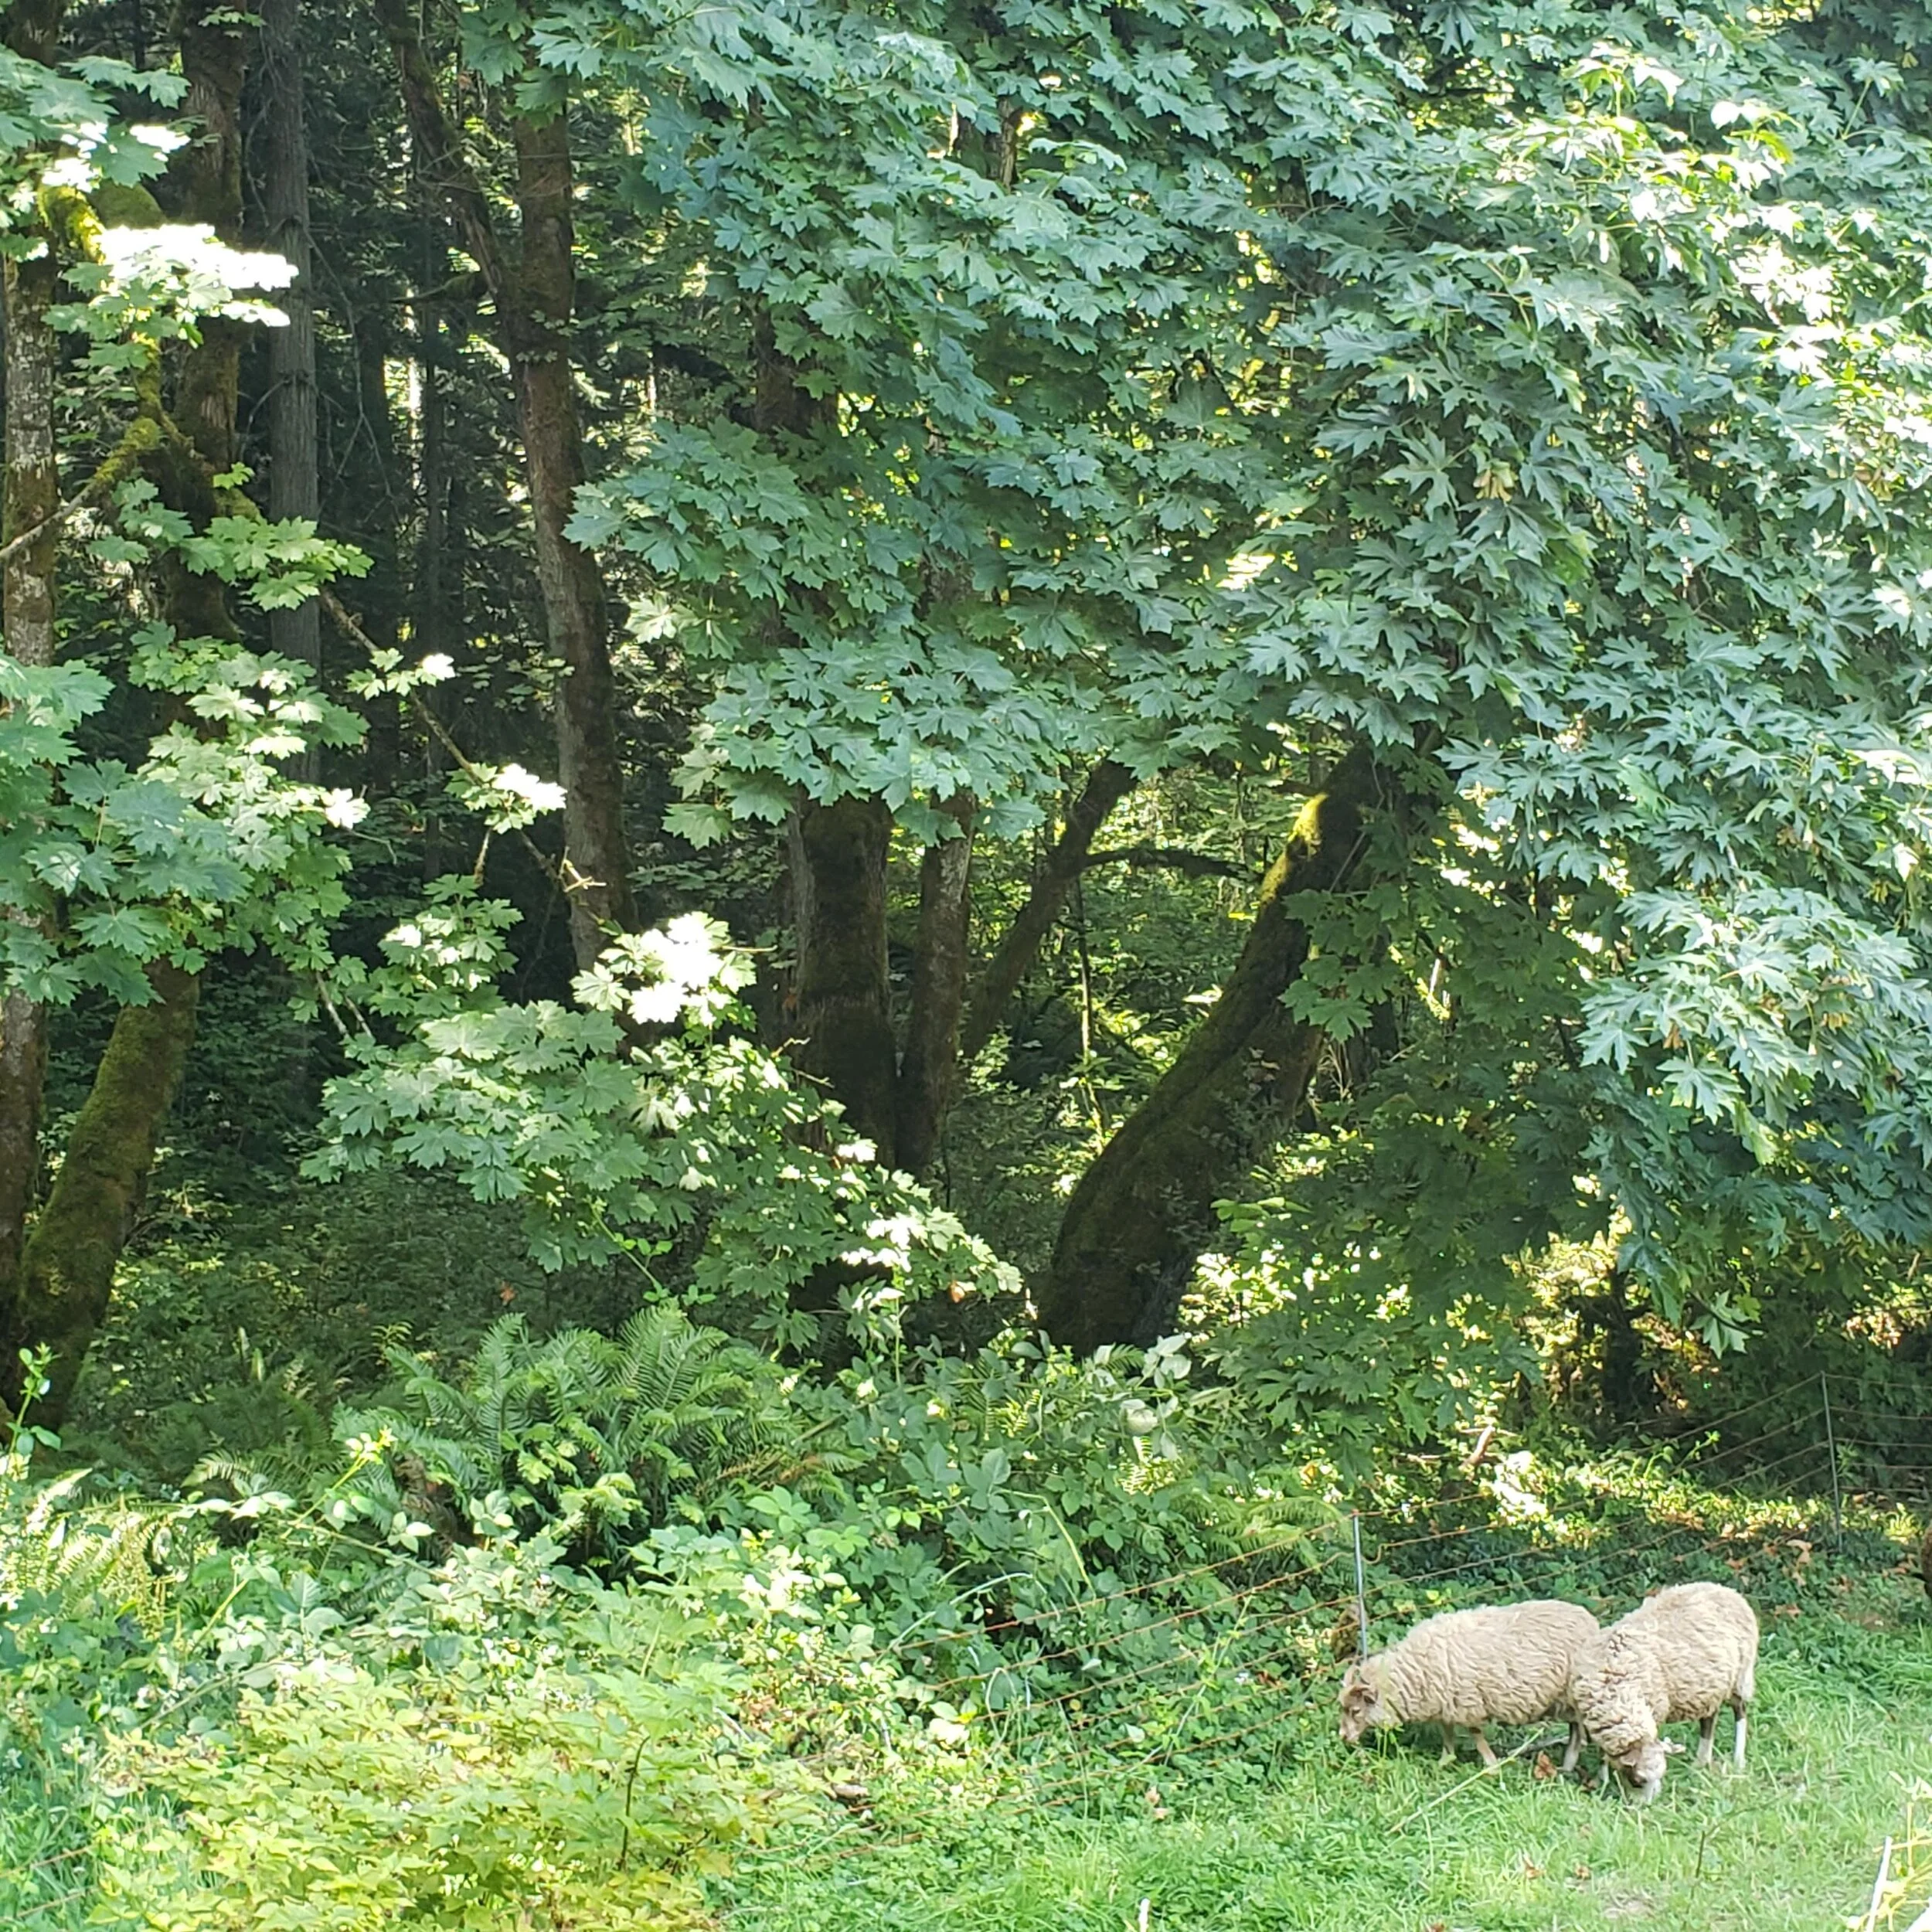
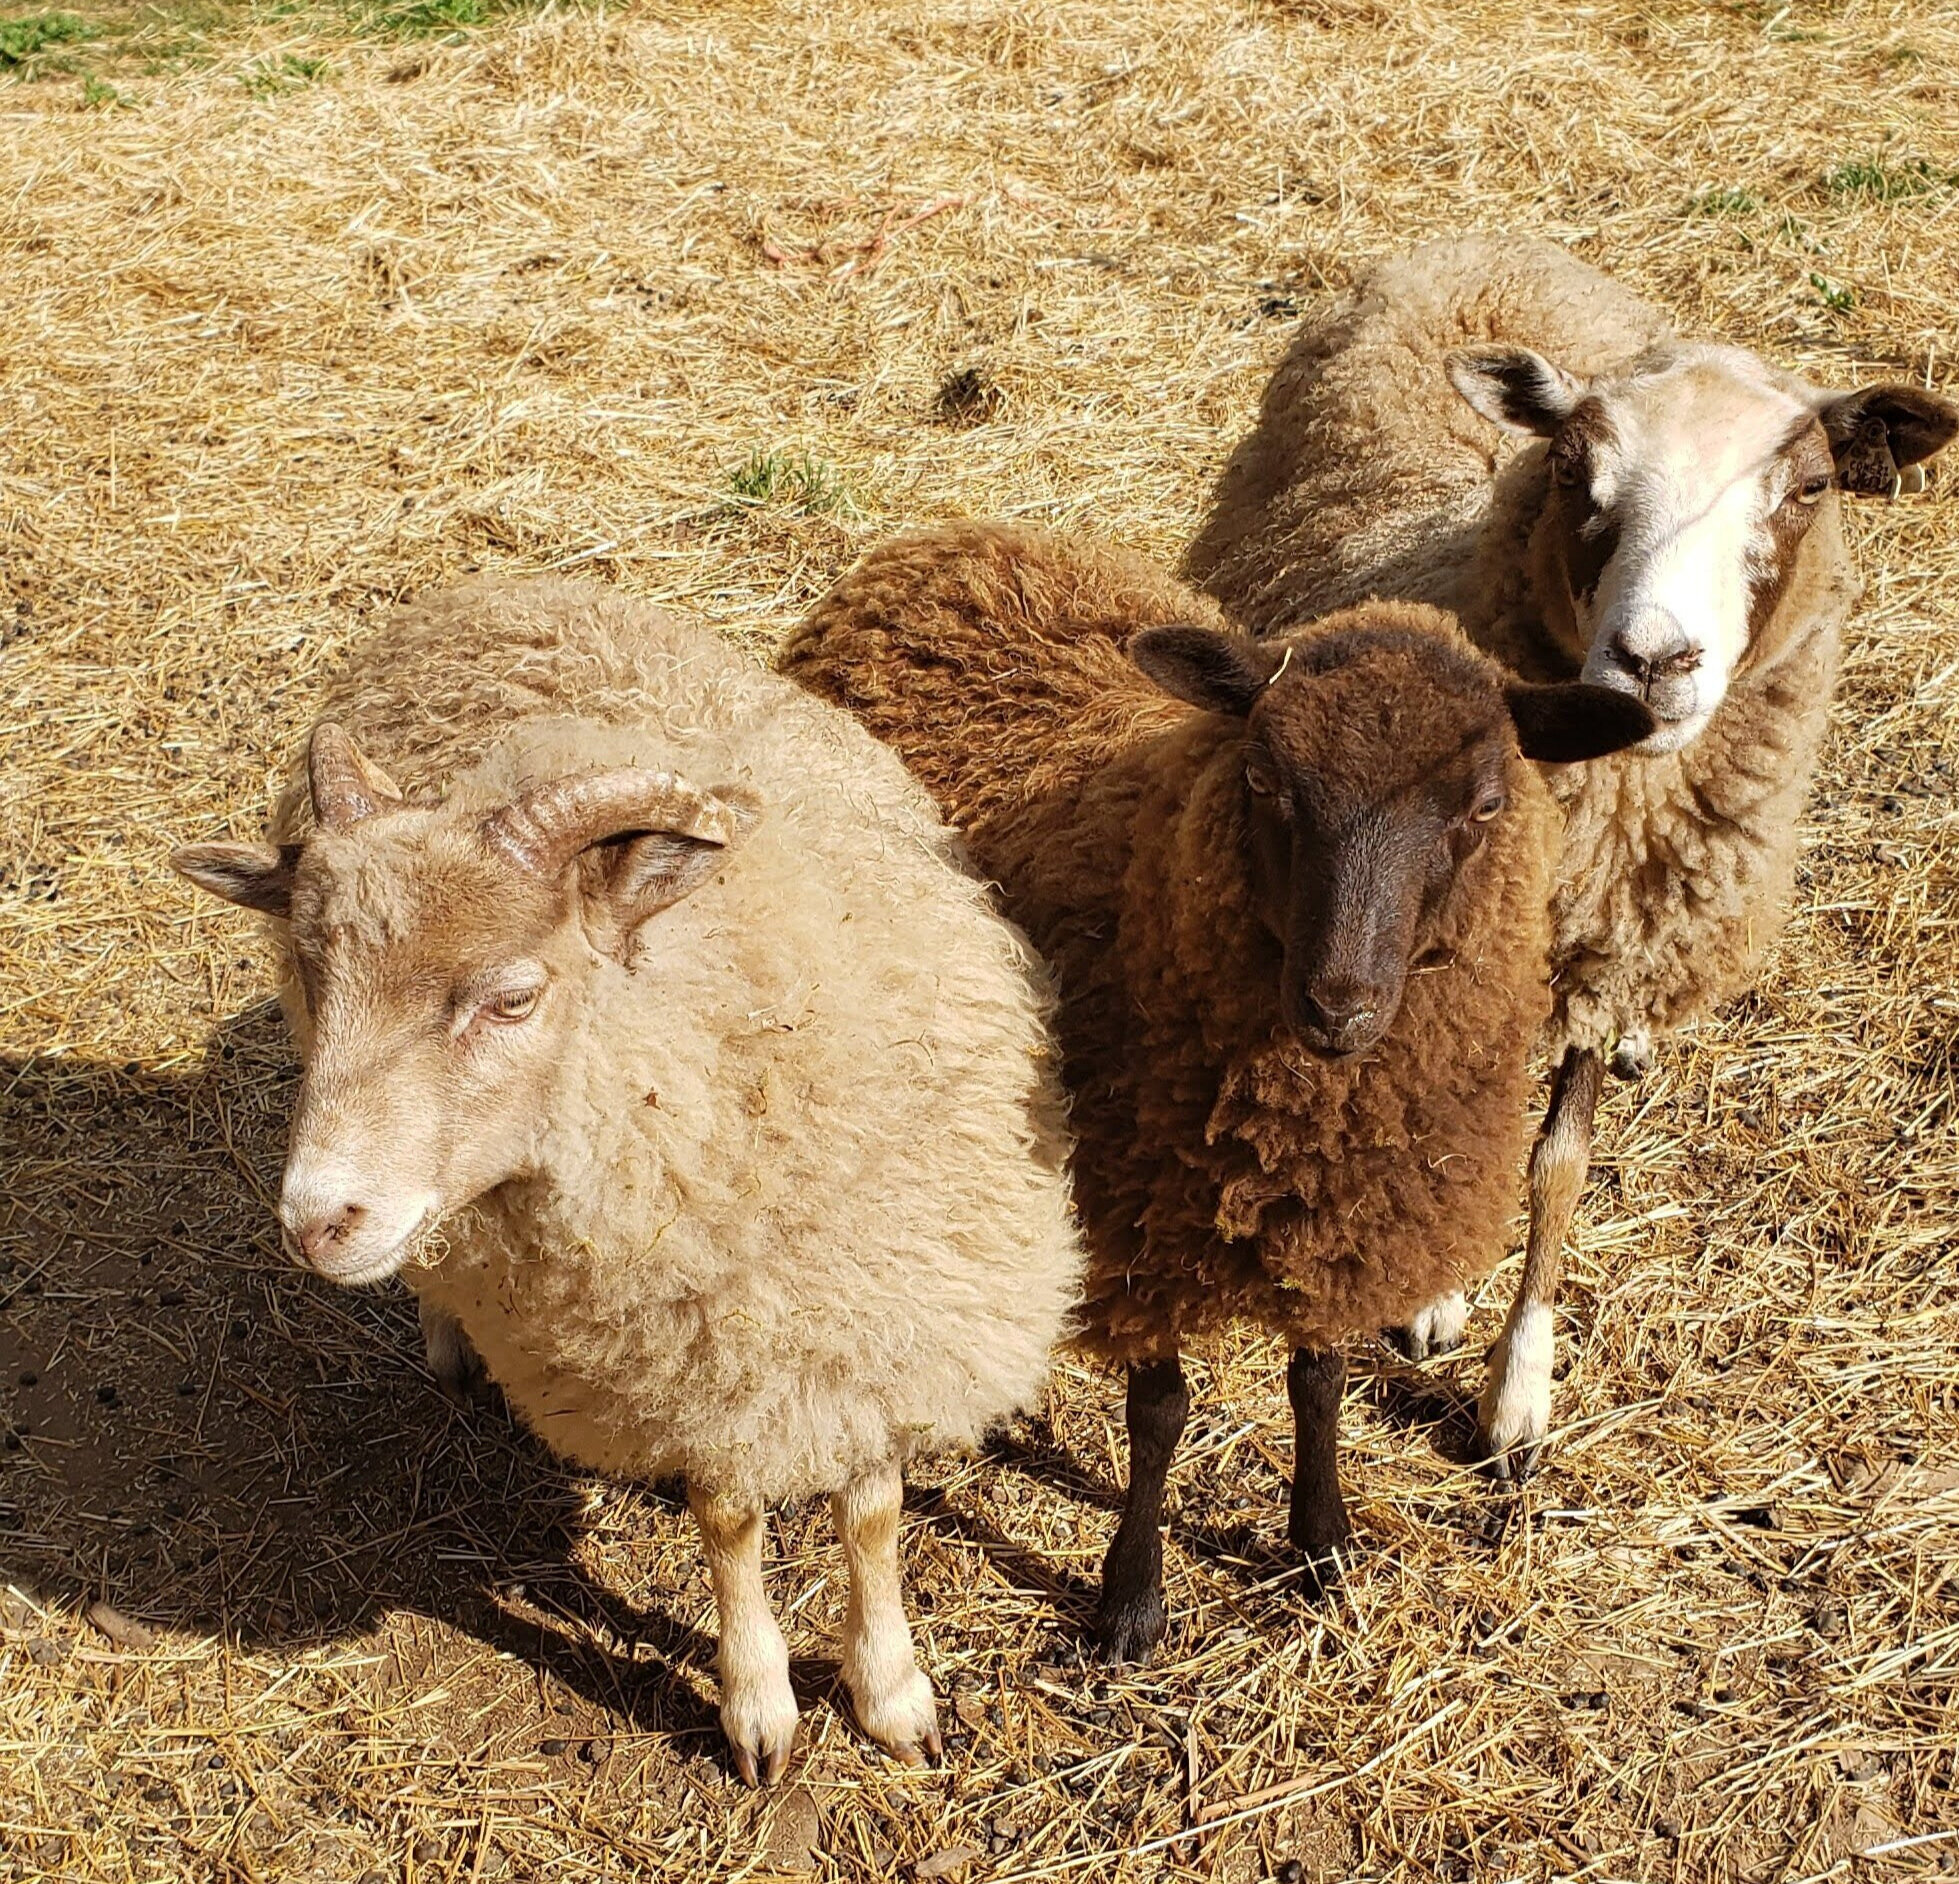
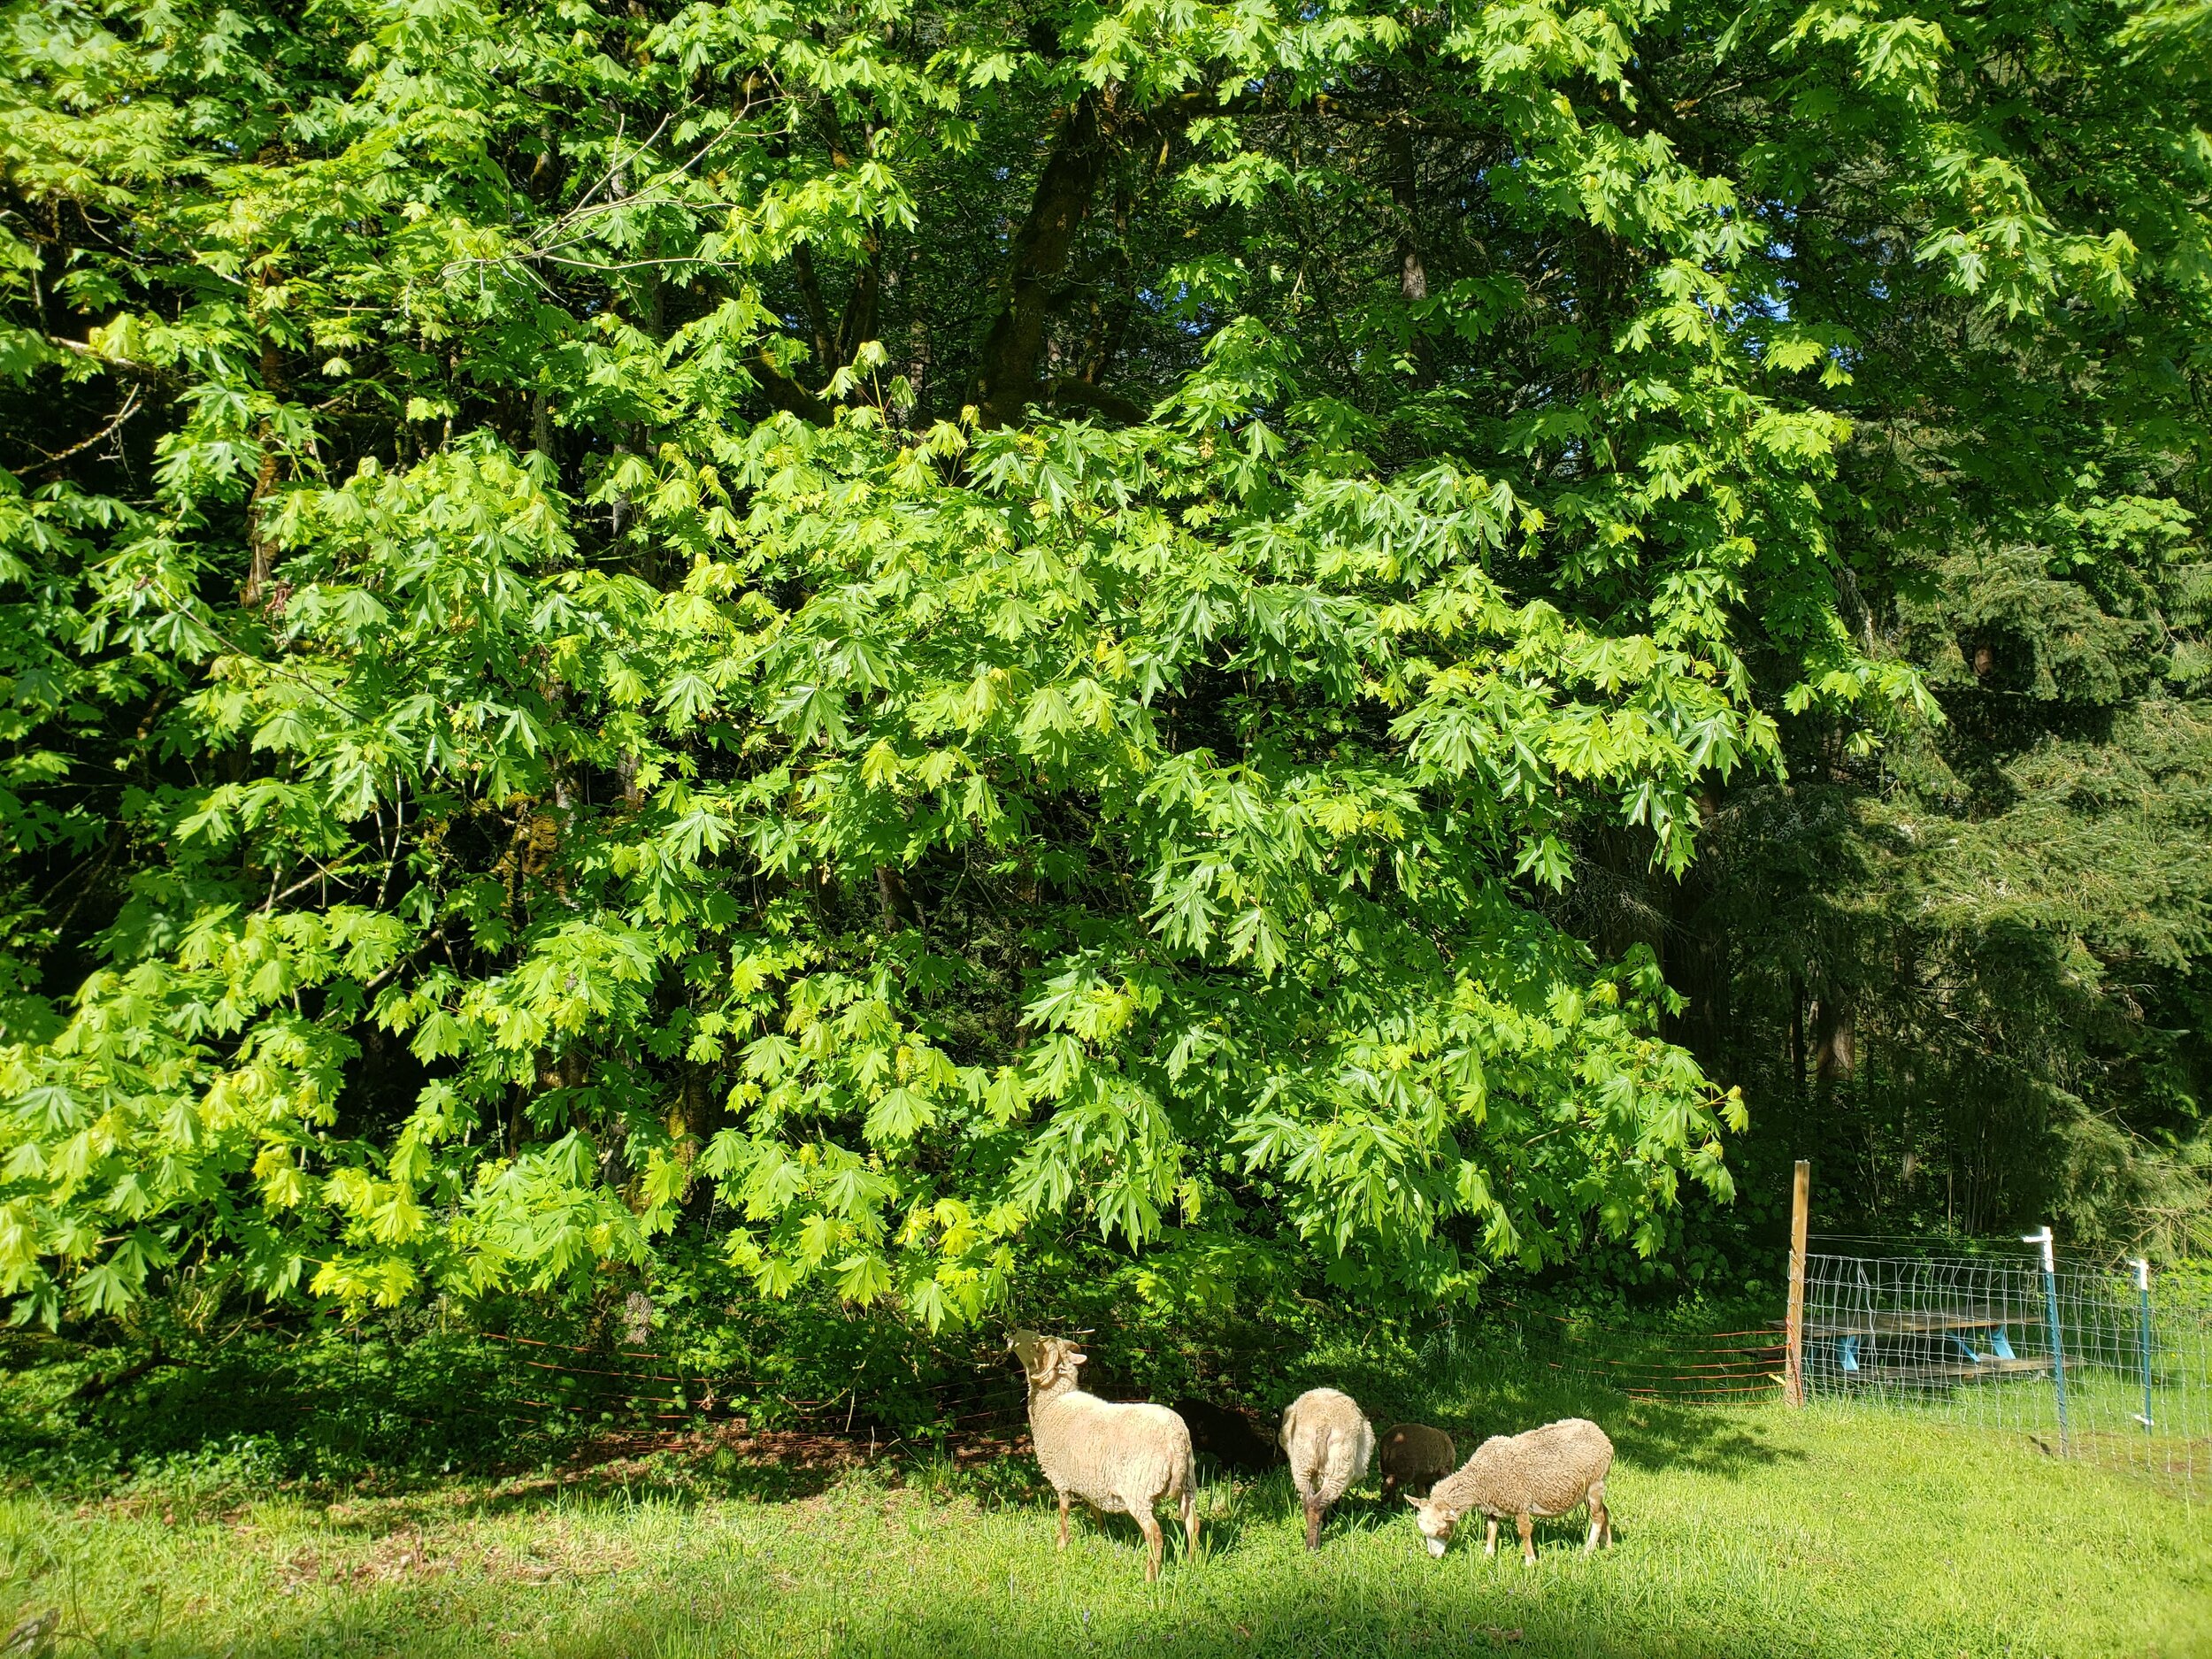
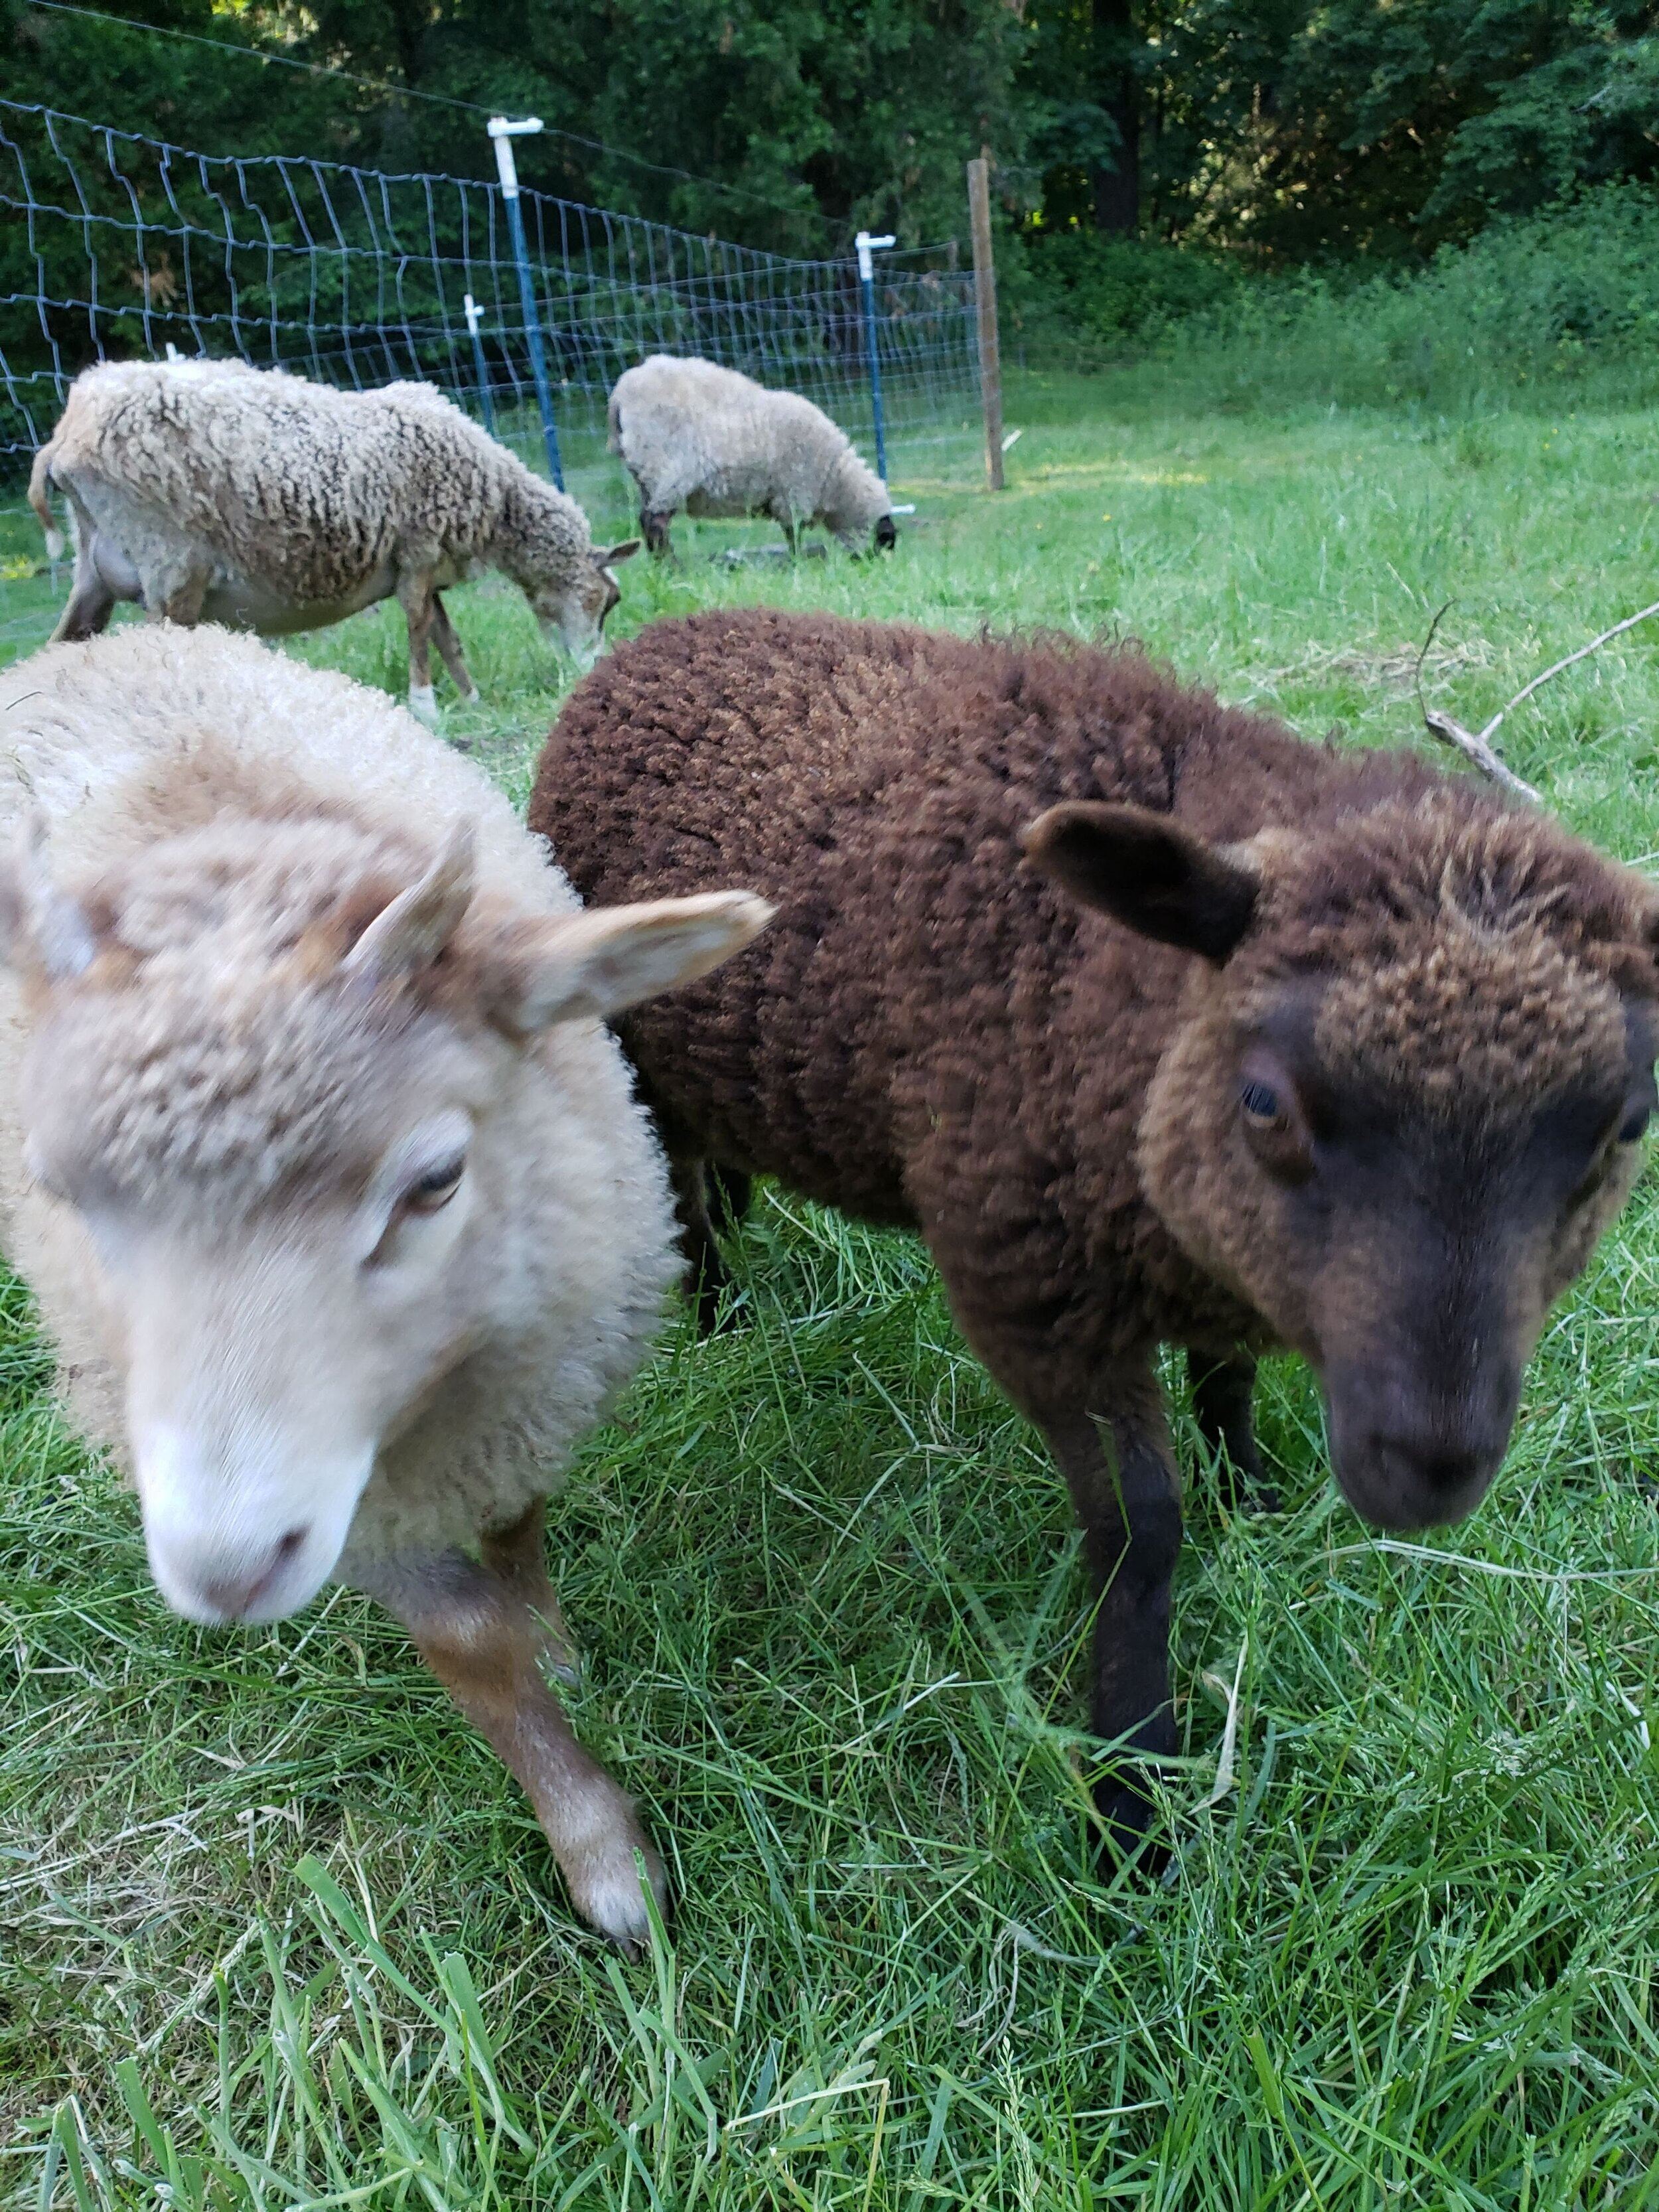
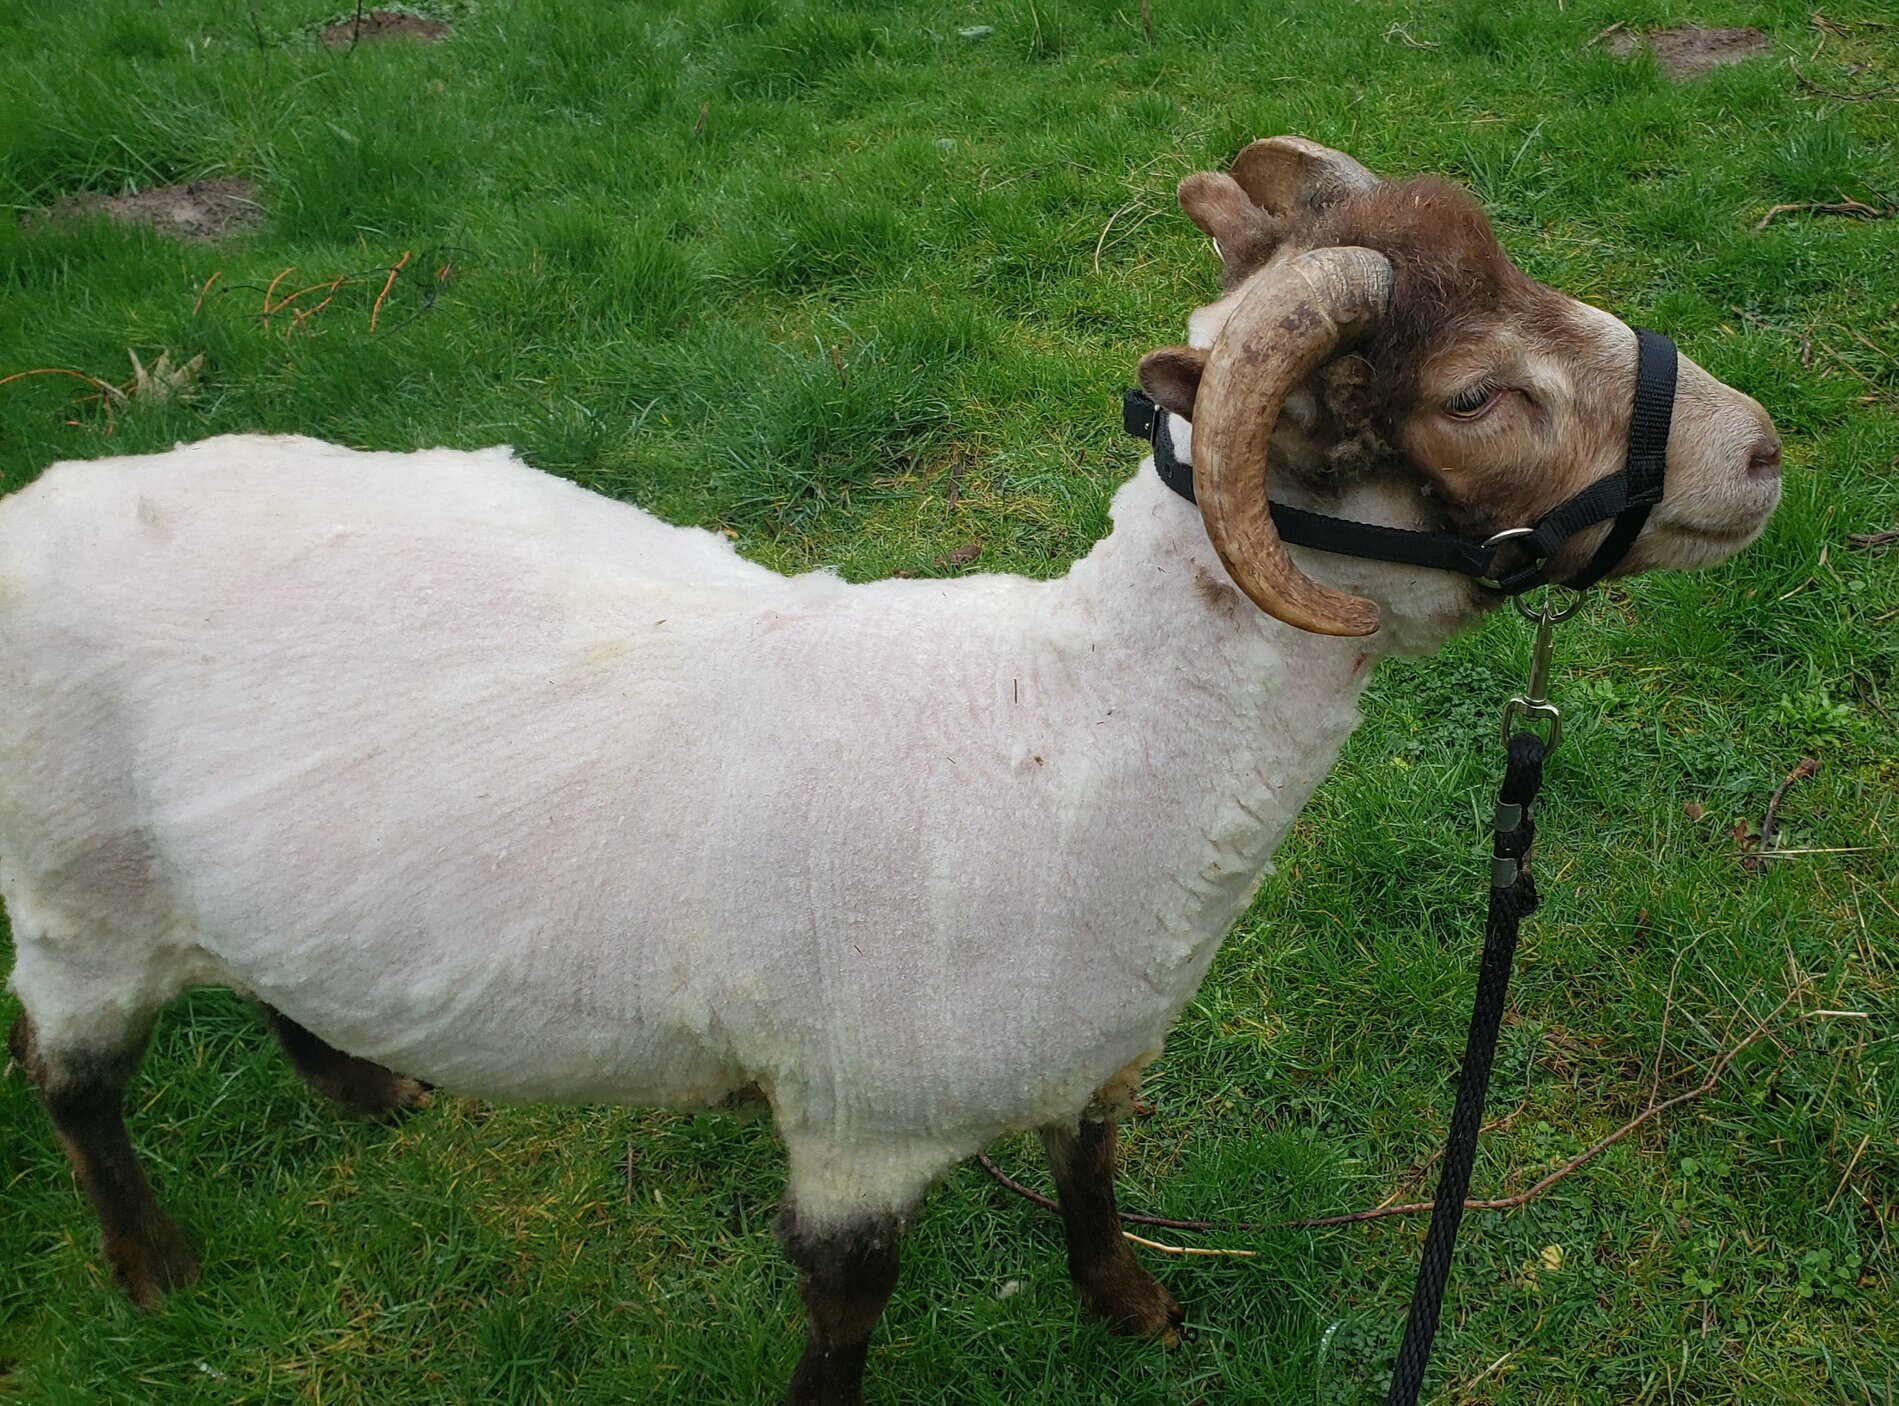
Even with all their wool, the sheep get a little grumpy about the snow. Flint was the only one who regularly came out of their shelter to explore the snow. Eventually the snow became covered with a thick layer of ice and then even Flint stayed under cover.

snowy forest path
20210213_163030.jpg
20210214_121834.jpg

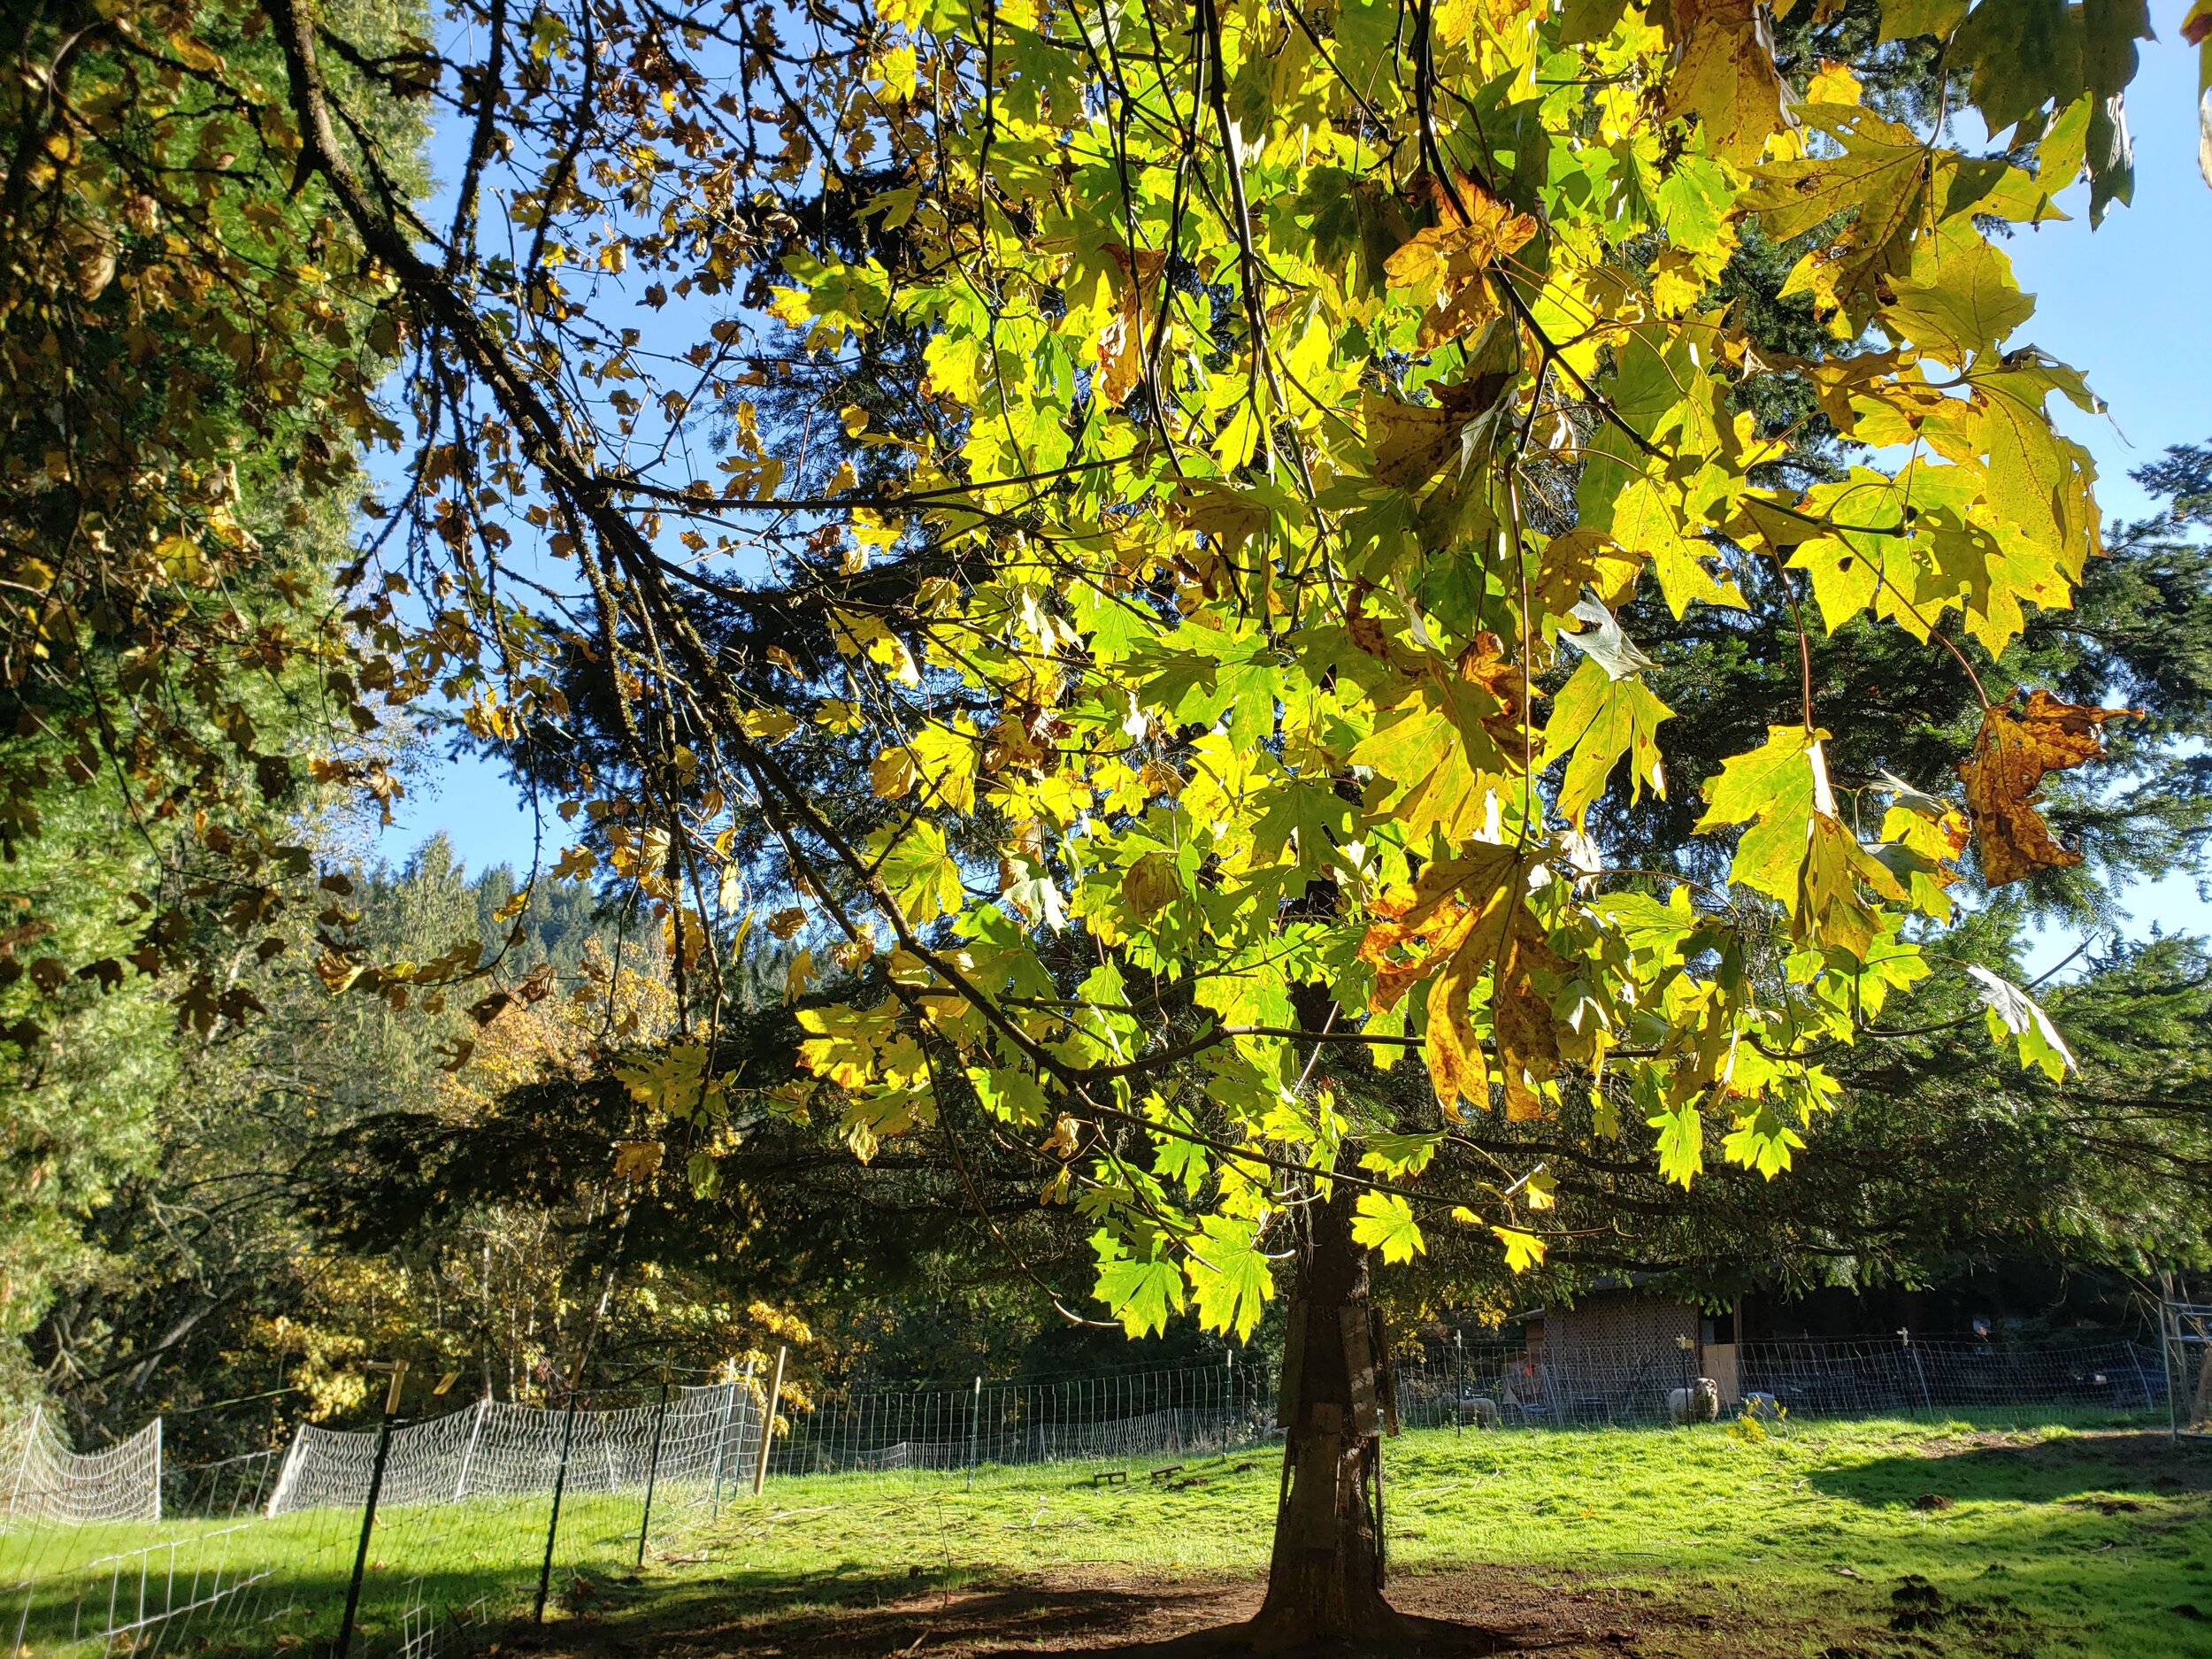
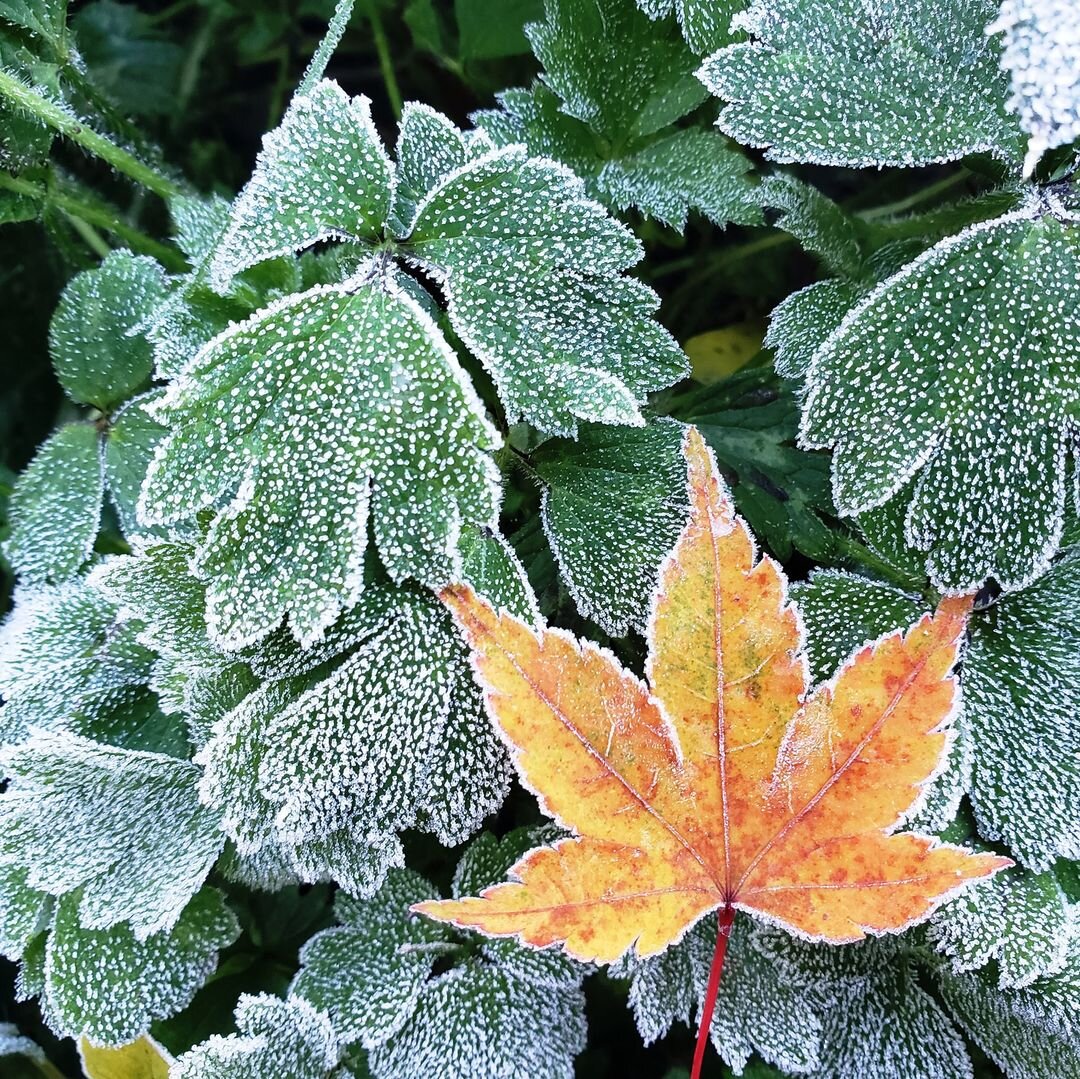
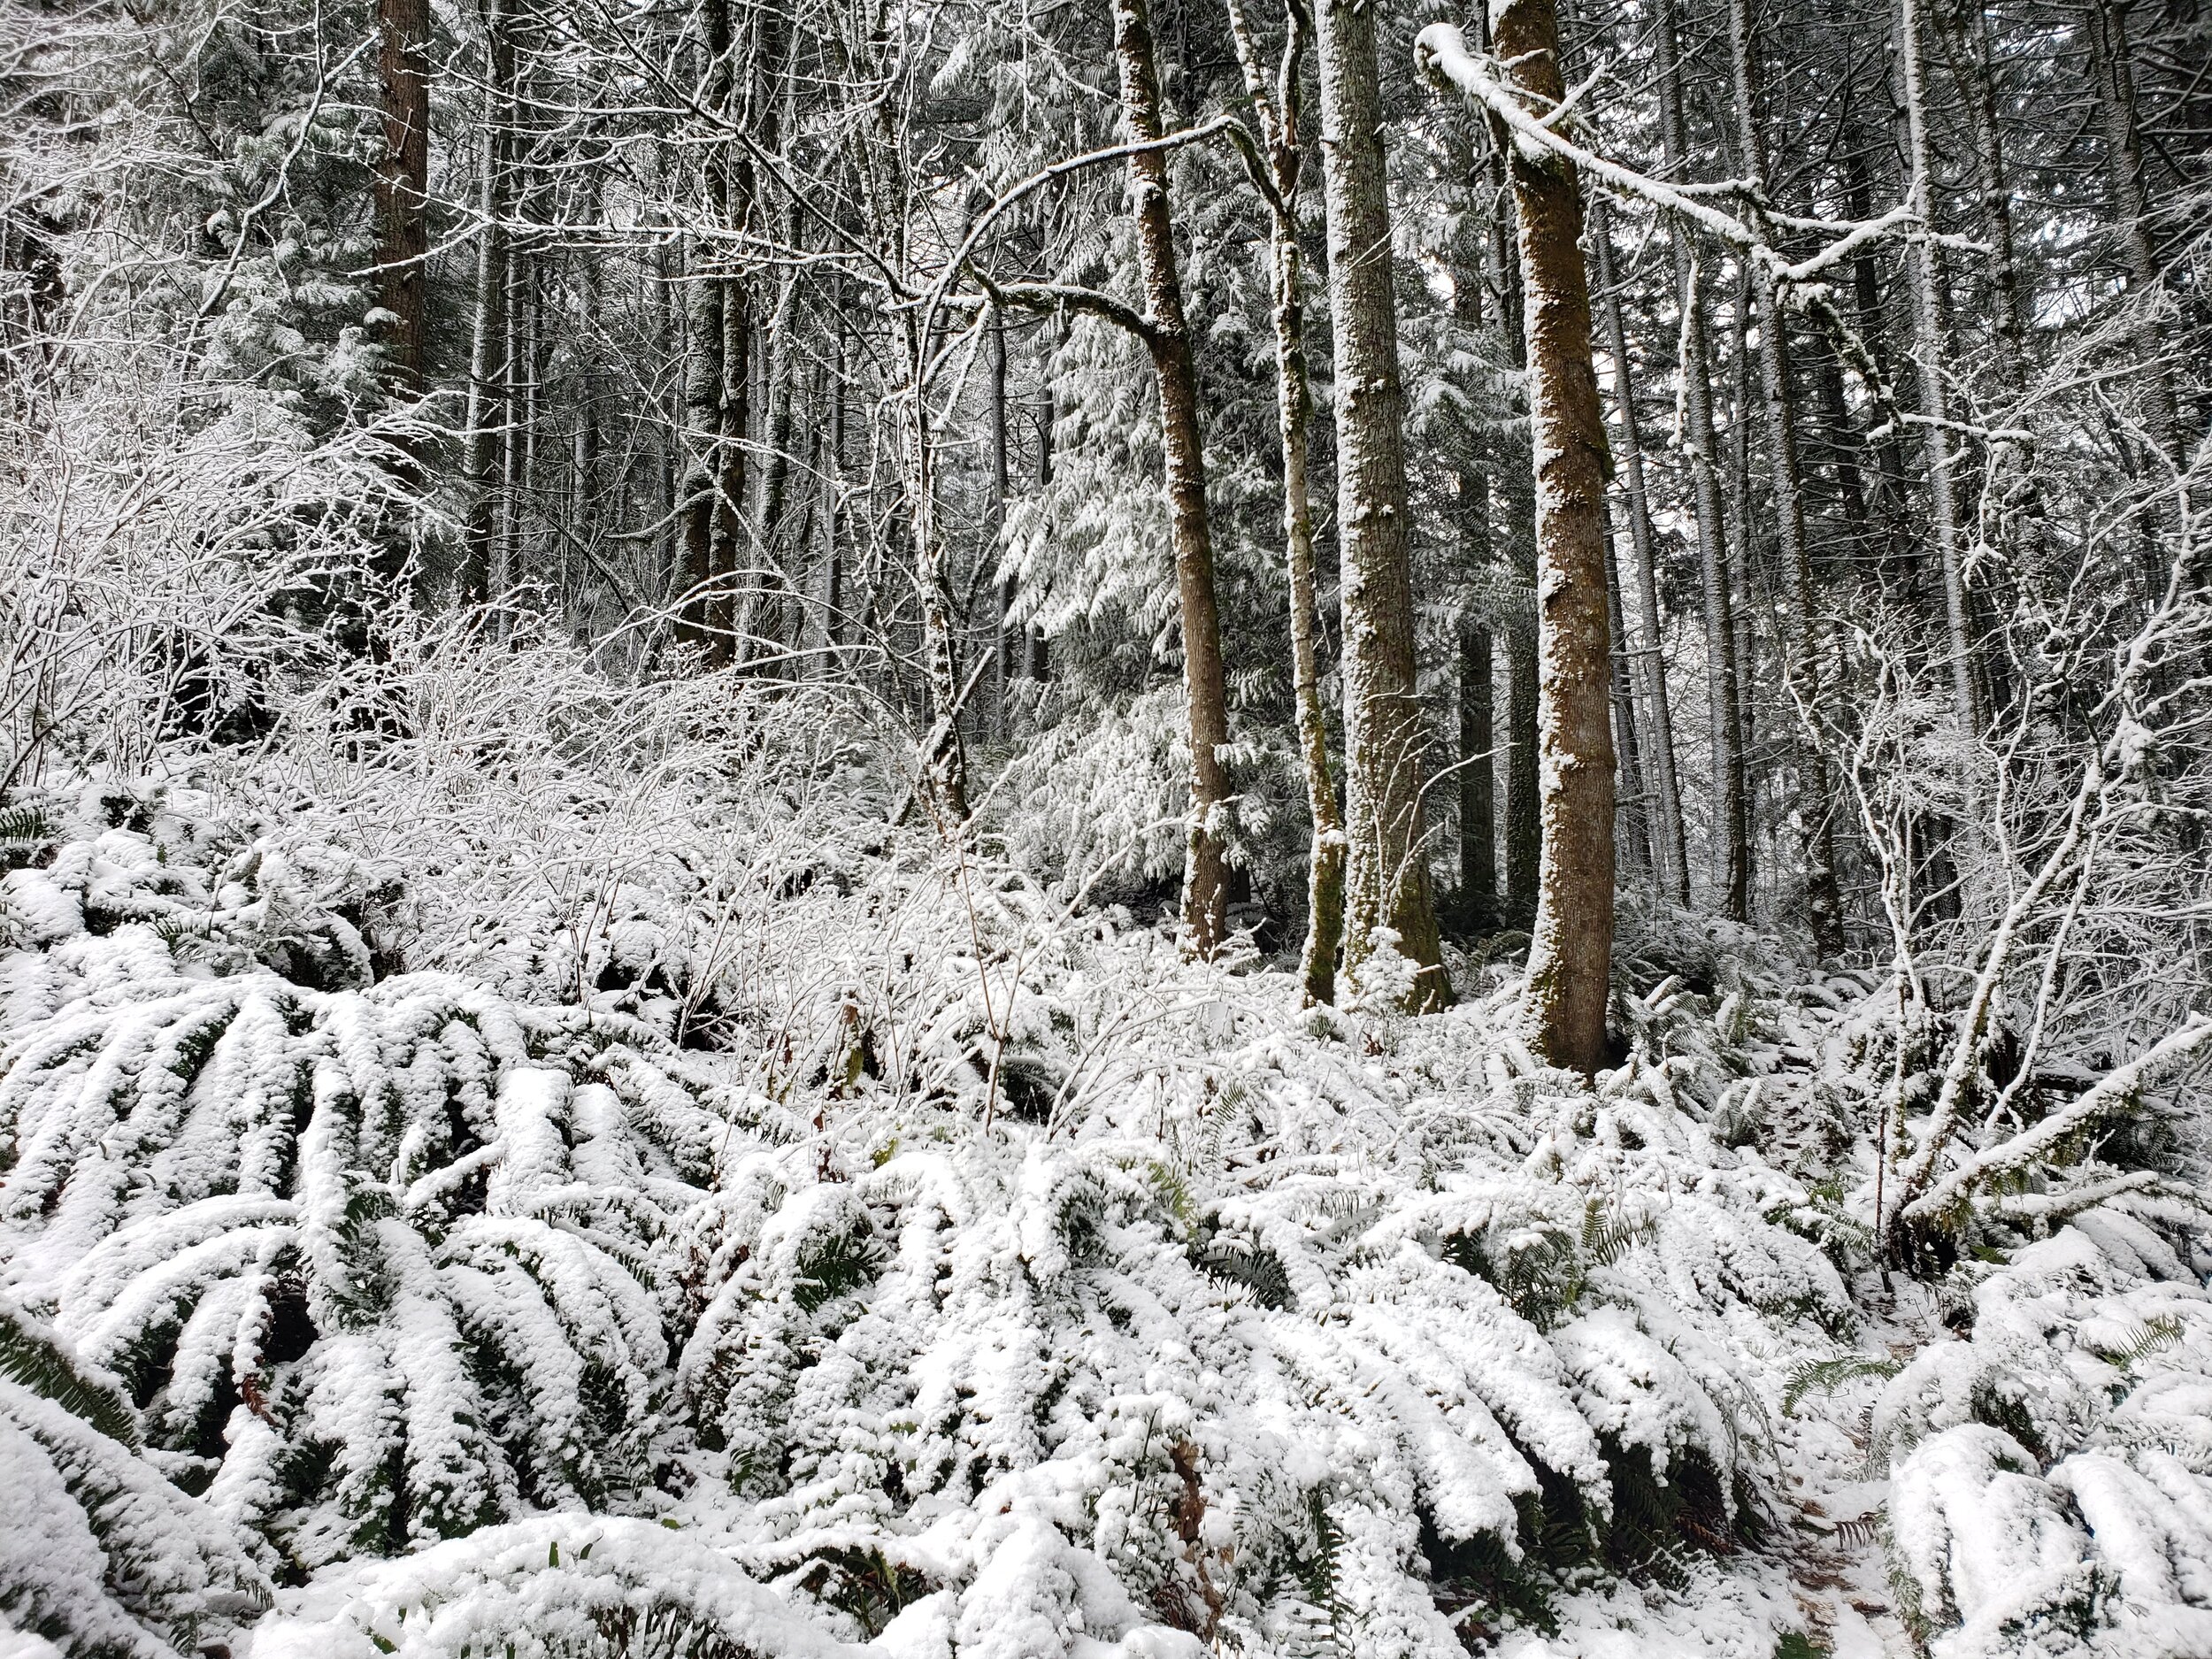
The ice-covered landscape was eerily beautiful. Our sprawling Japanese maple tree looked like a crystal sculpture. Ice covered everything!

20210214_121335.jpg
ice covered lichen
ice covered maple tree
20210214_162331.jpg

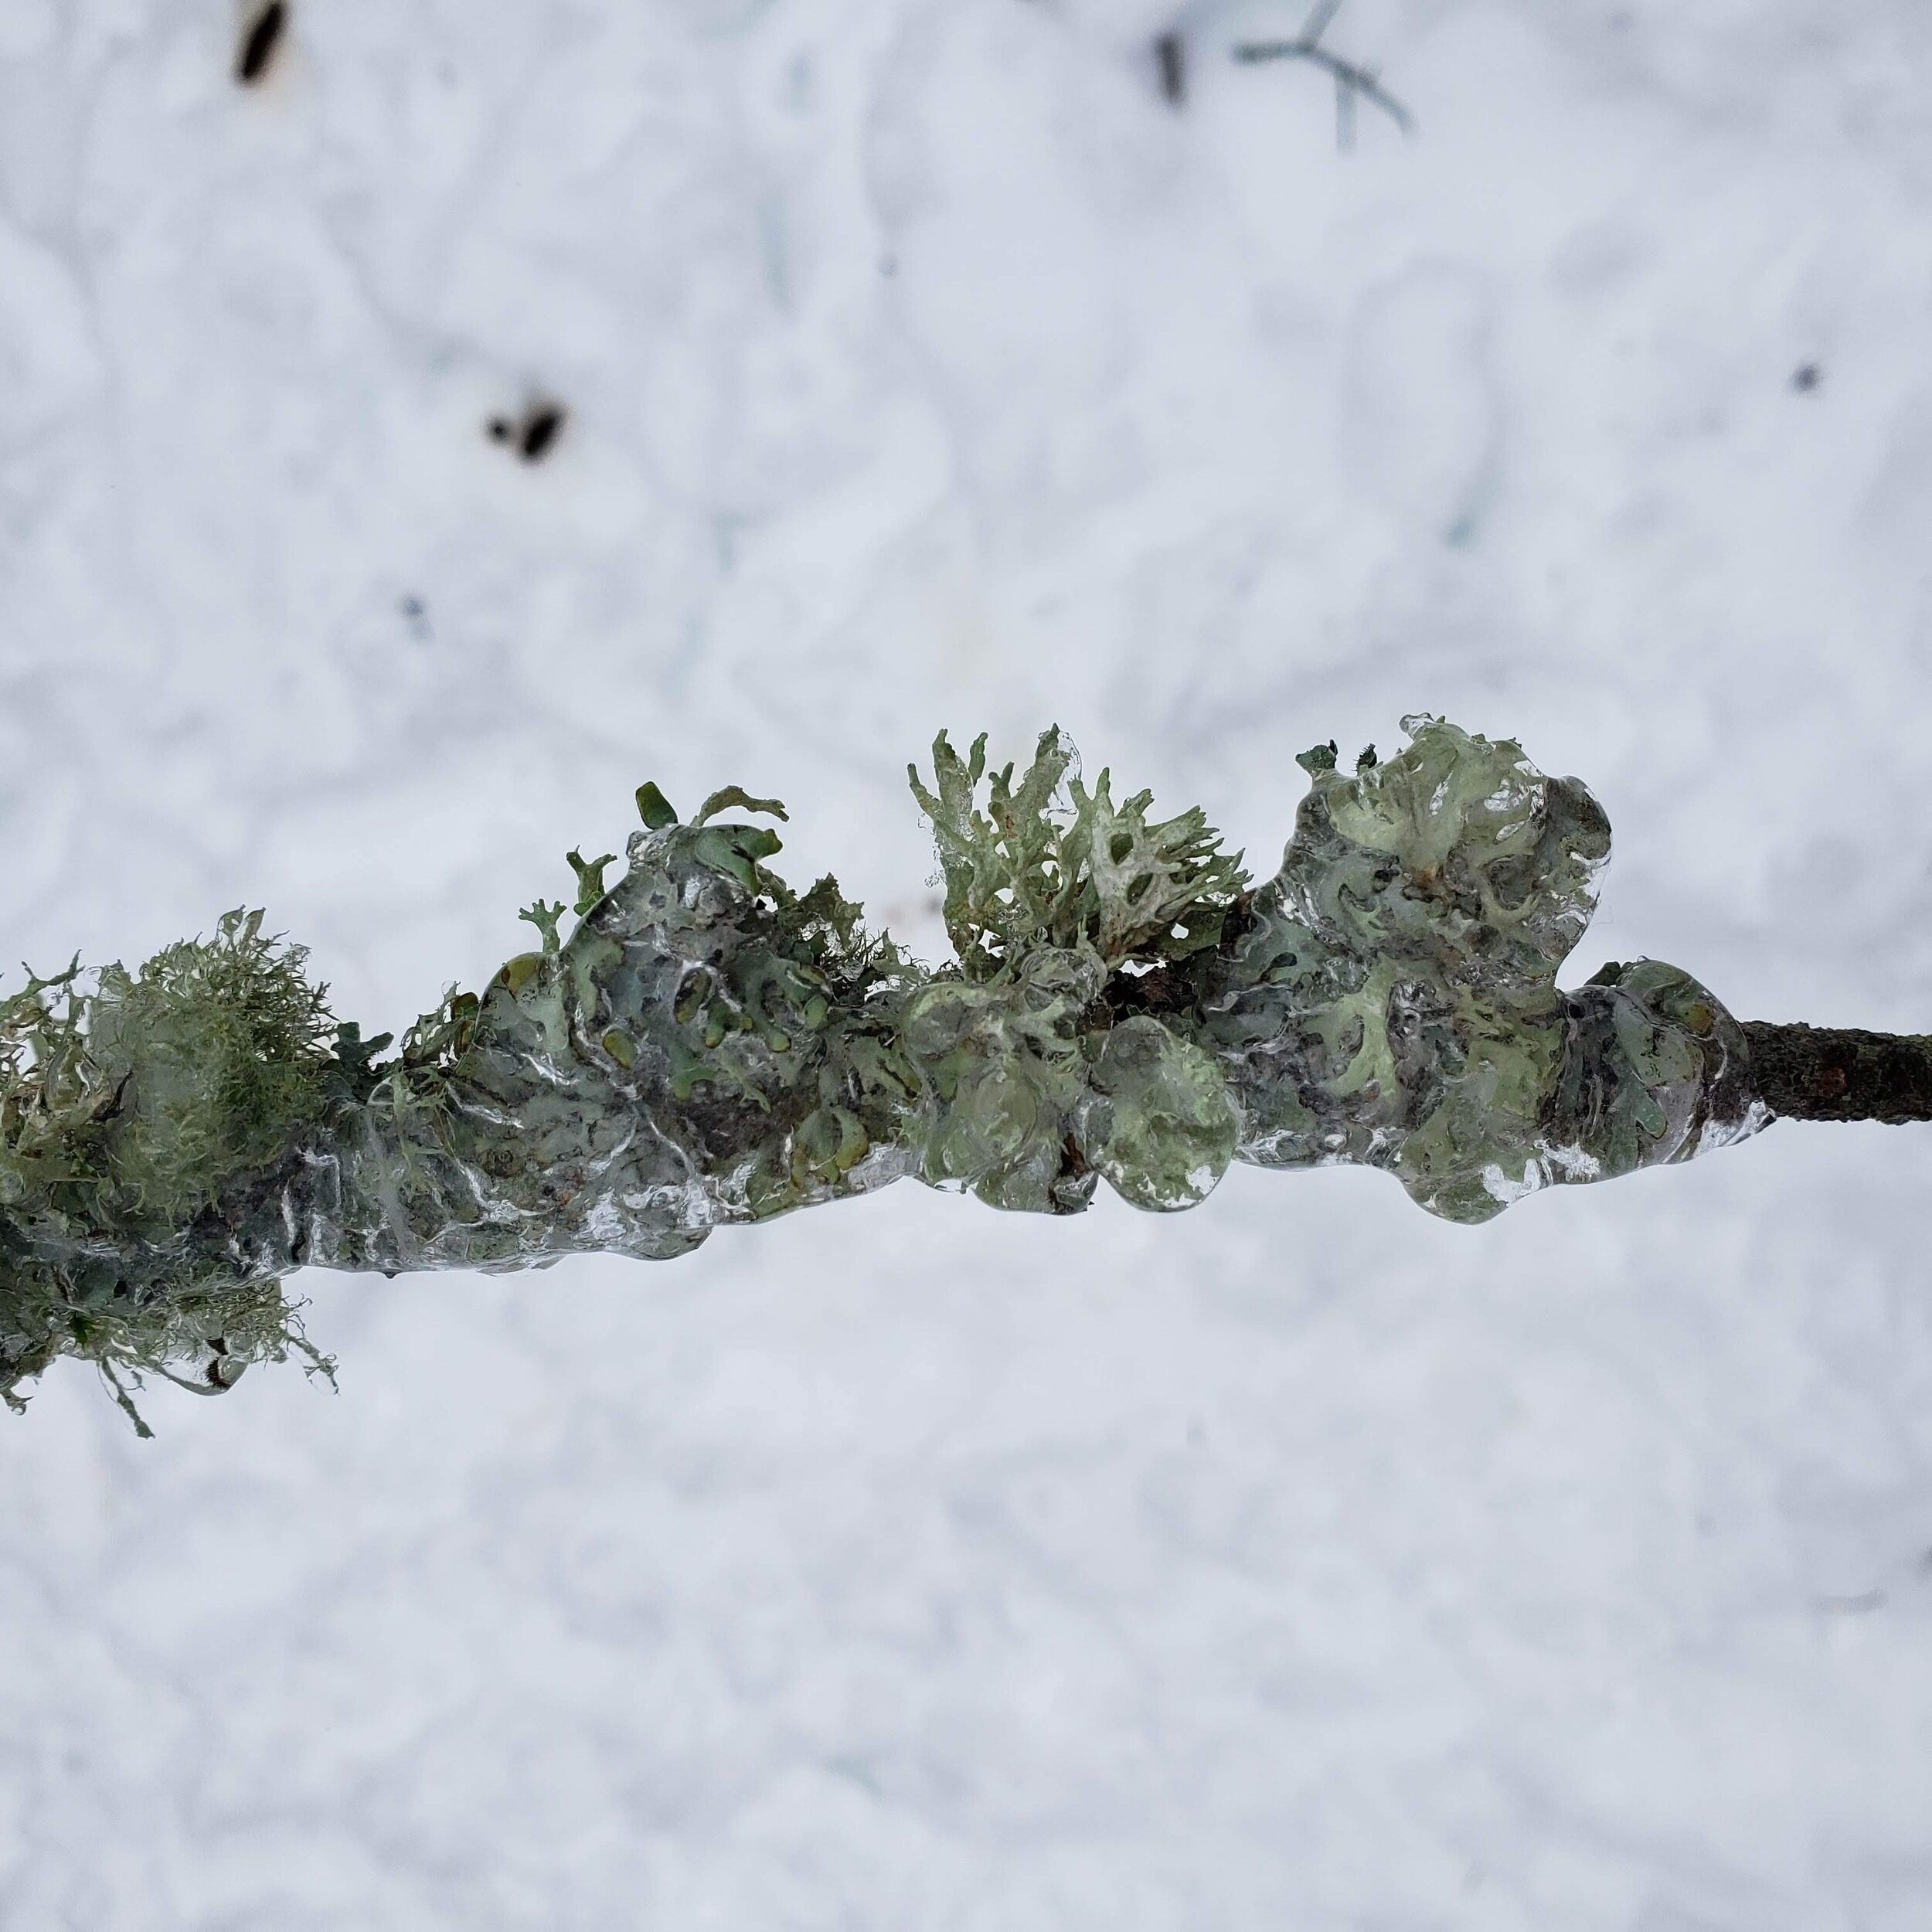
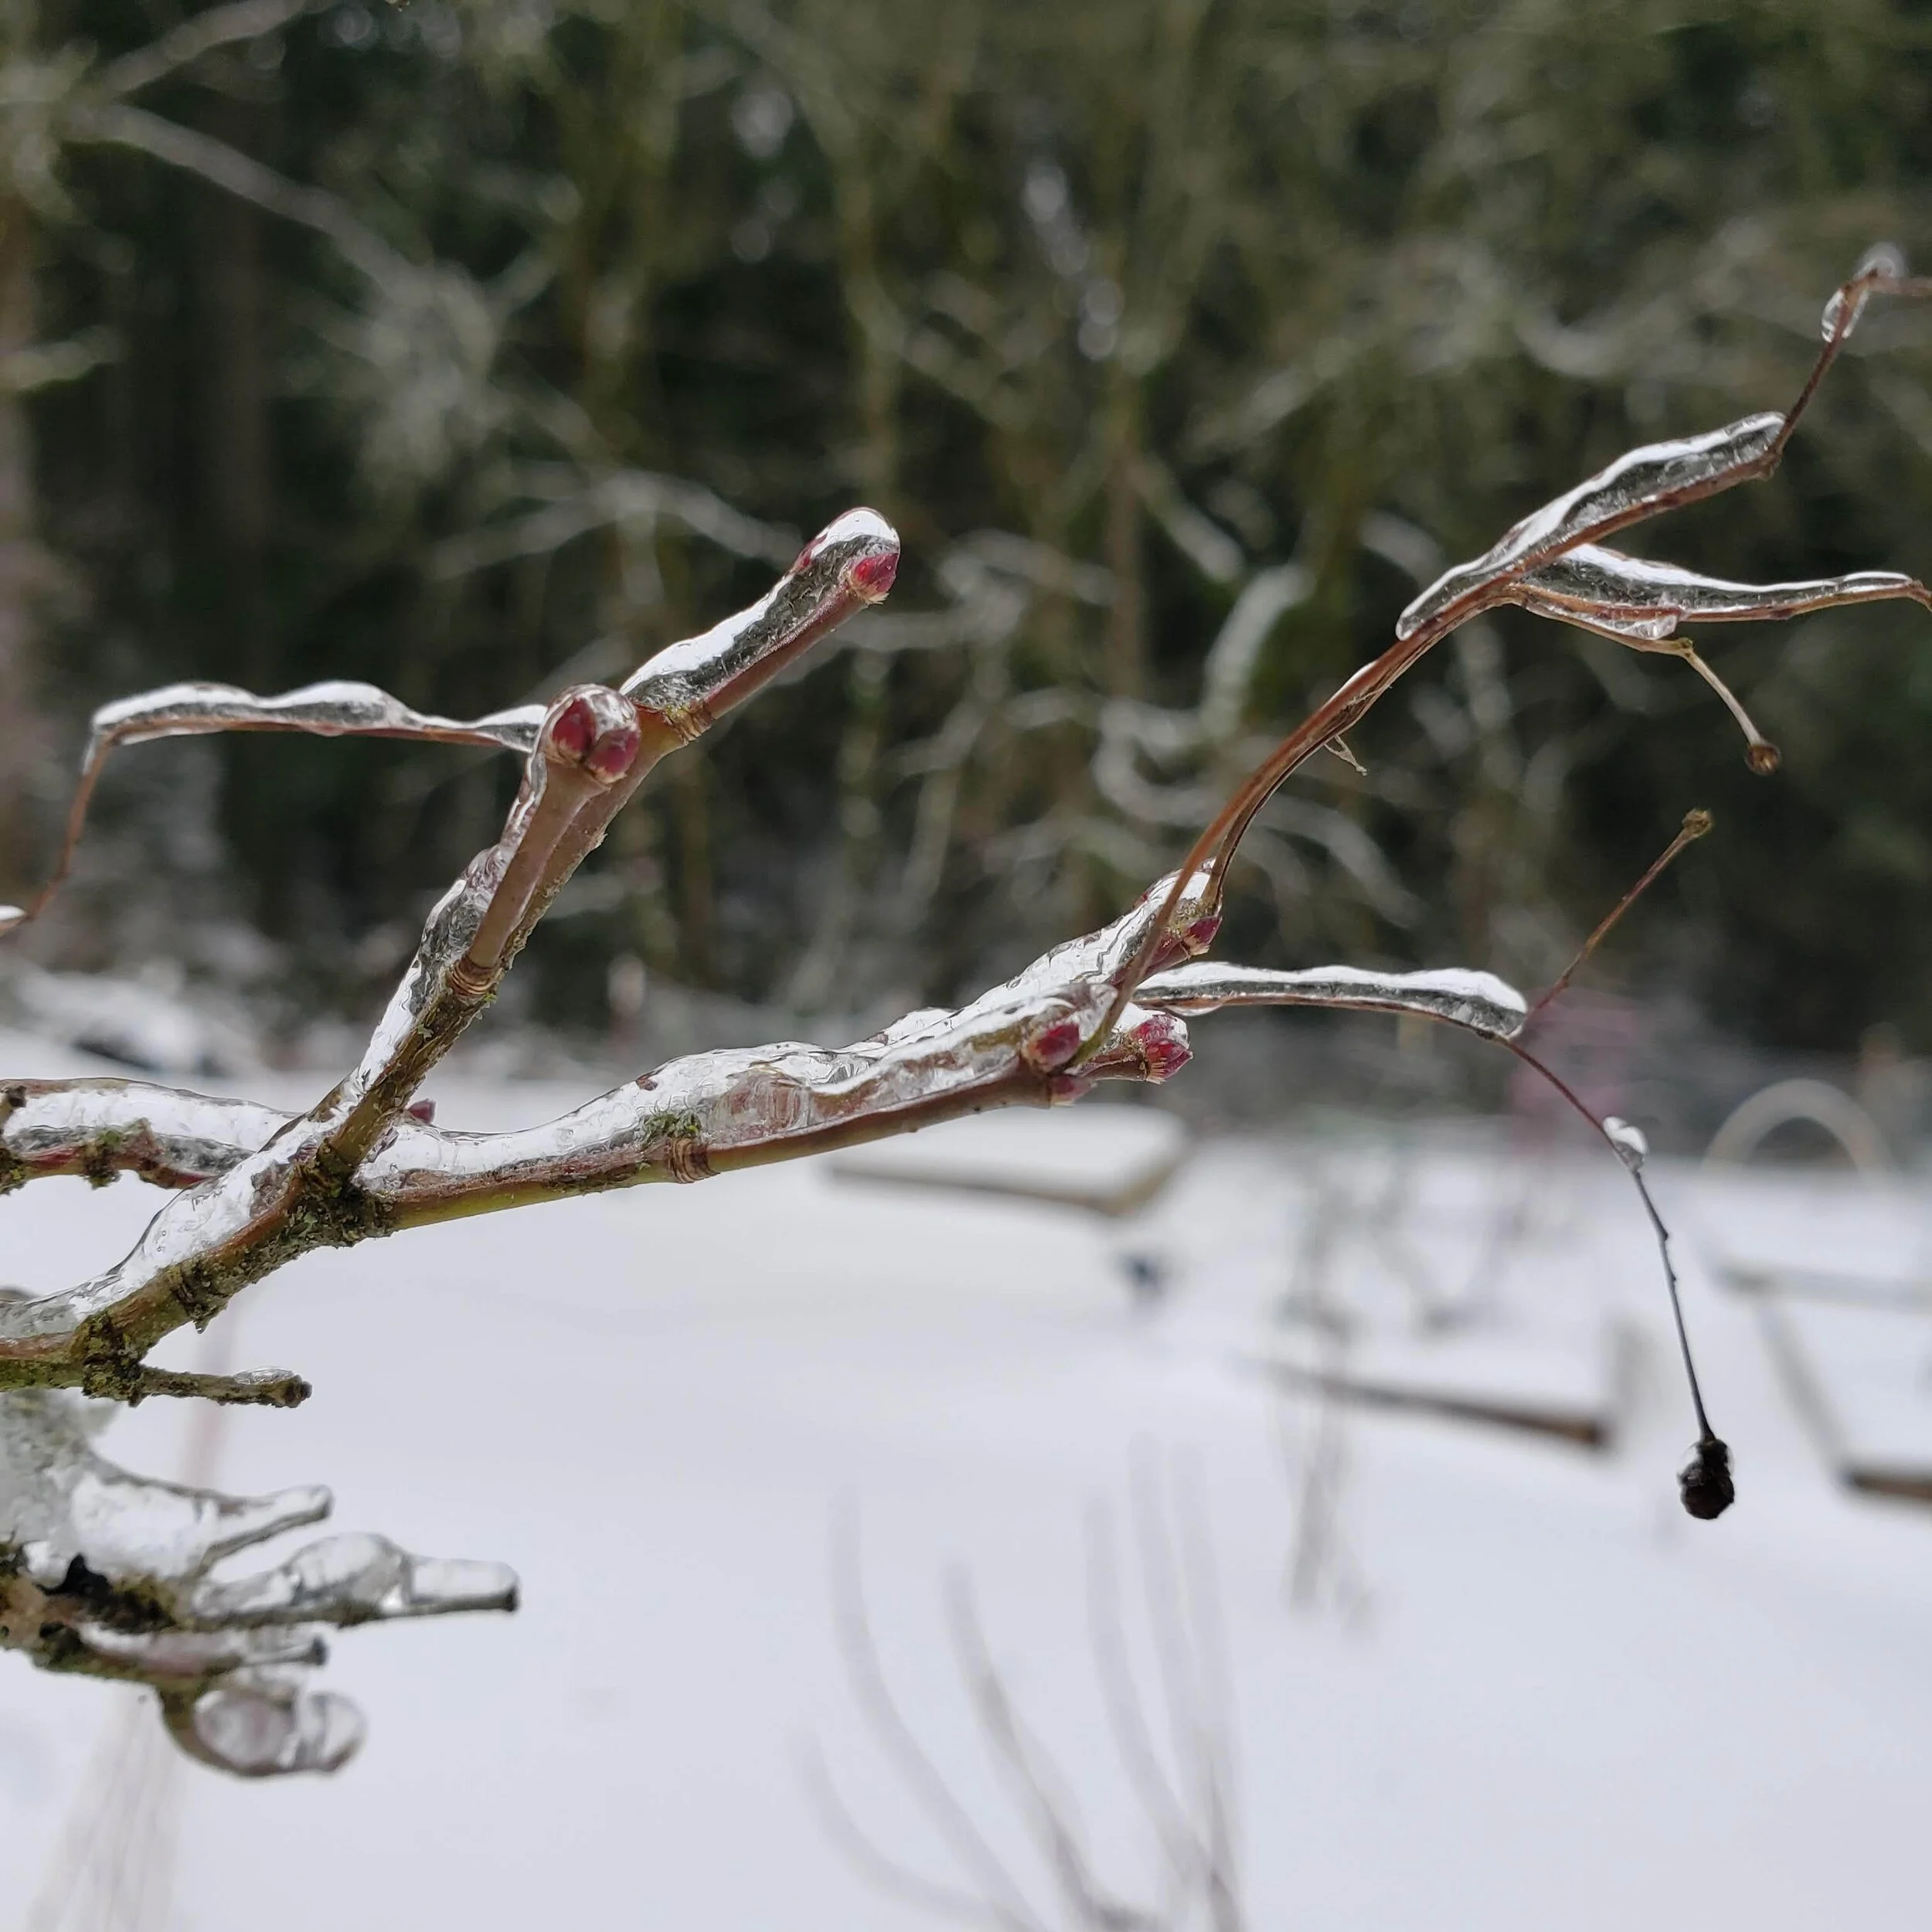
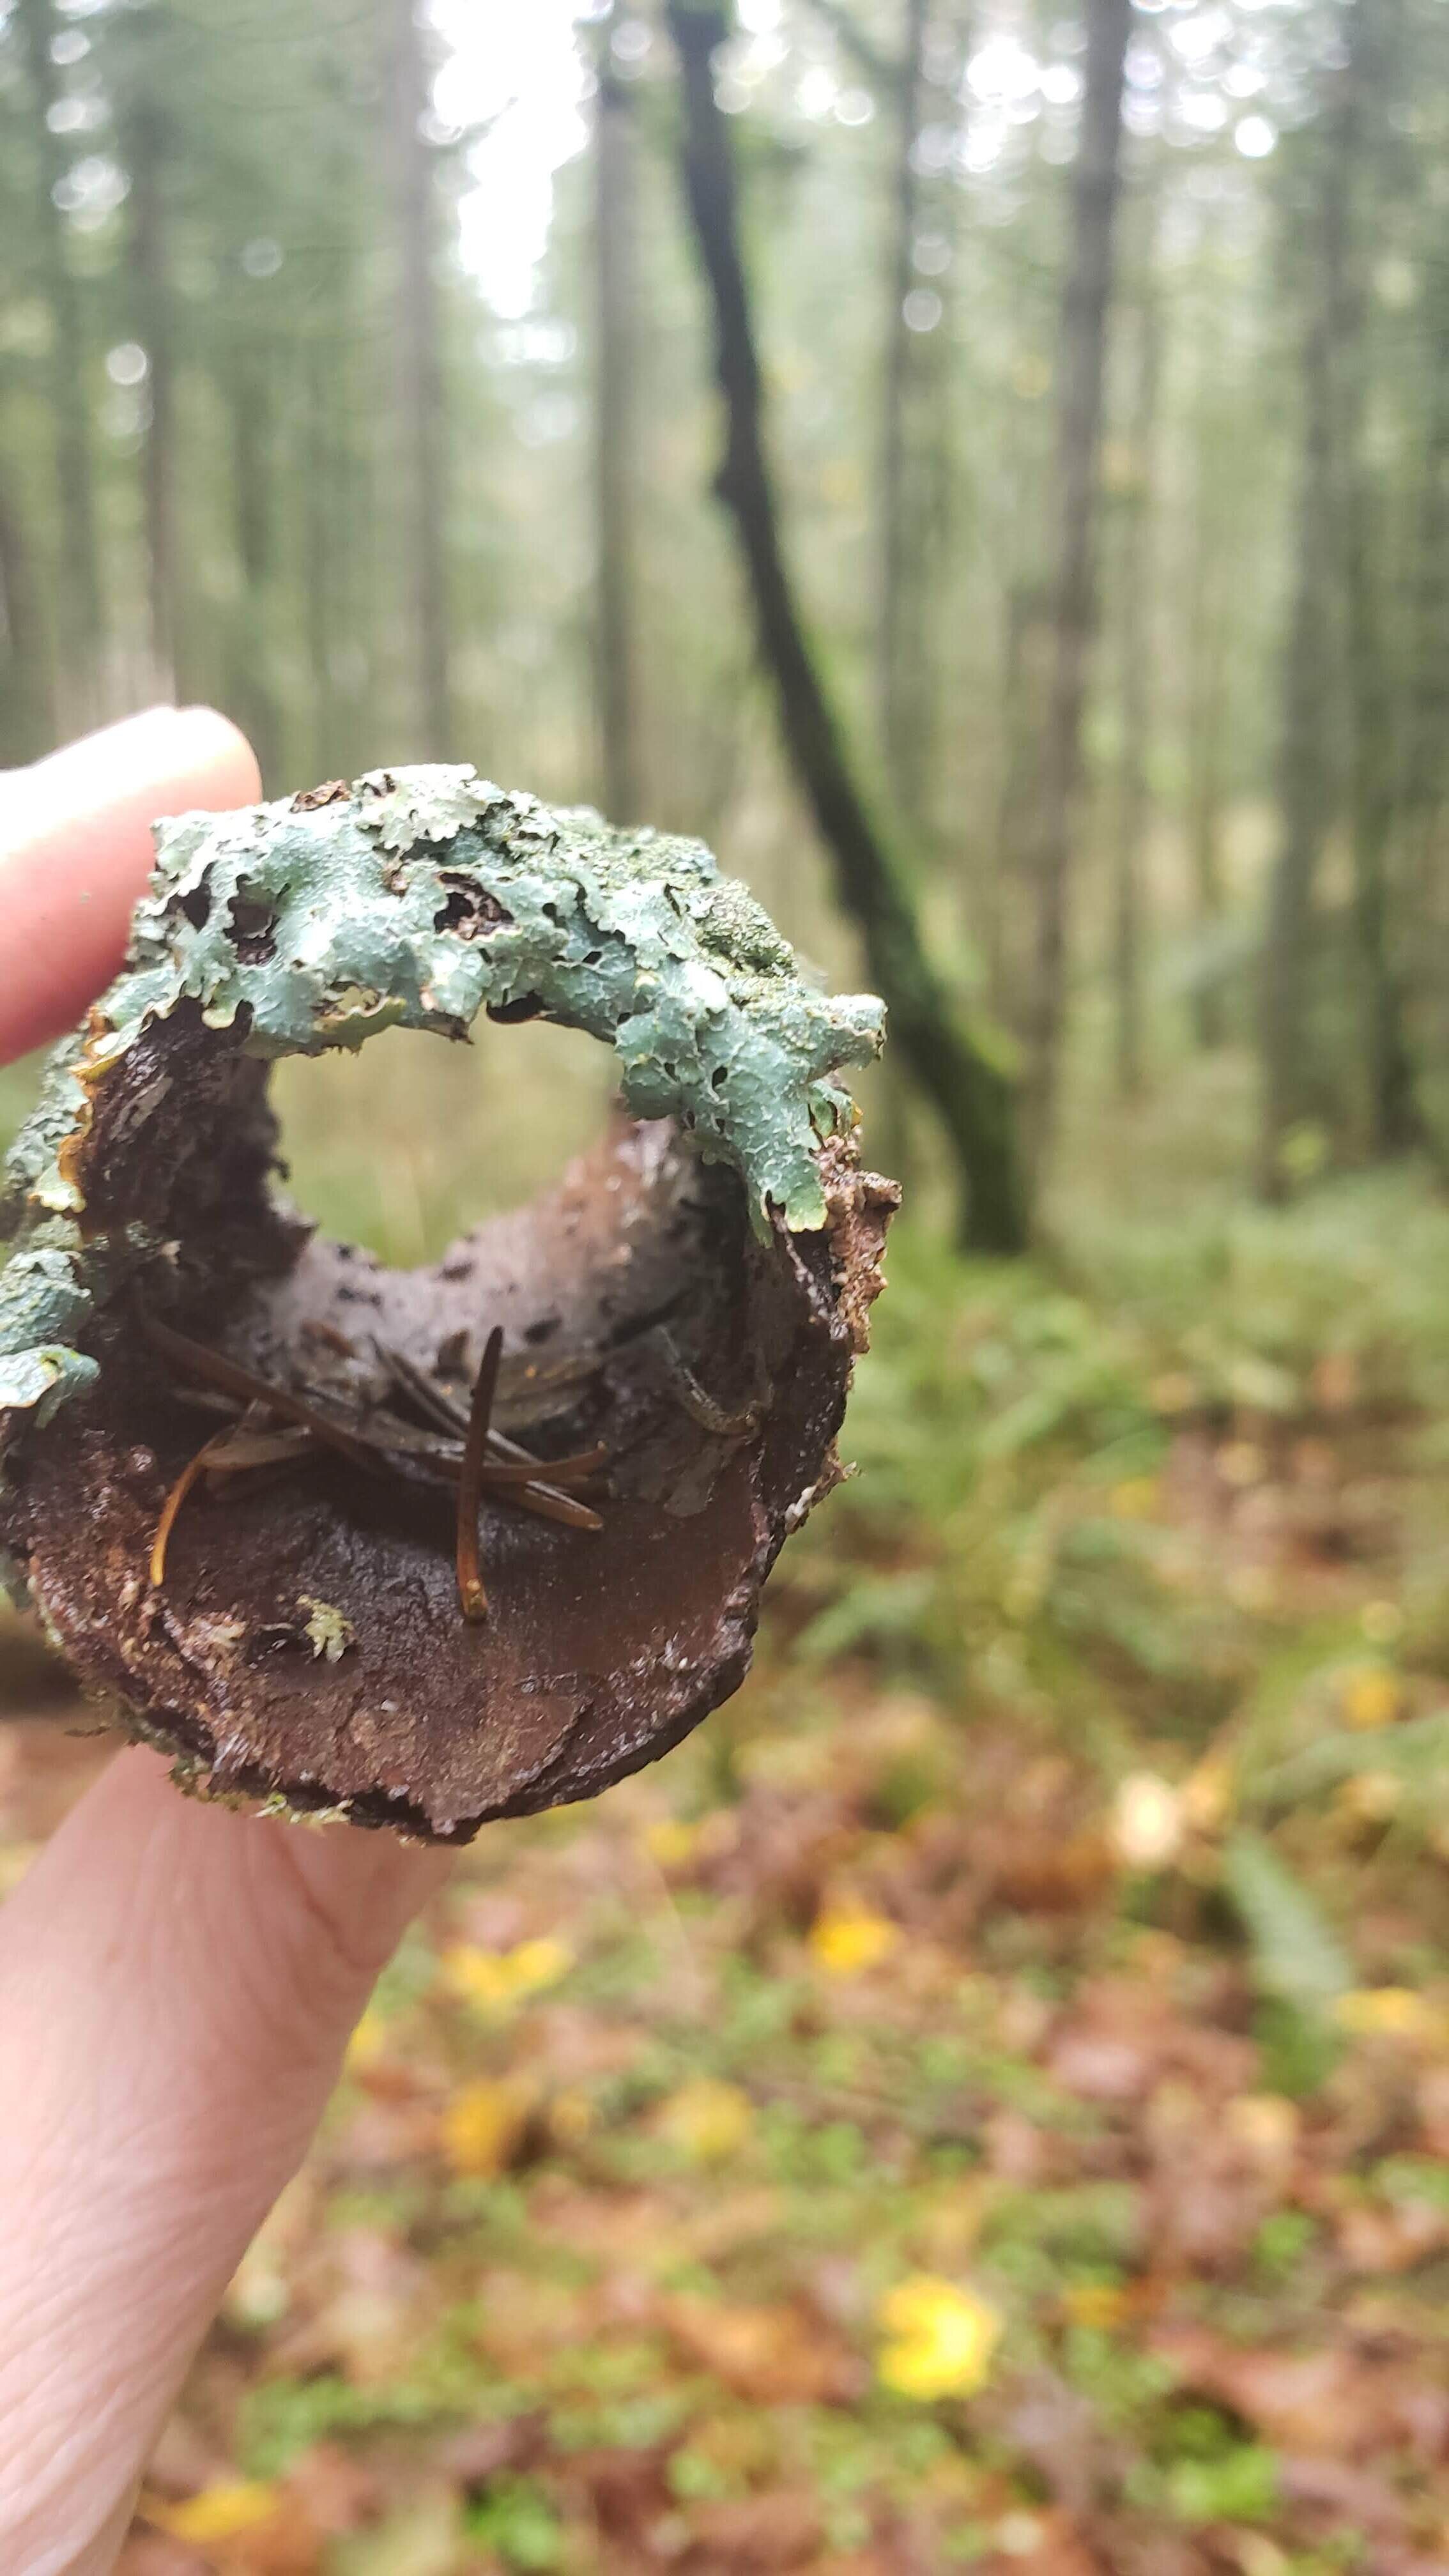
When the weather warmed up just a little, we could peel ice off of the cedar trees and other plants in large pieces. These images are the ice sheets that were covering the cedar trees. They’re like cedar branch ice sculptures! The center image is a little branch with moss and lichen encased in ice. Doesn’t it look like a nature-made snow globe?

ice storm
20210214_160556.jpg
ice covered cedar branch
naturally+dyed+cotton+rope+baskets

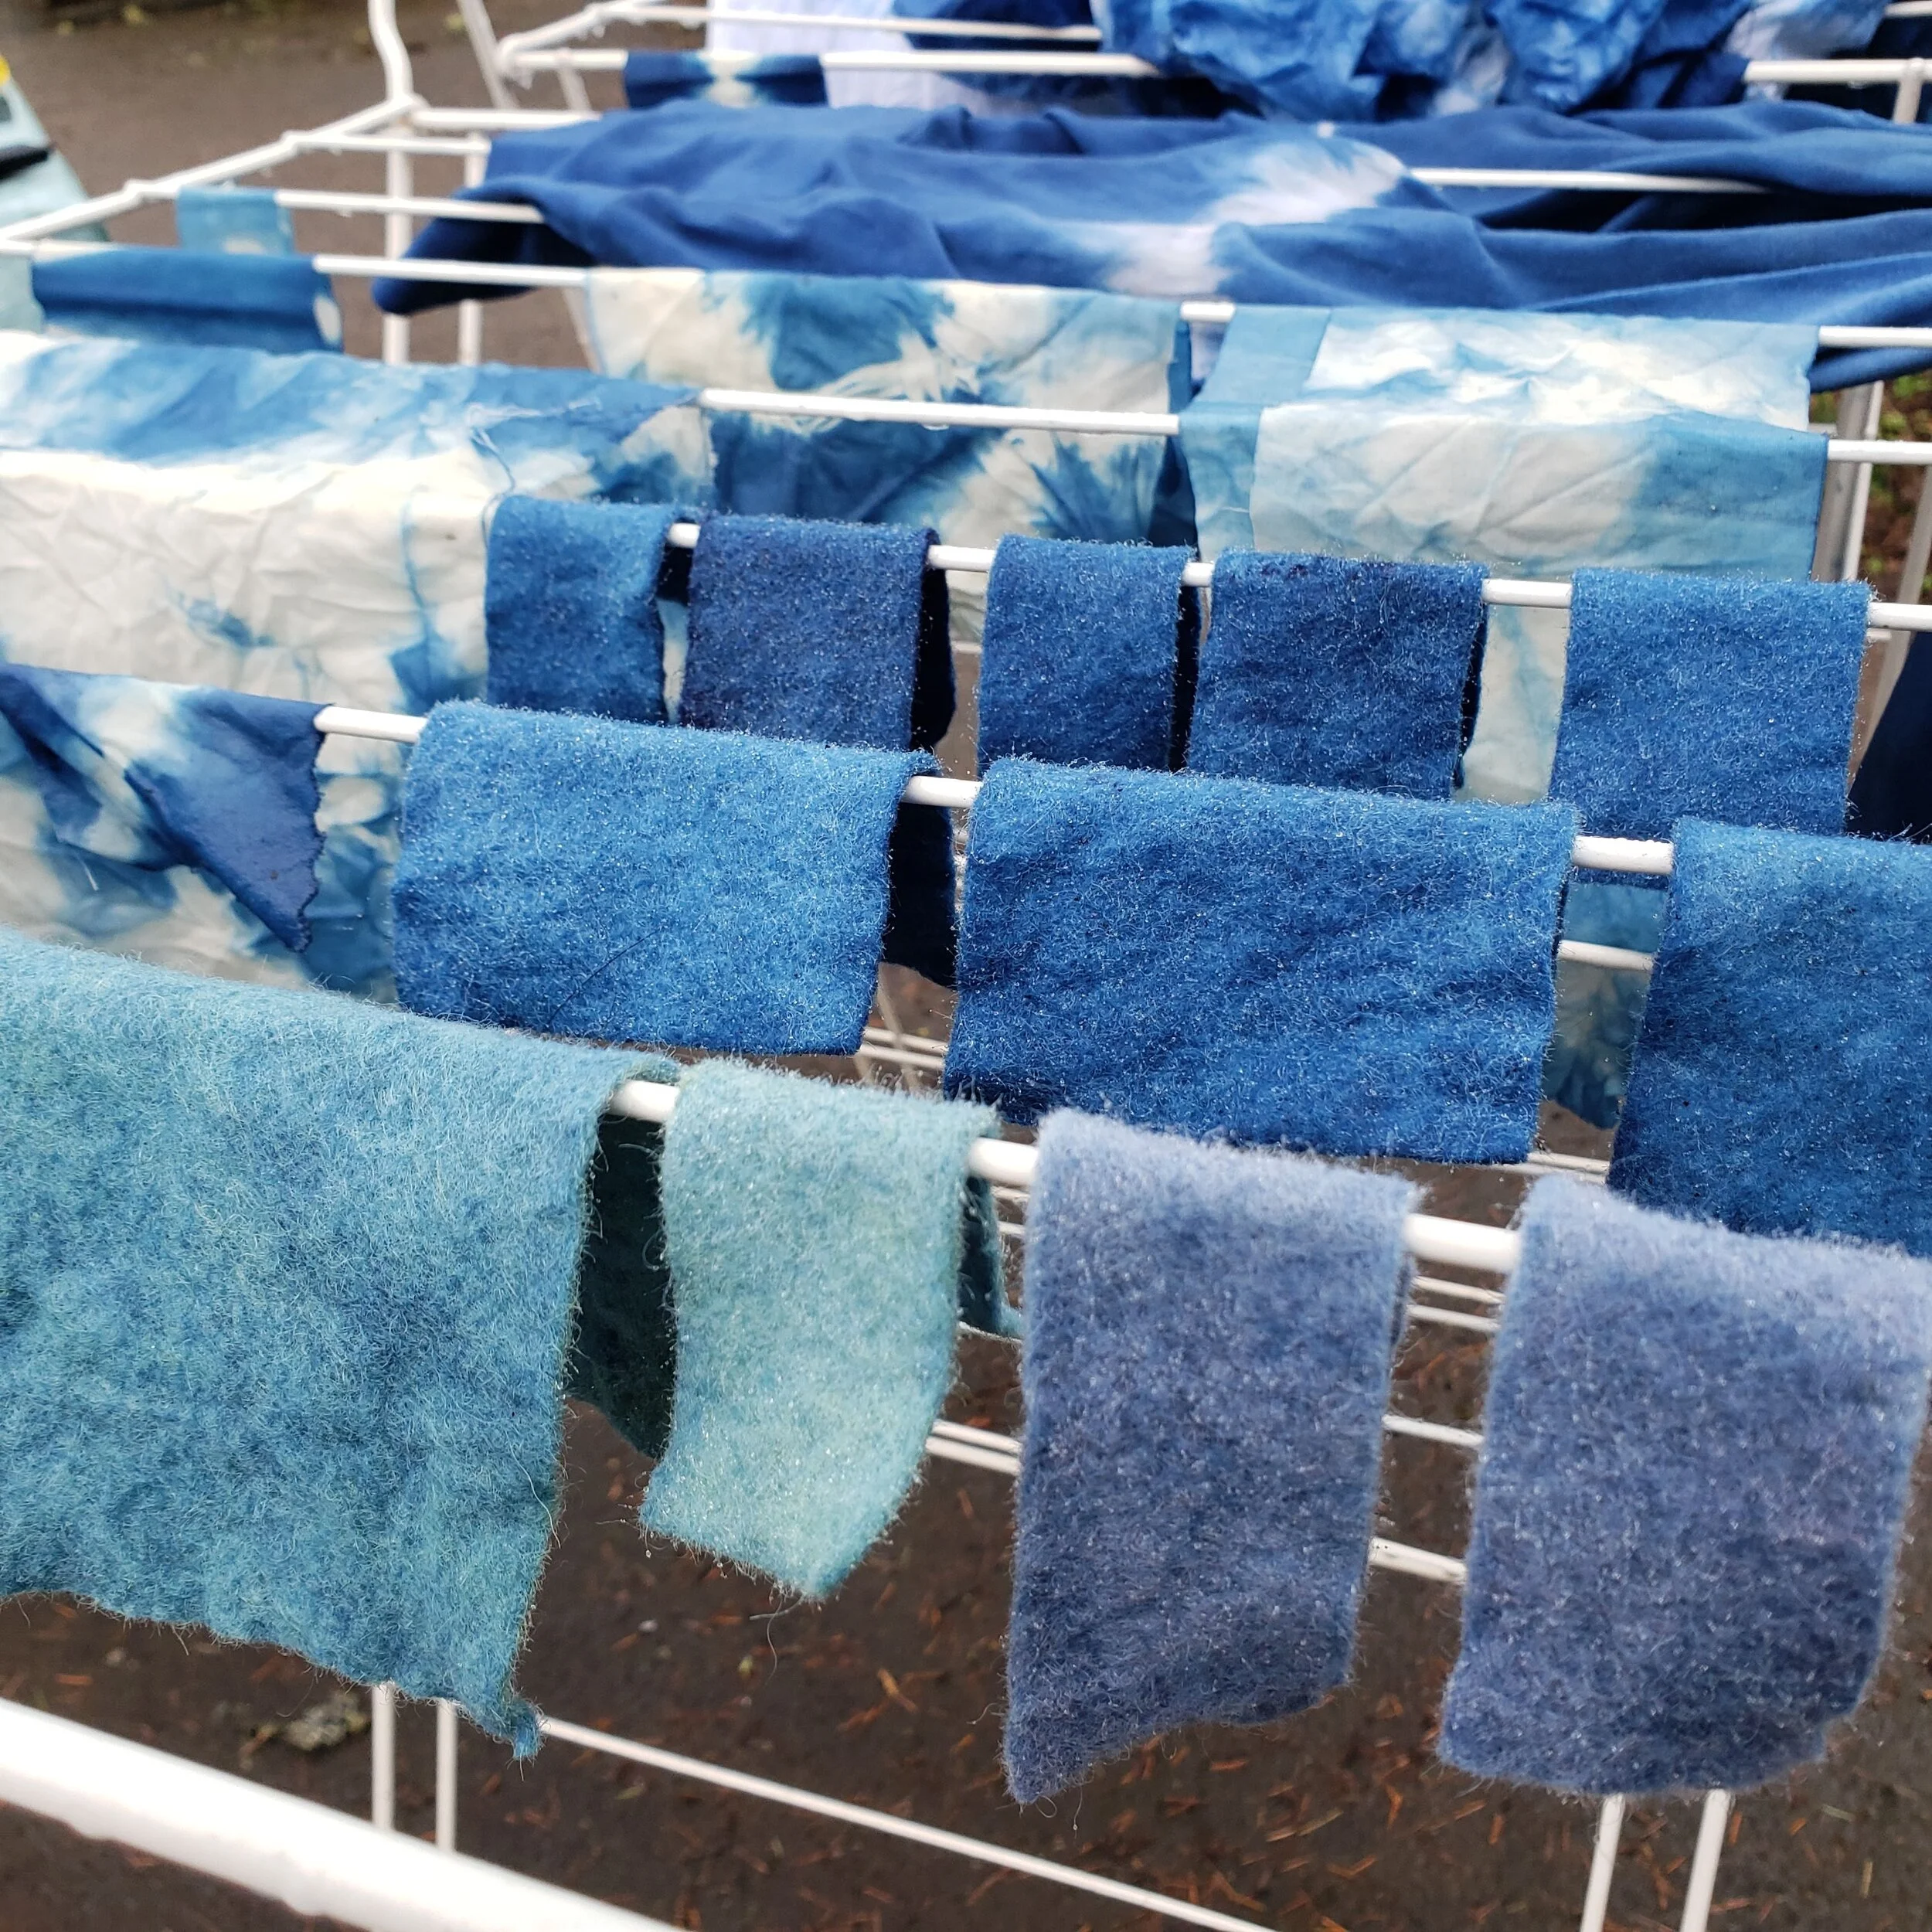
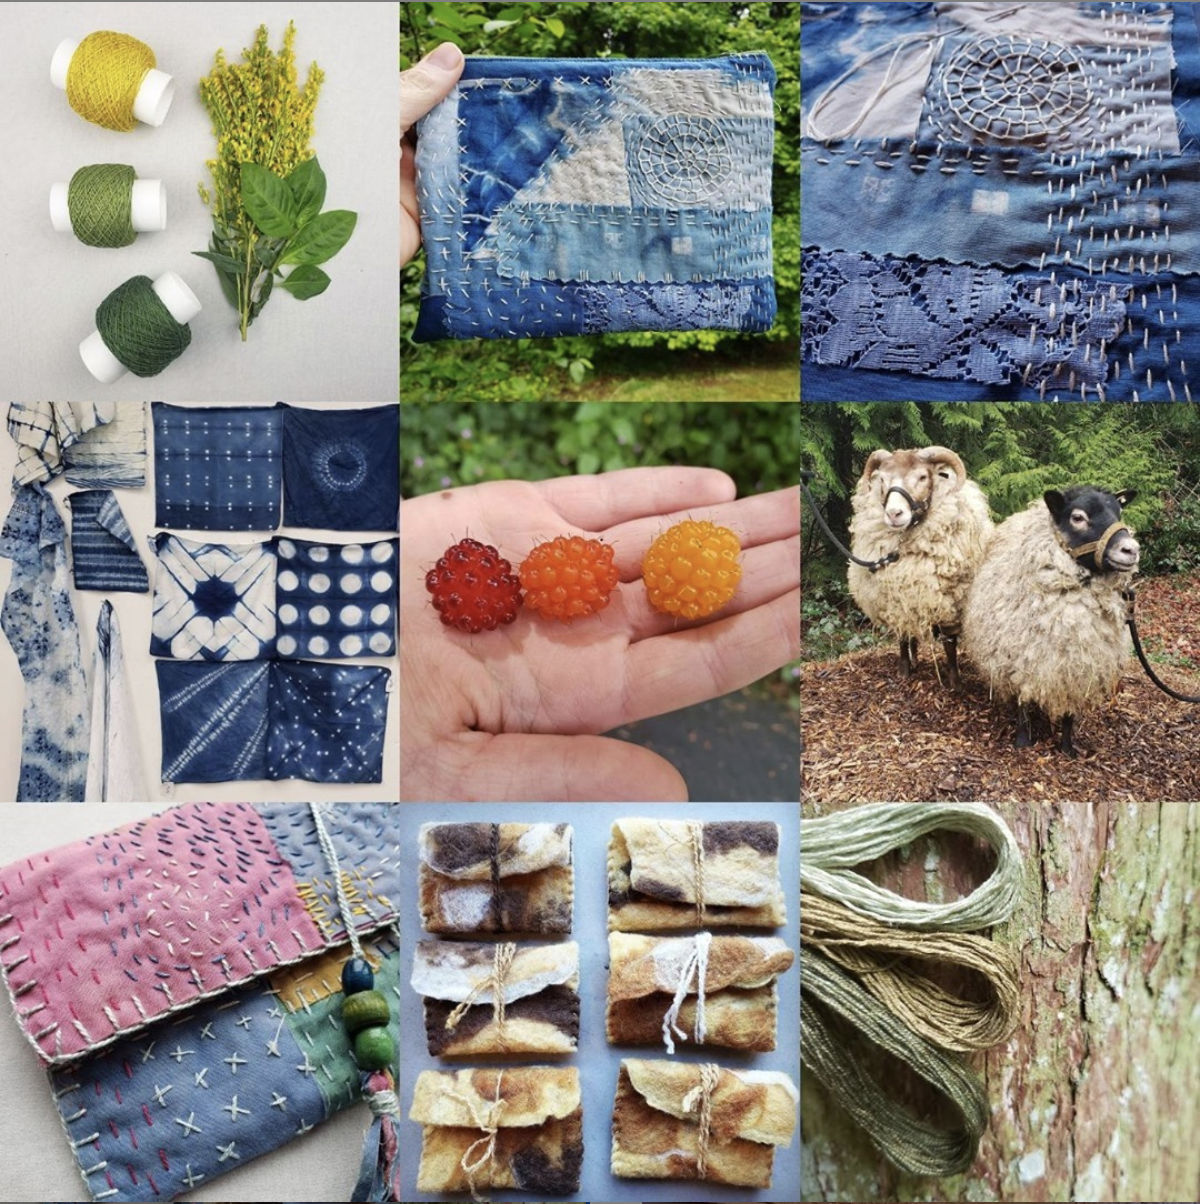
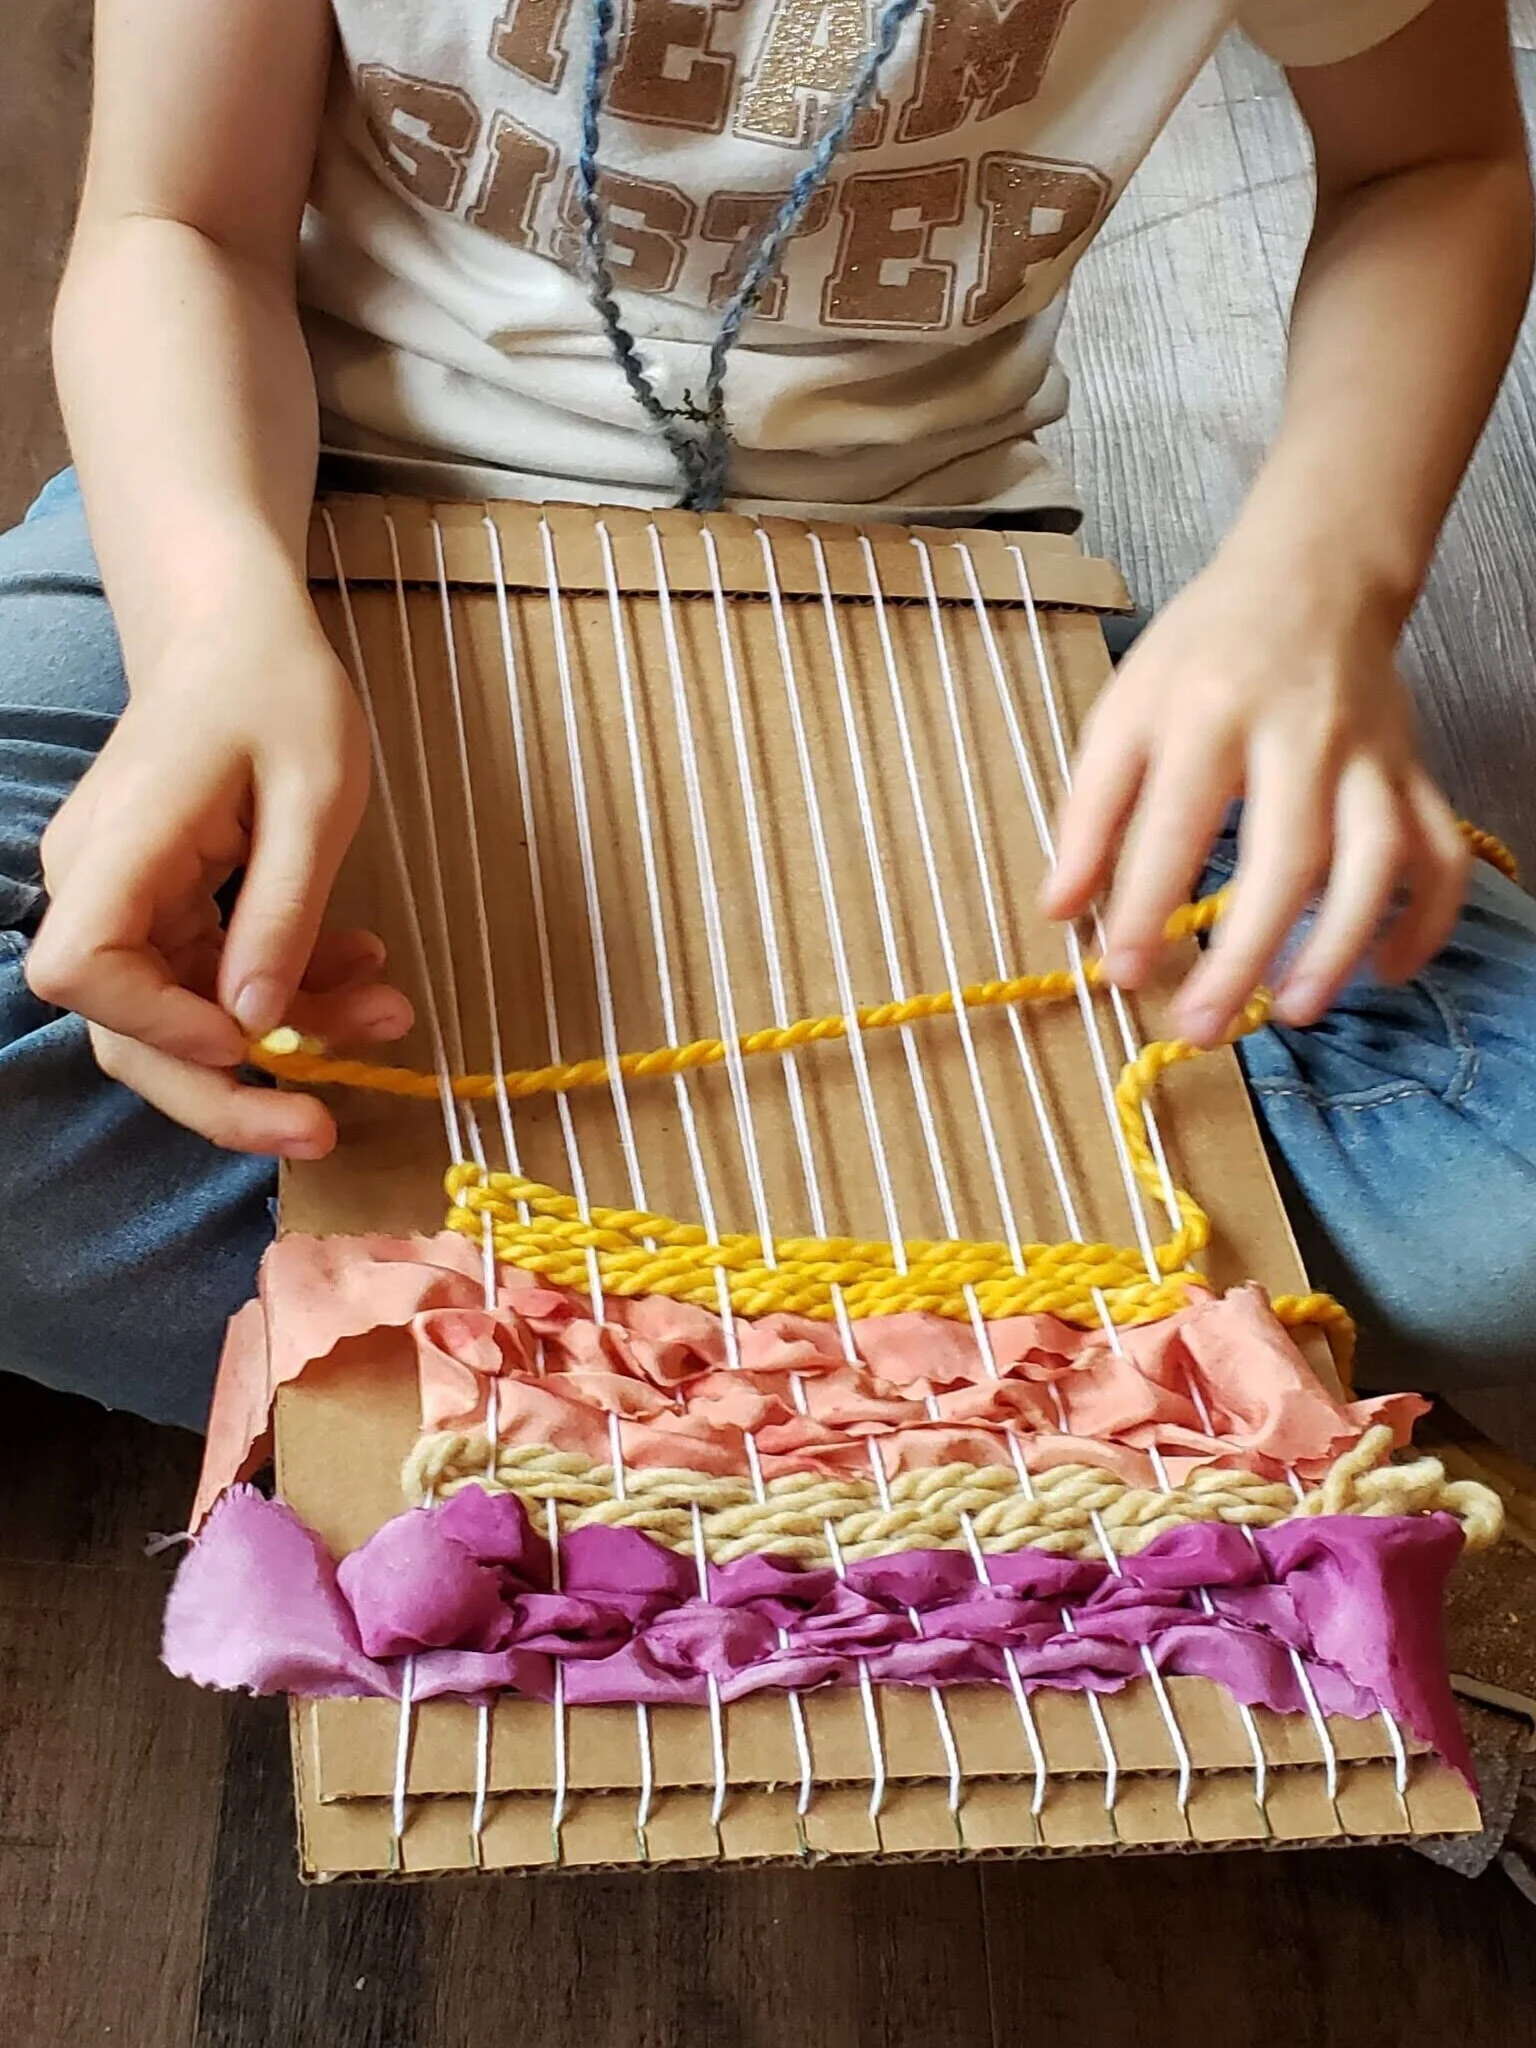
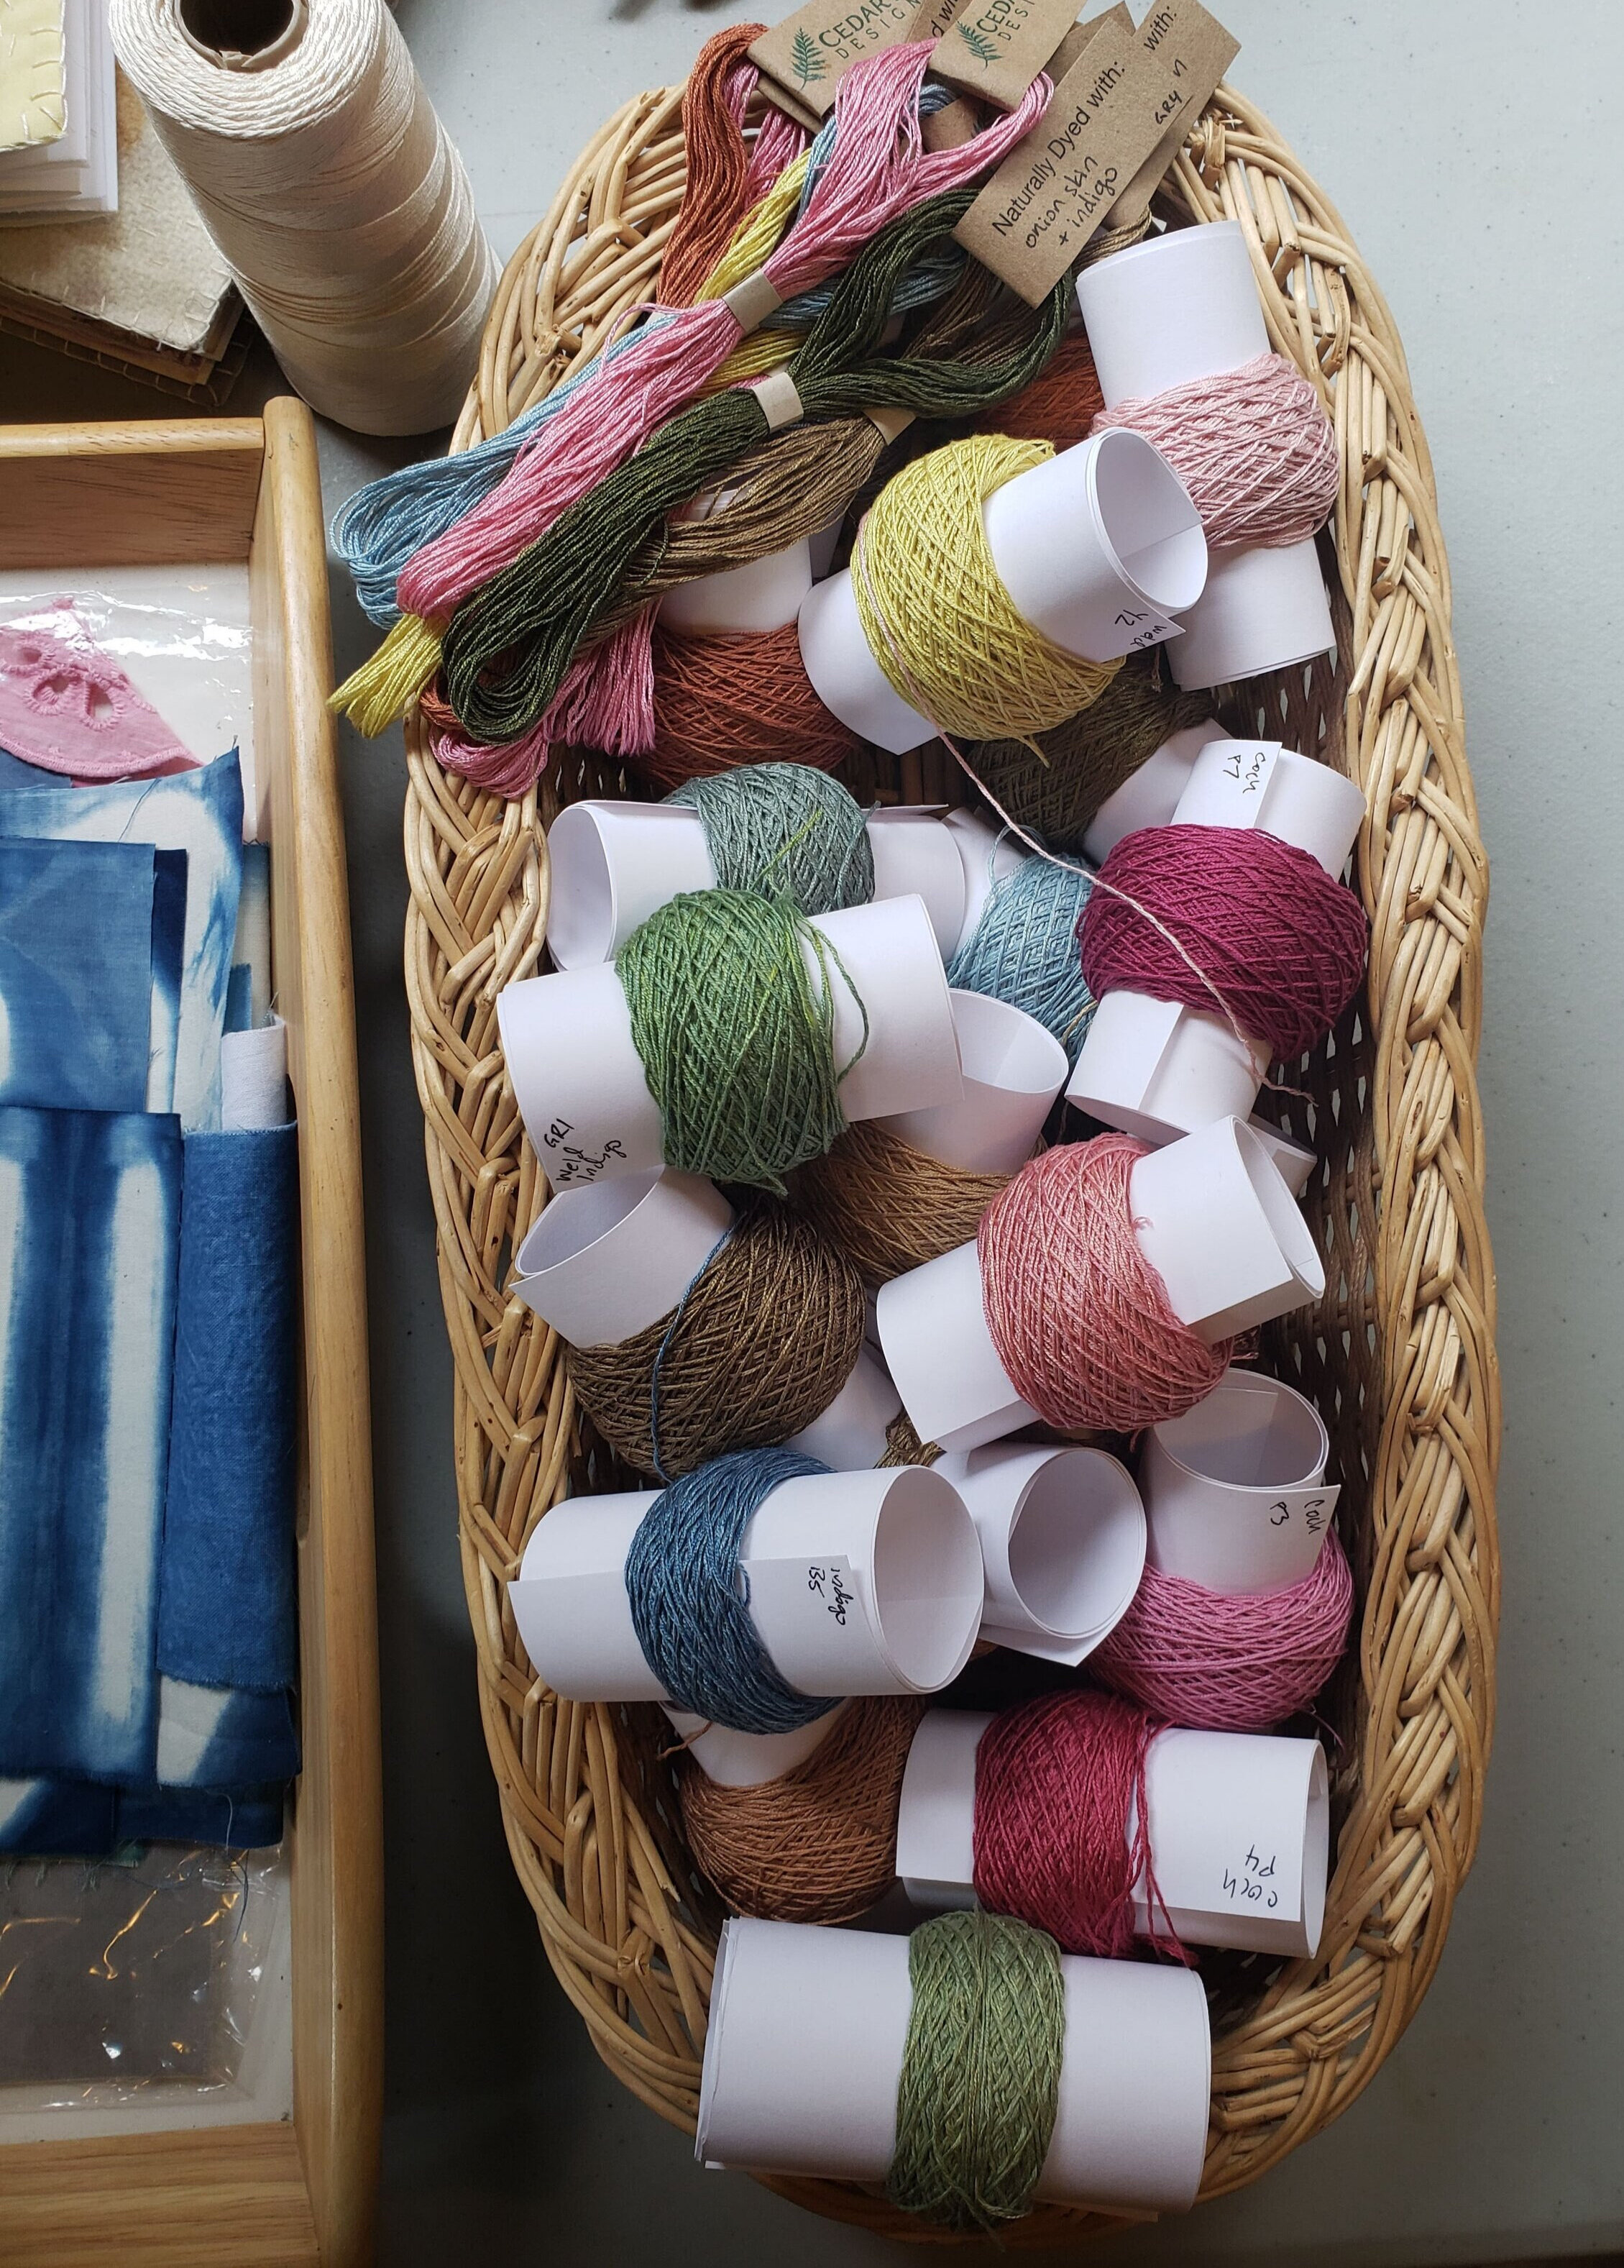
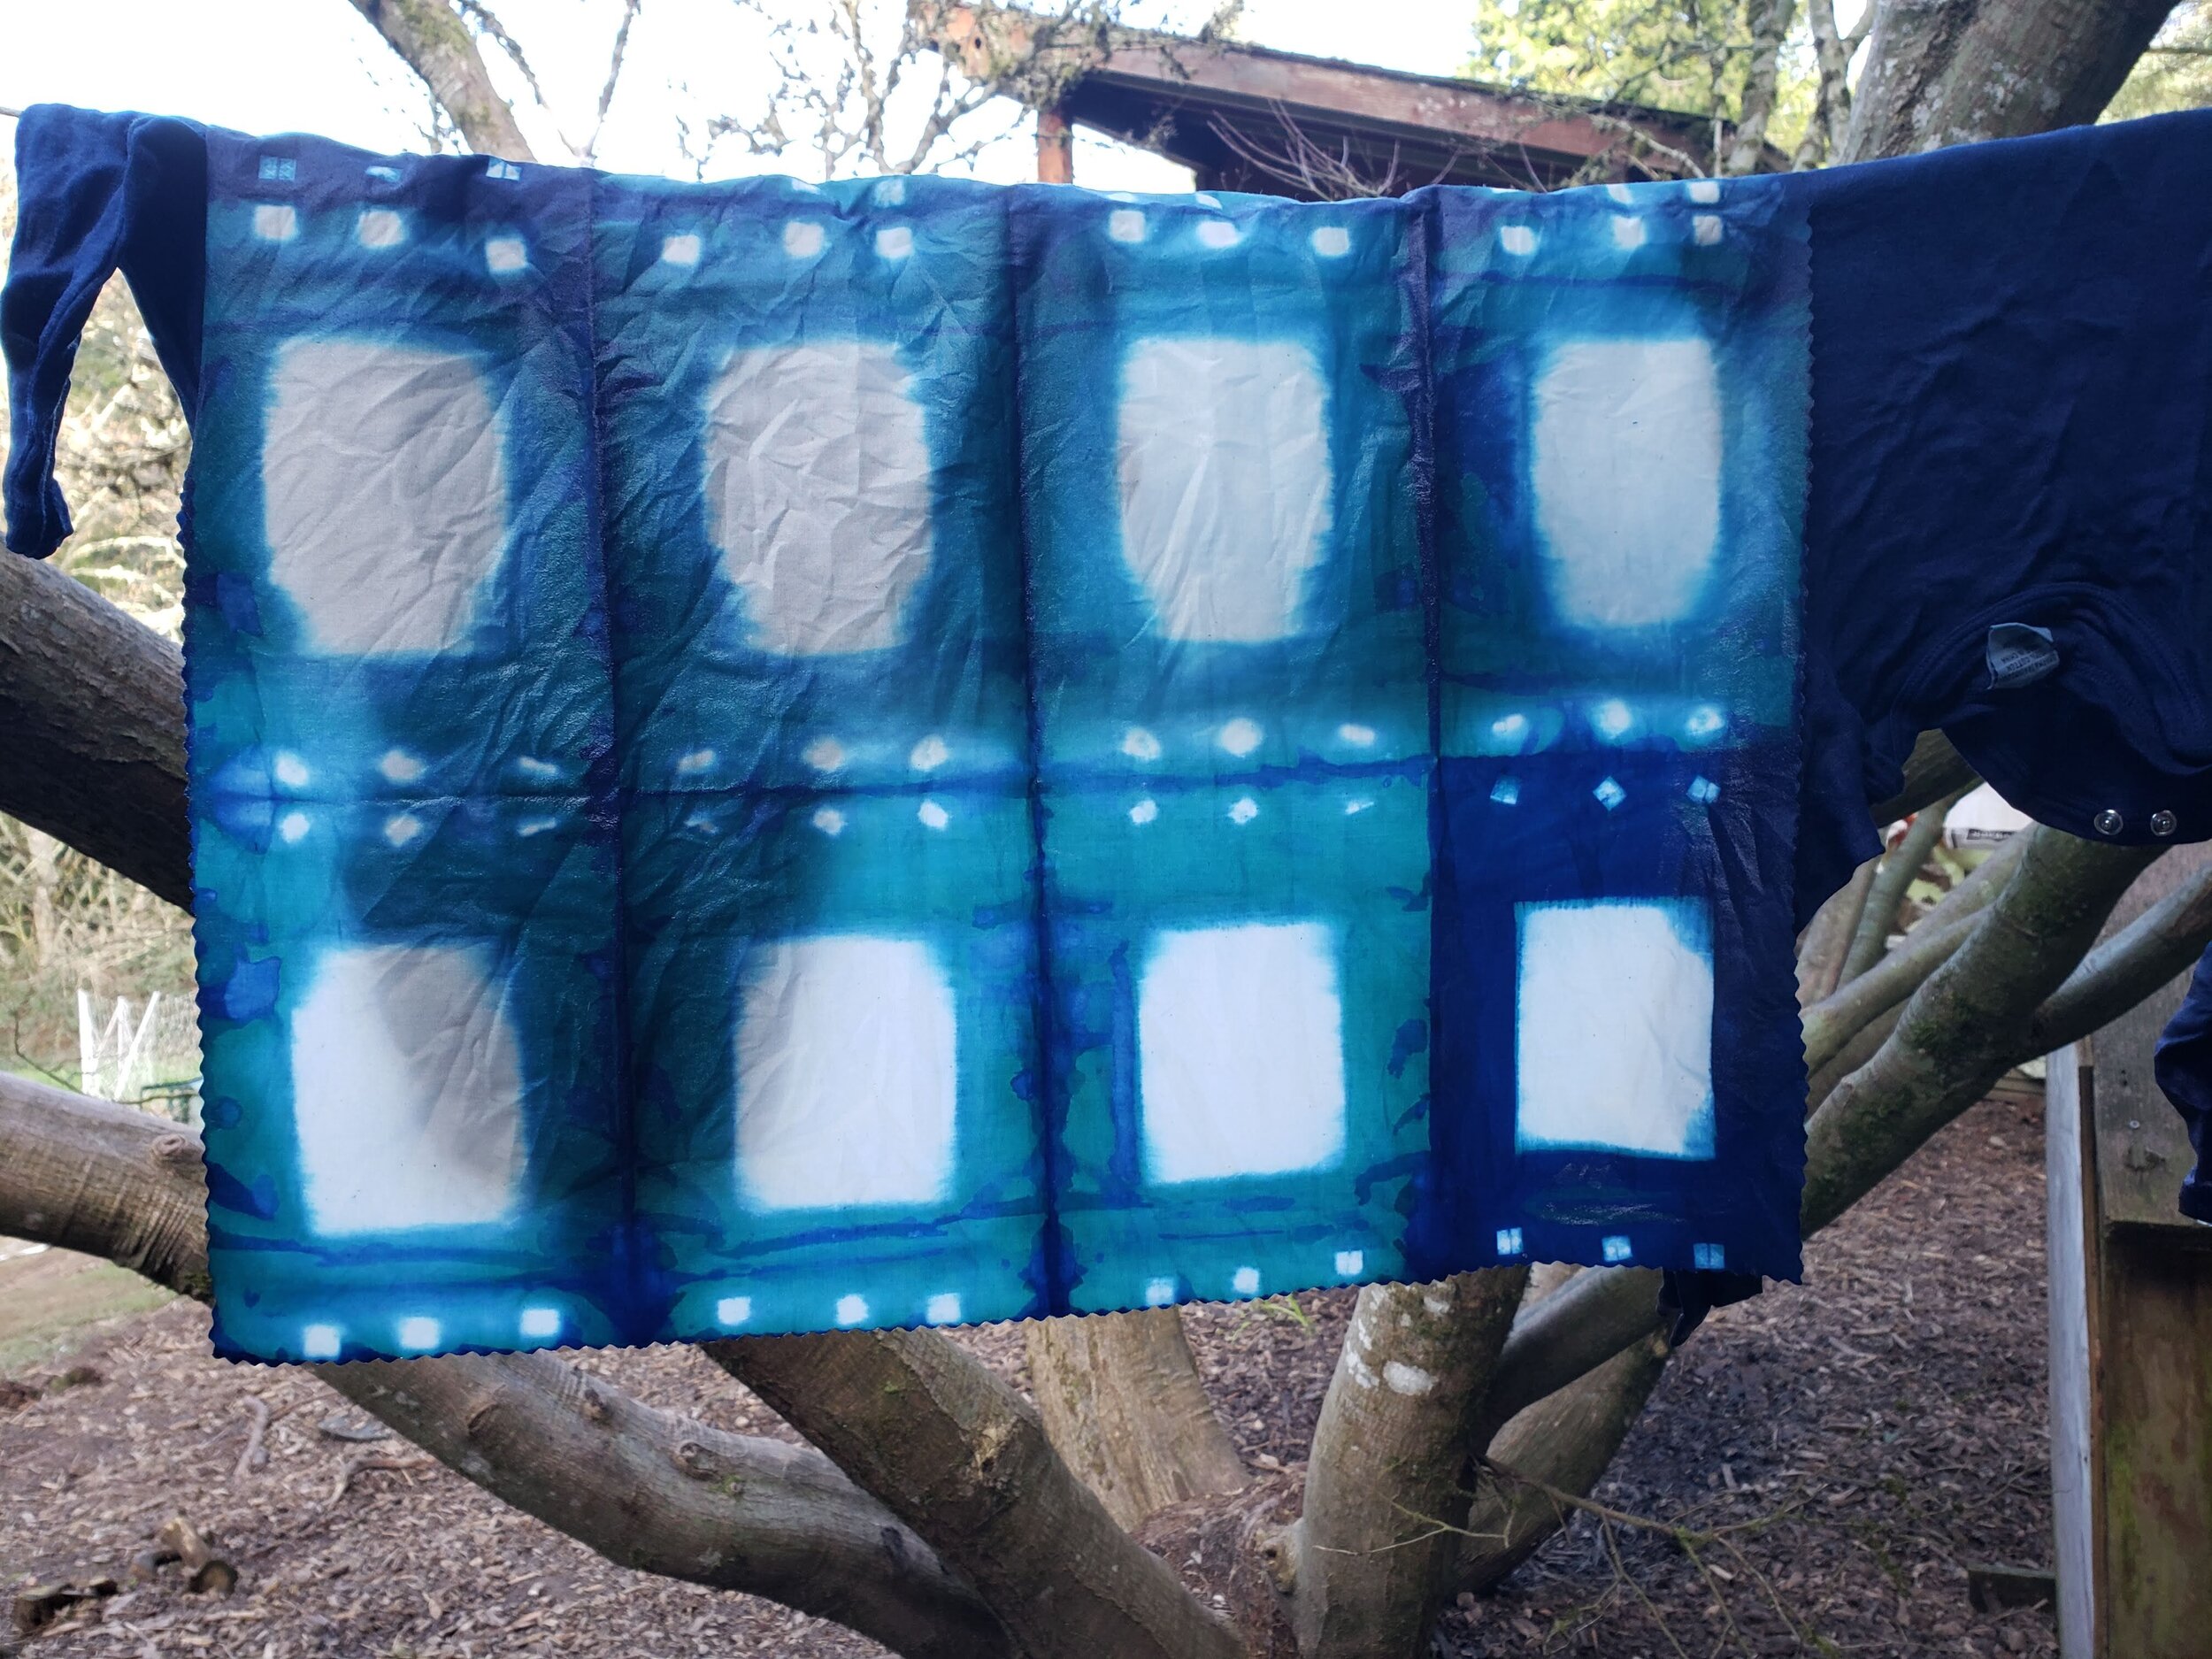
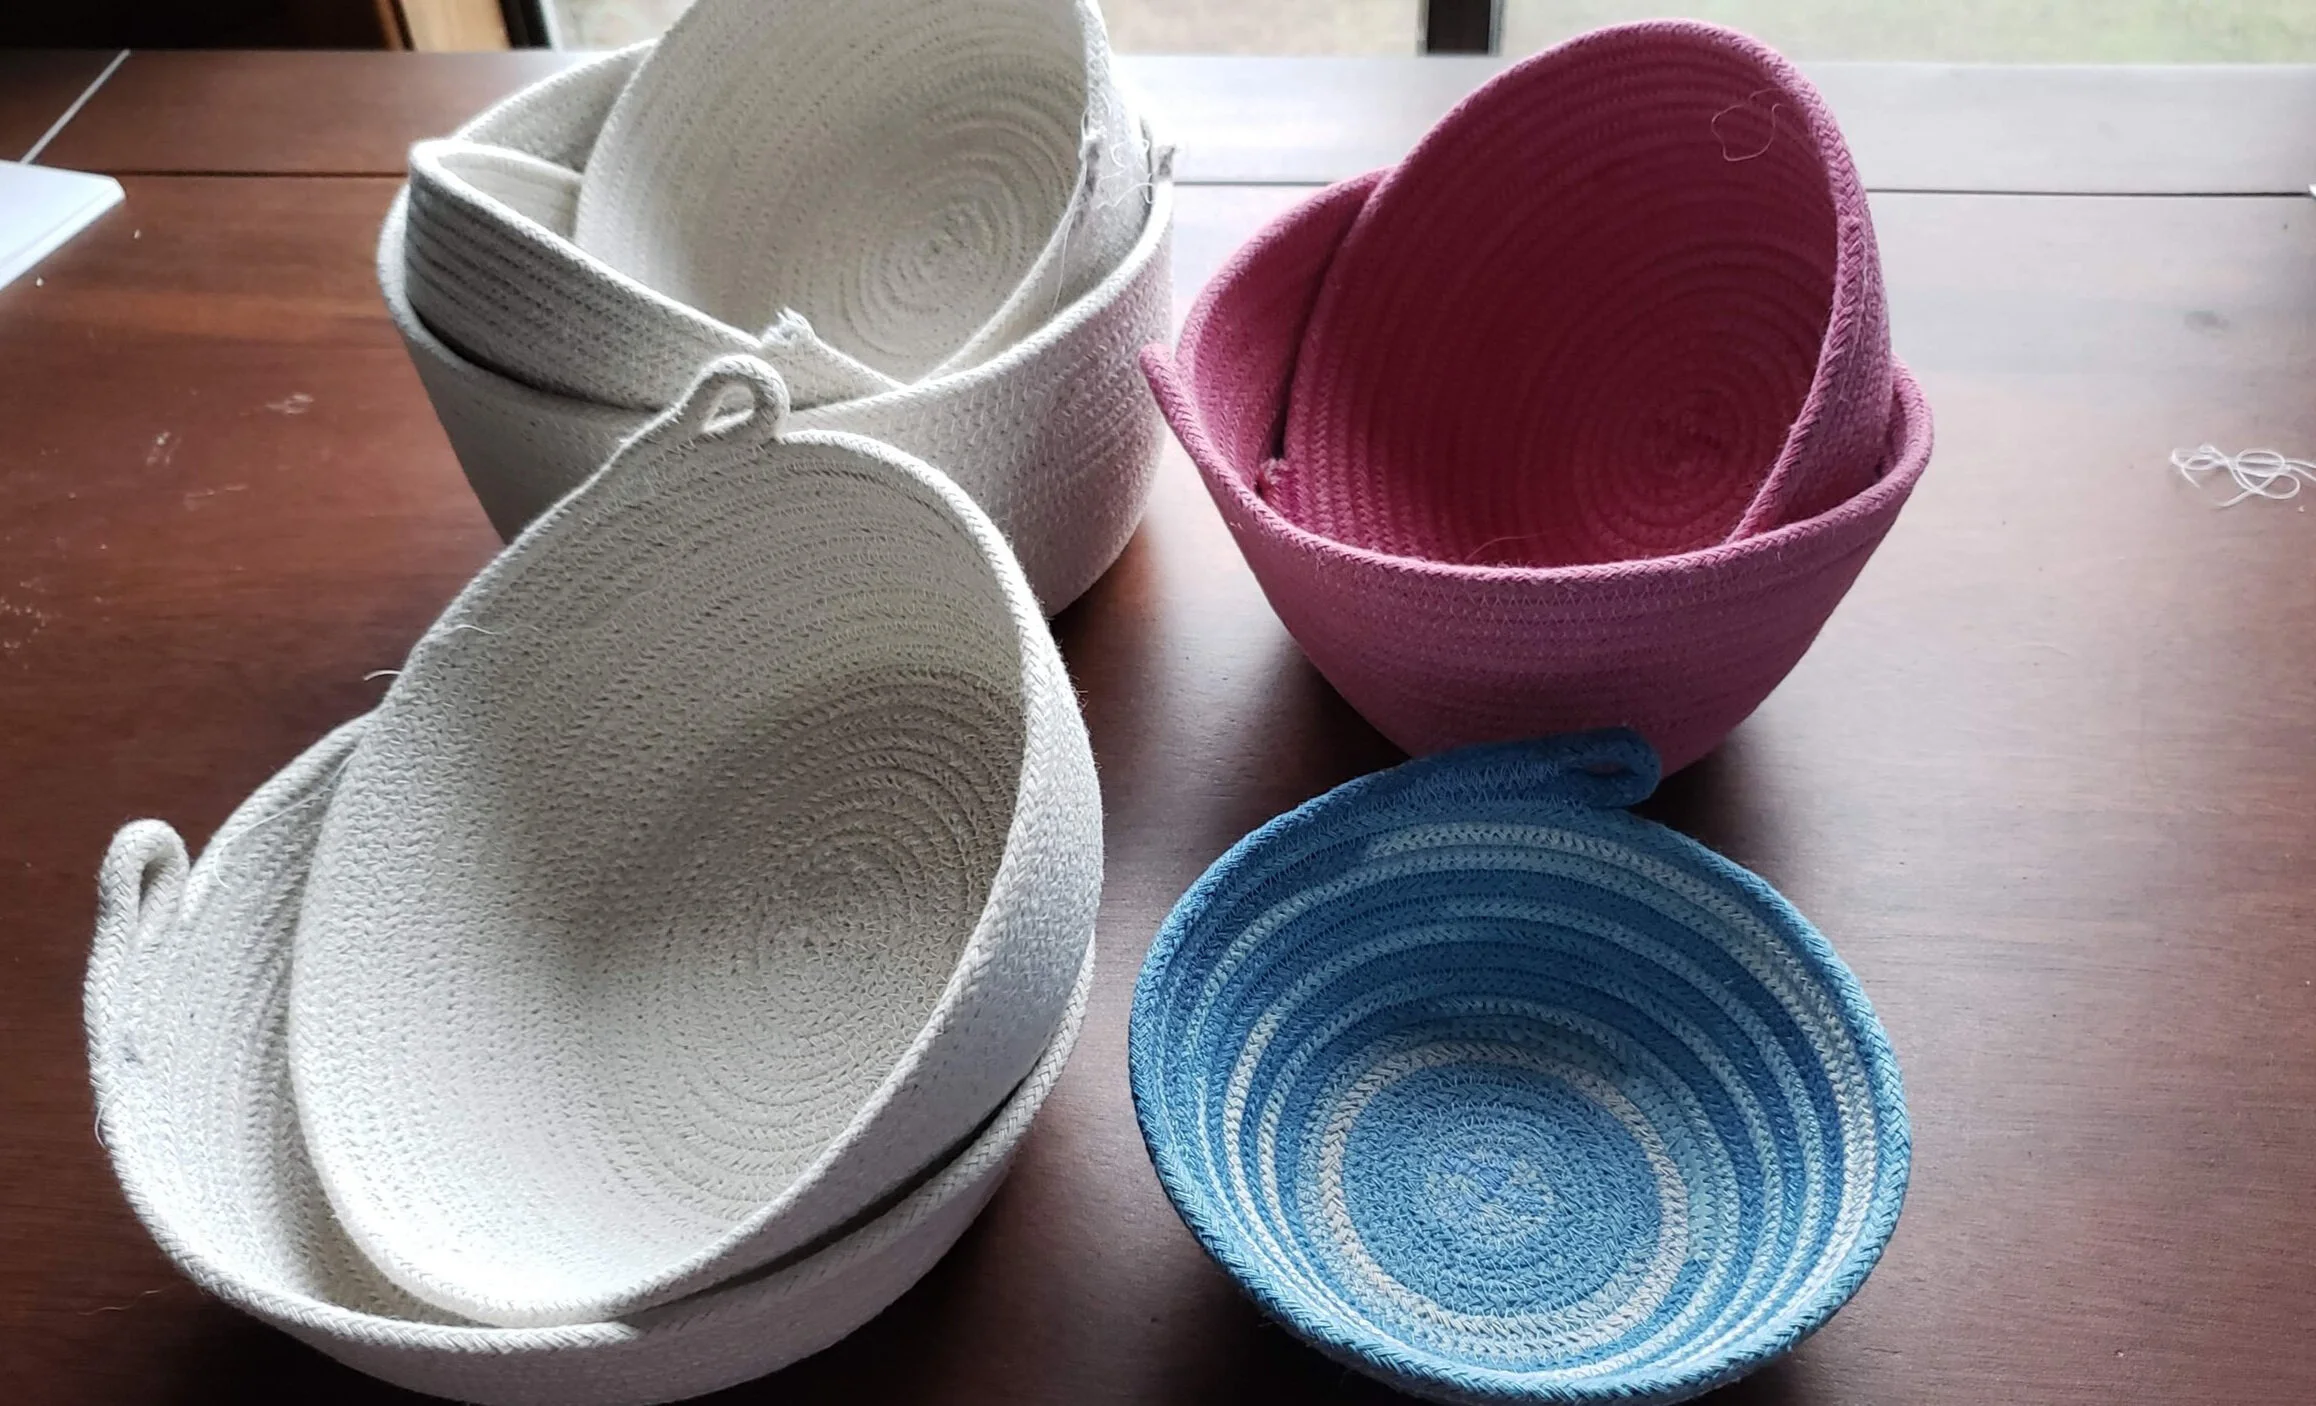
The cold weather let to lots of creative time indoors. Naturally dyed cotton rope became a new batch of baskets for the shop.

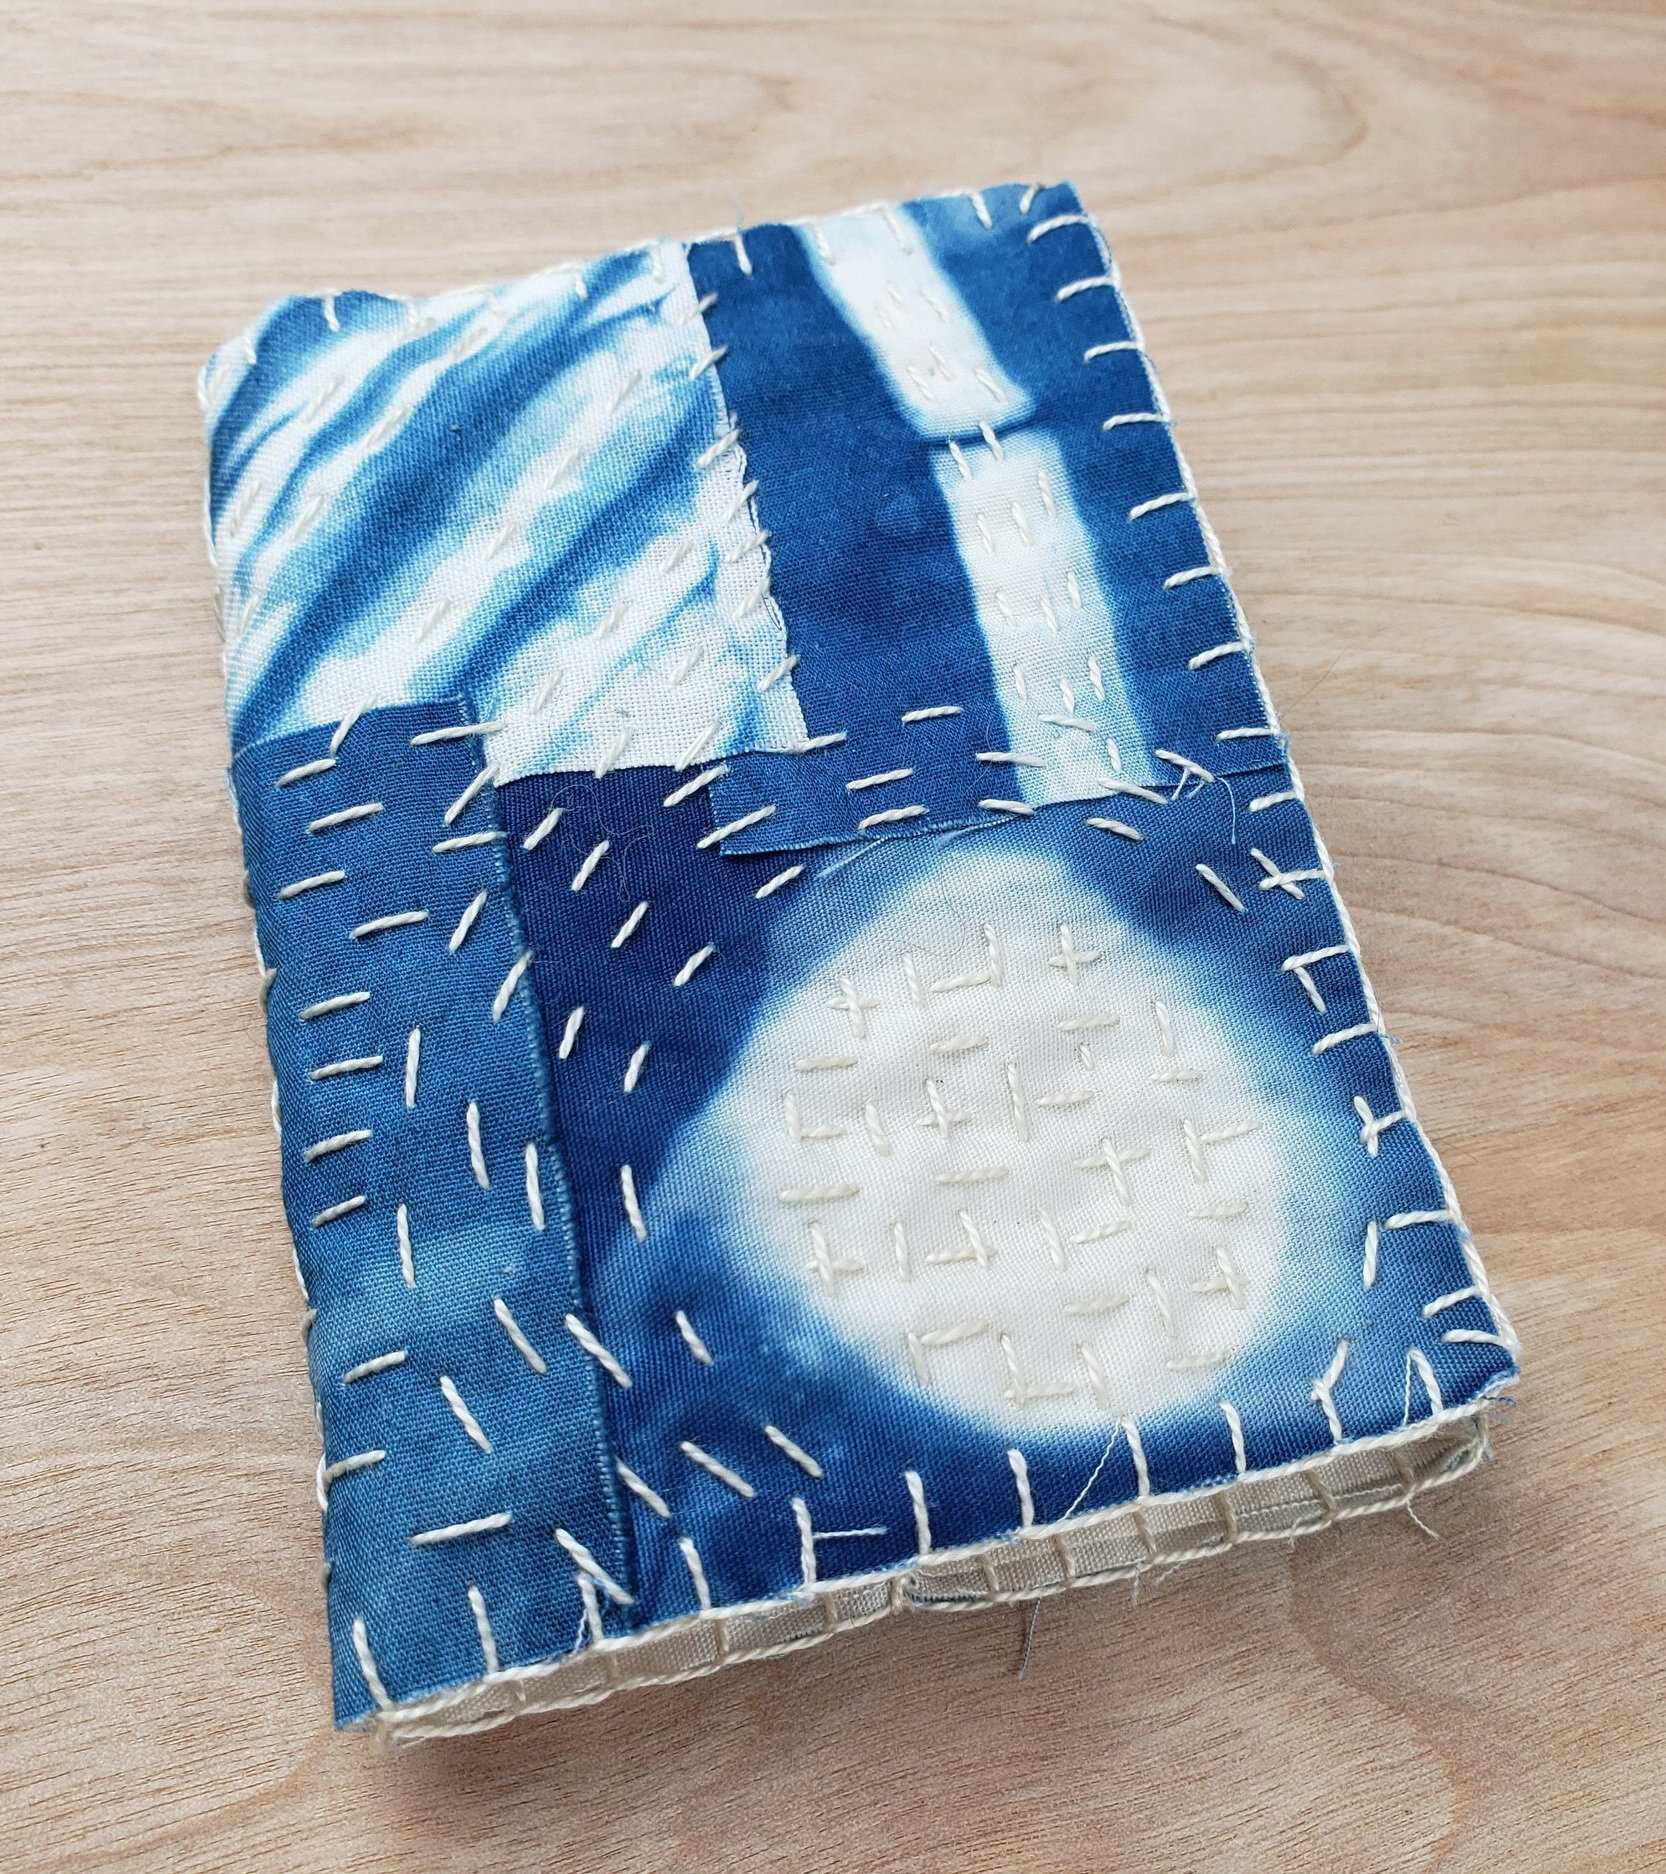
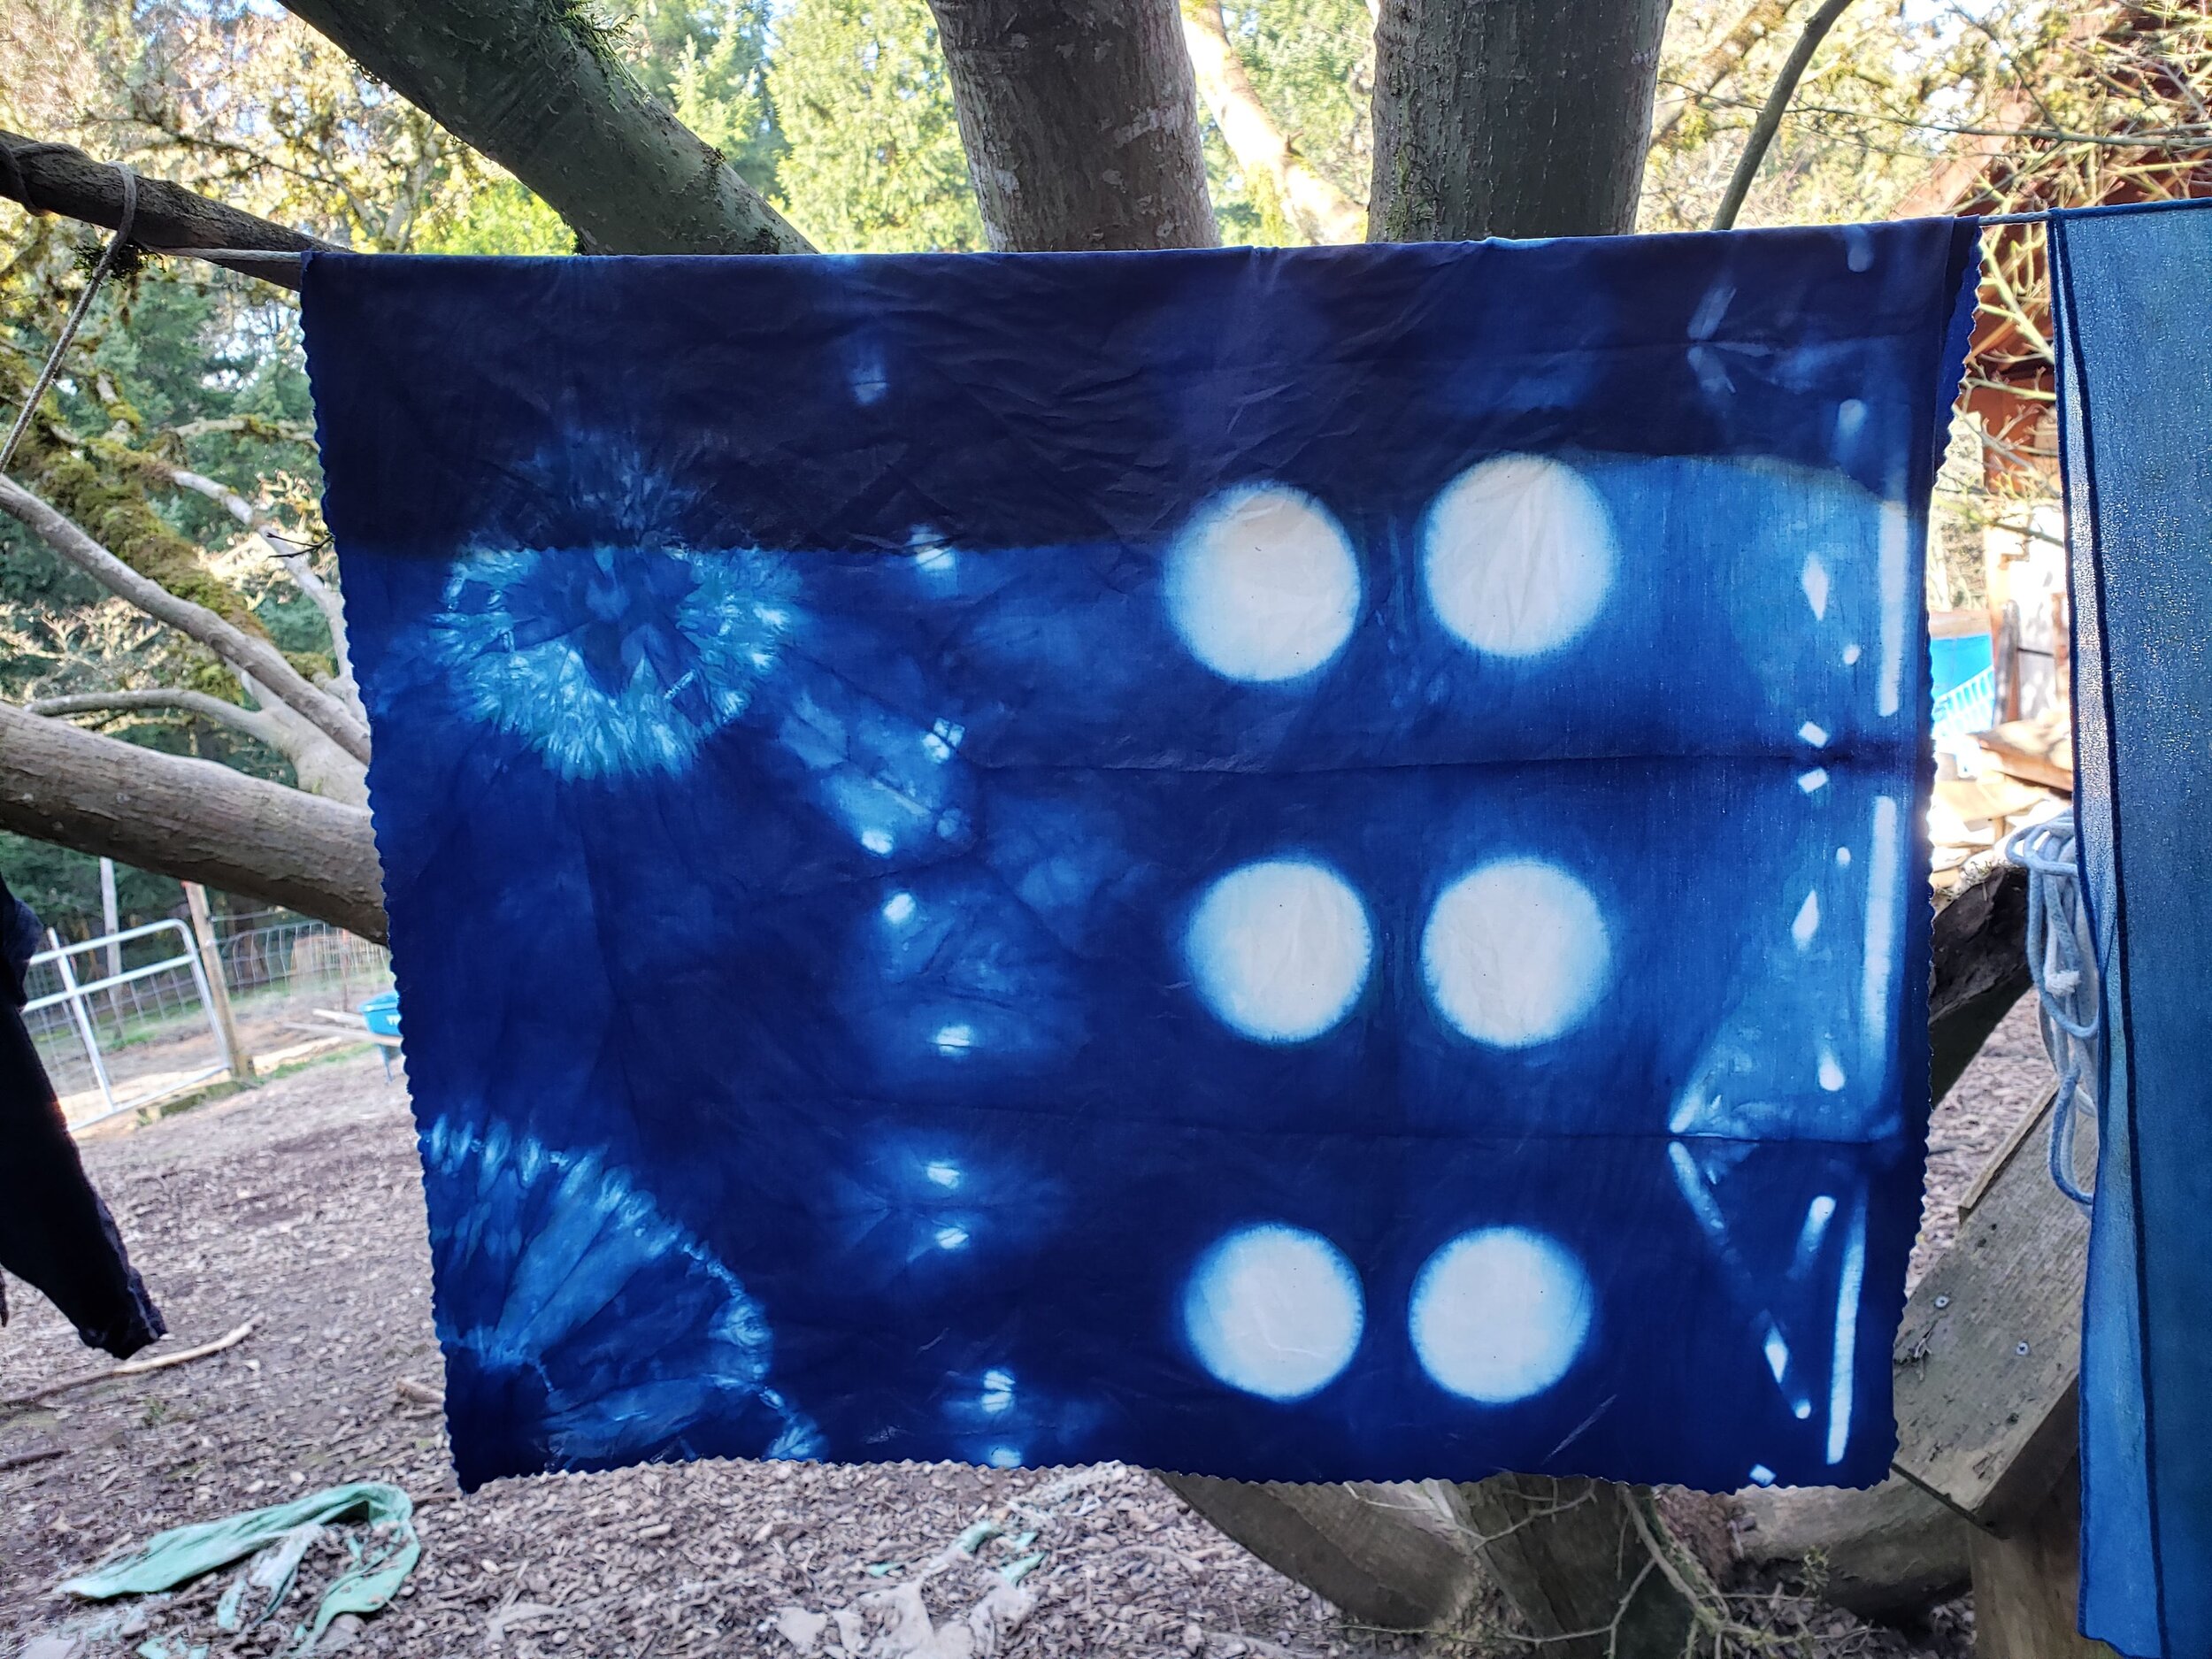
The blue and white indigo-dyed baskets really embody the wintry feel of the weather.

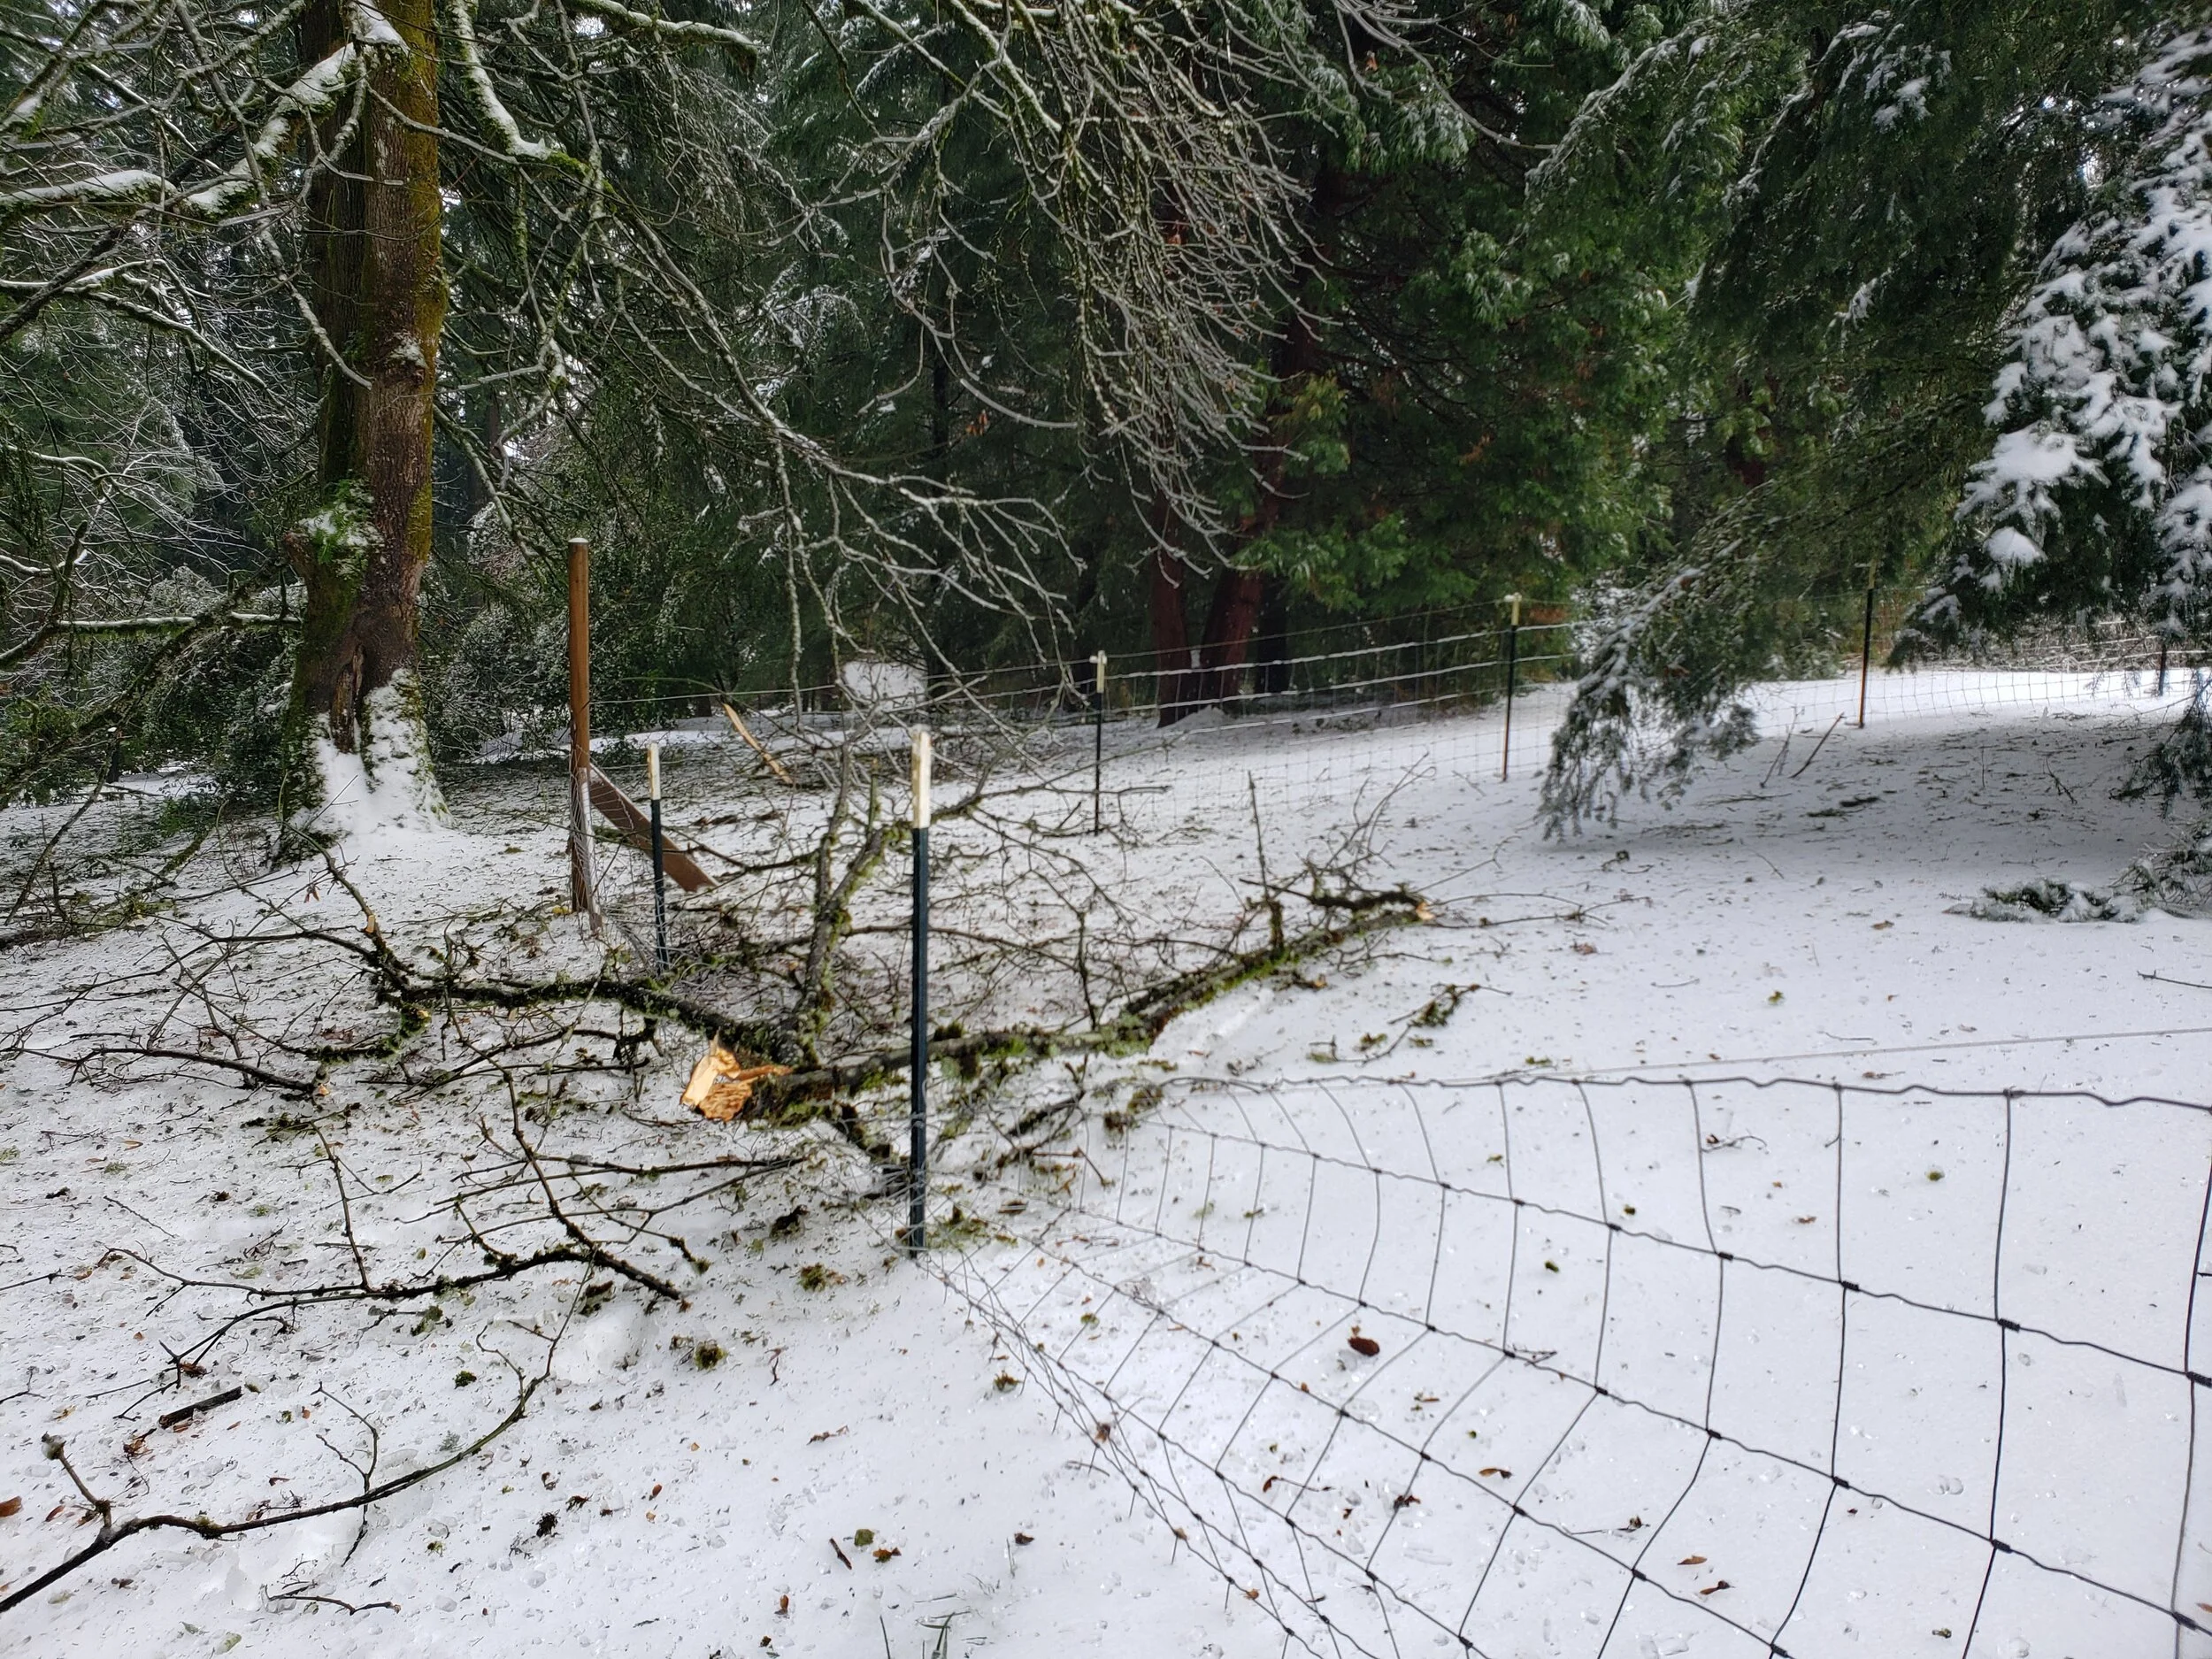
The storm did not leave Cedar Dell completely unharmed. The weight of the ice caused many trees and branches to fall. It was disconcerting to fall asleep at night to the regular sound of things crashing to the ground in the forest. Our sheep’s fence was damaged by large Douglas fir branches and our lovely old hawthorne tree lost most of its branches as well as large part of the trunk that split off from the rest. Time will tell if it survives.

20210215_094334.jpg
20210216_141506.jpg

For a brief time our water pipes froze so water couldn’t be pumped out of the well. I imagined us having to toil like the Ingalls family from Little House on the Prairie, carrying buckets of water uphill in the snow. We were able to defrost our pipes and return the plumbing to working order but we did pull out the Little House Cookbook and make molasses candy in the snow! It was delicious and you can read about how we made it in more detail on this Facebook post.

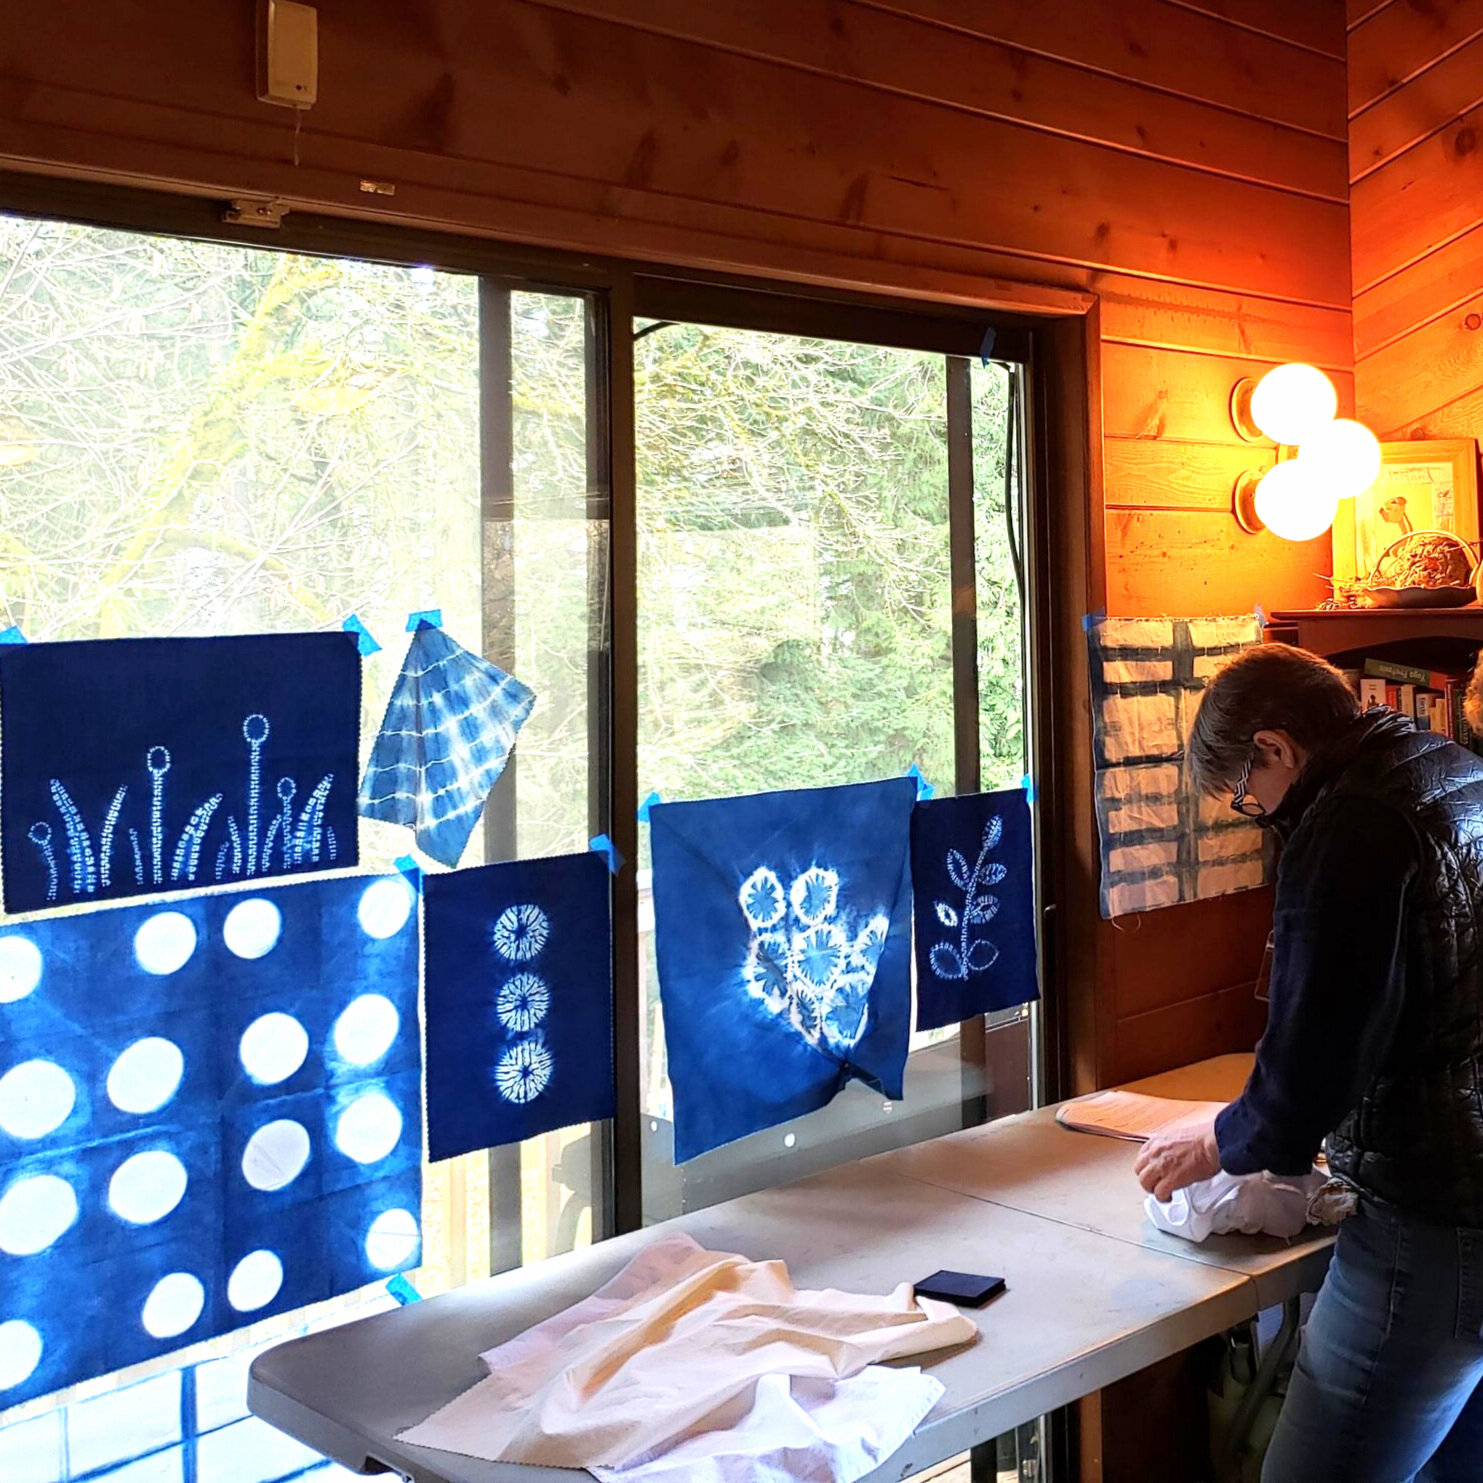
Another exciting event of February was that we started offering in-person workshops here again! We’re offering single-family and private classes as we ease back into larger groups farther down the road. We’ve had a great response to these new offerings and we can’t wait for our first visitors to arrive. It’s been such a long year of cancelled programs and it feels so great to to start welcoming people back!

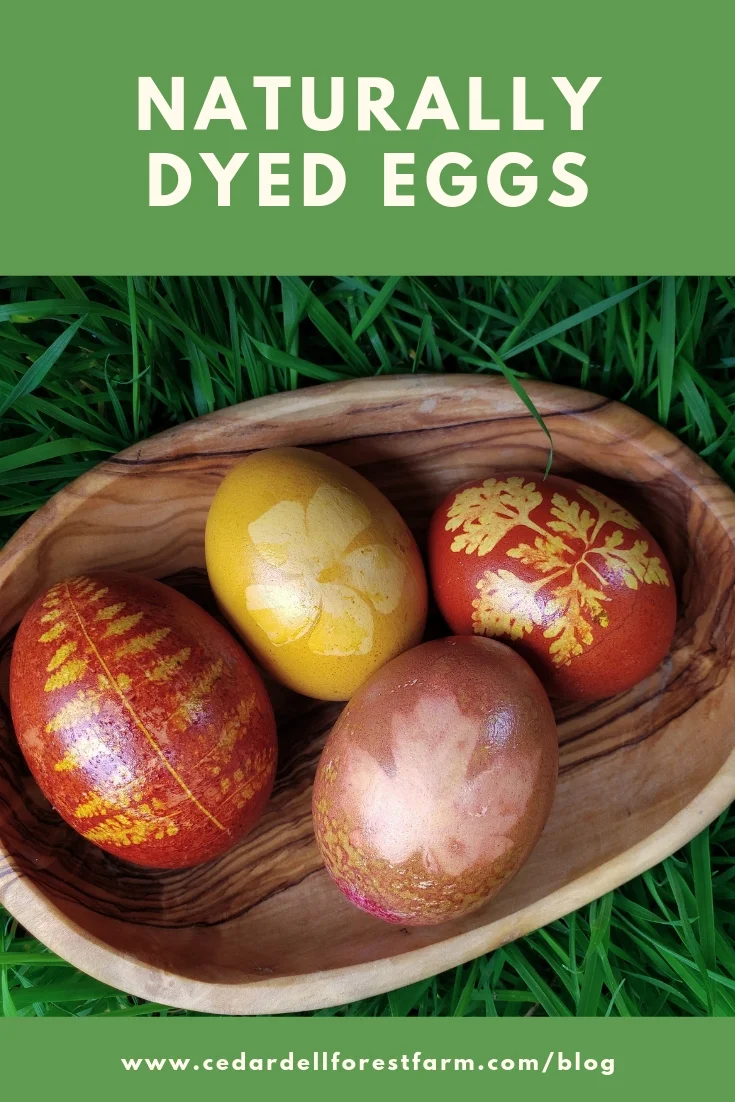
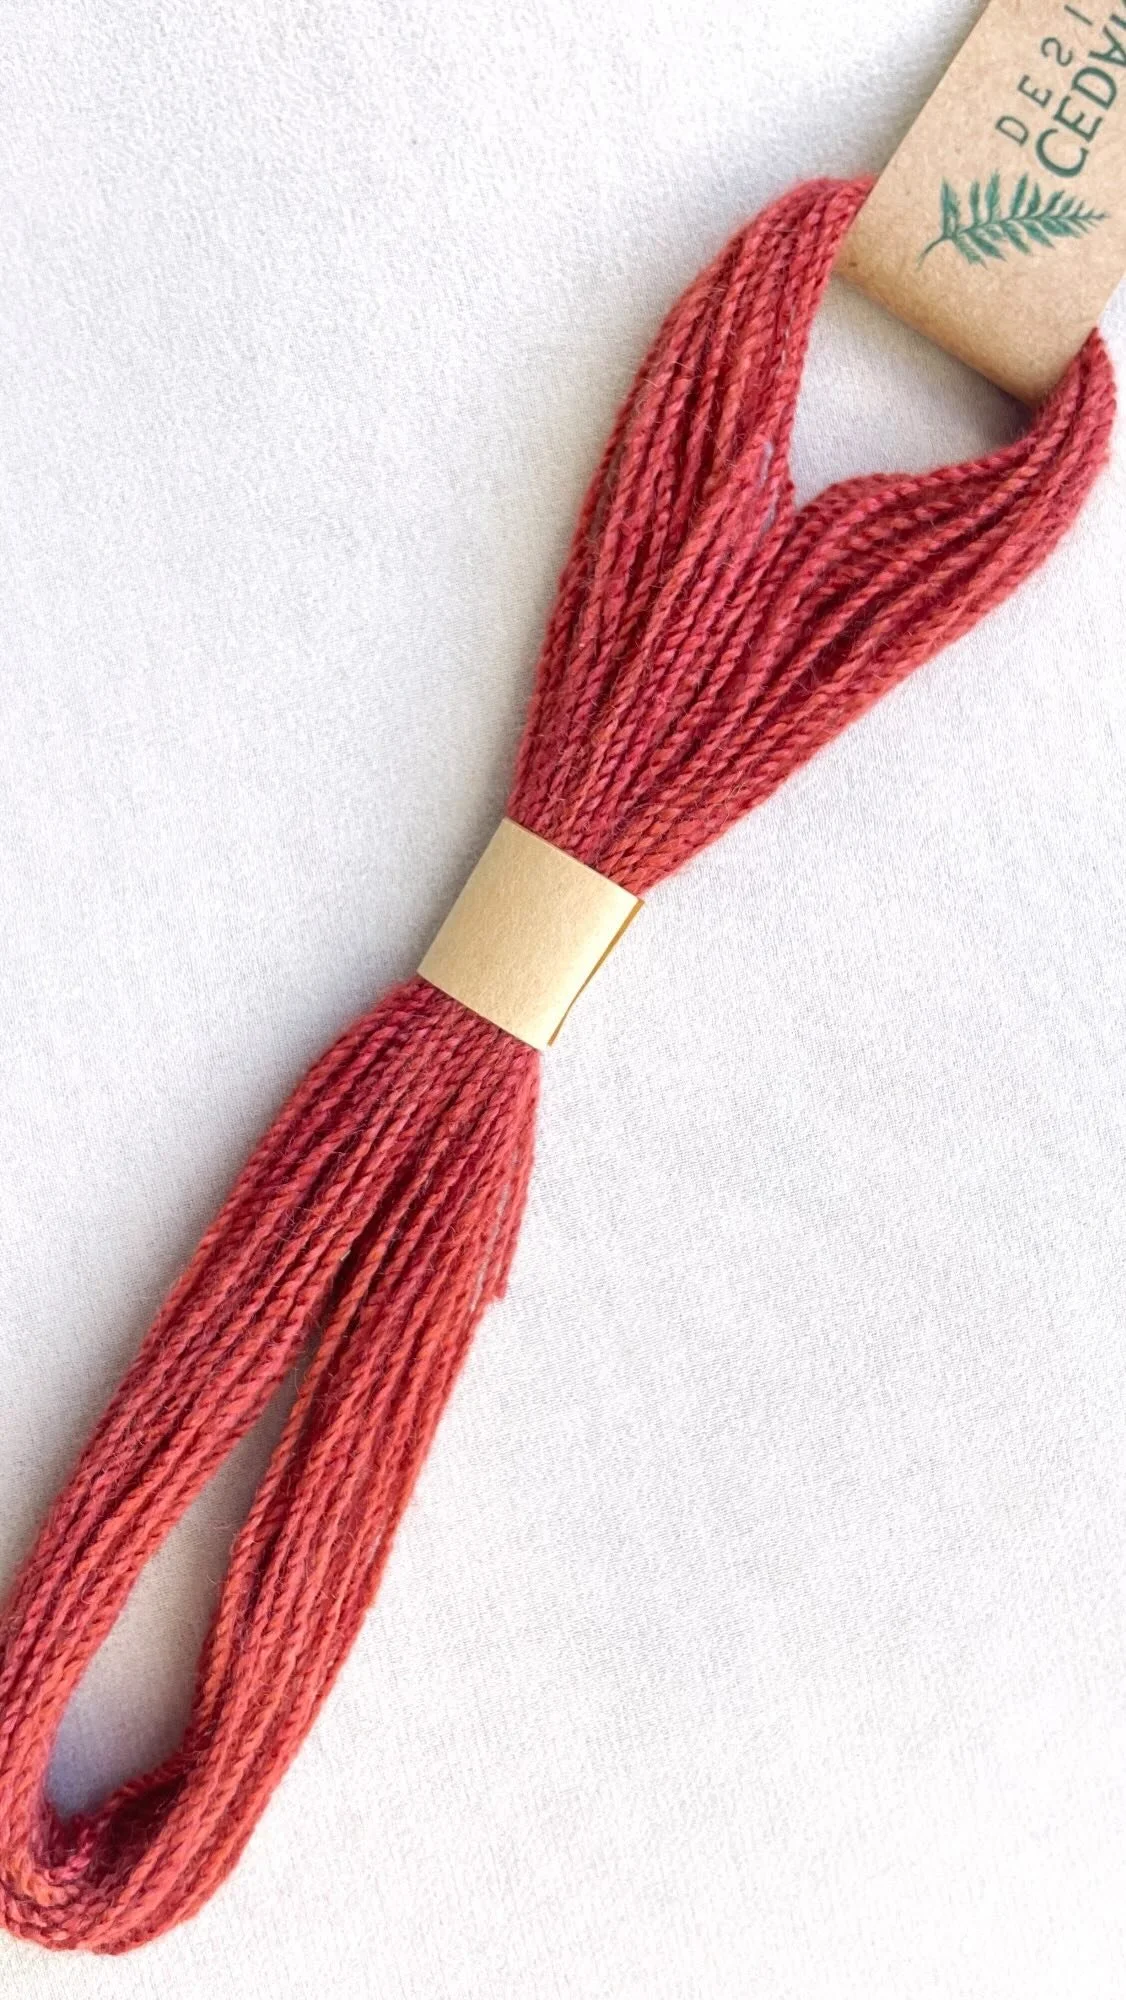
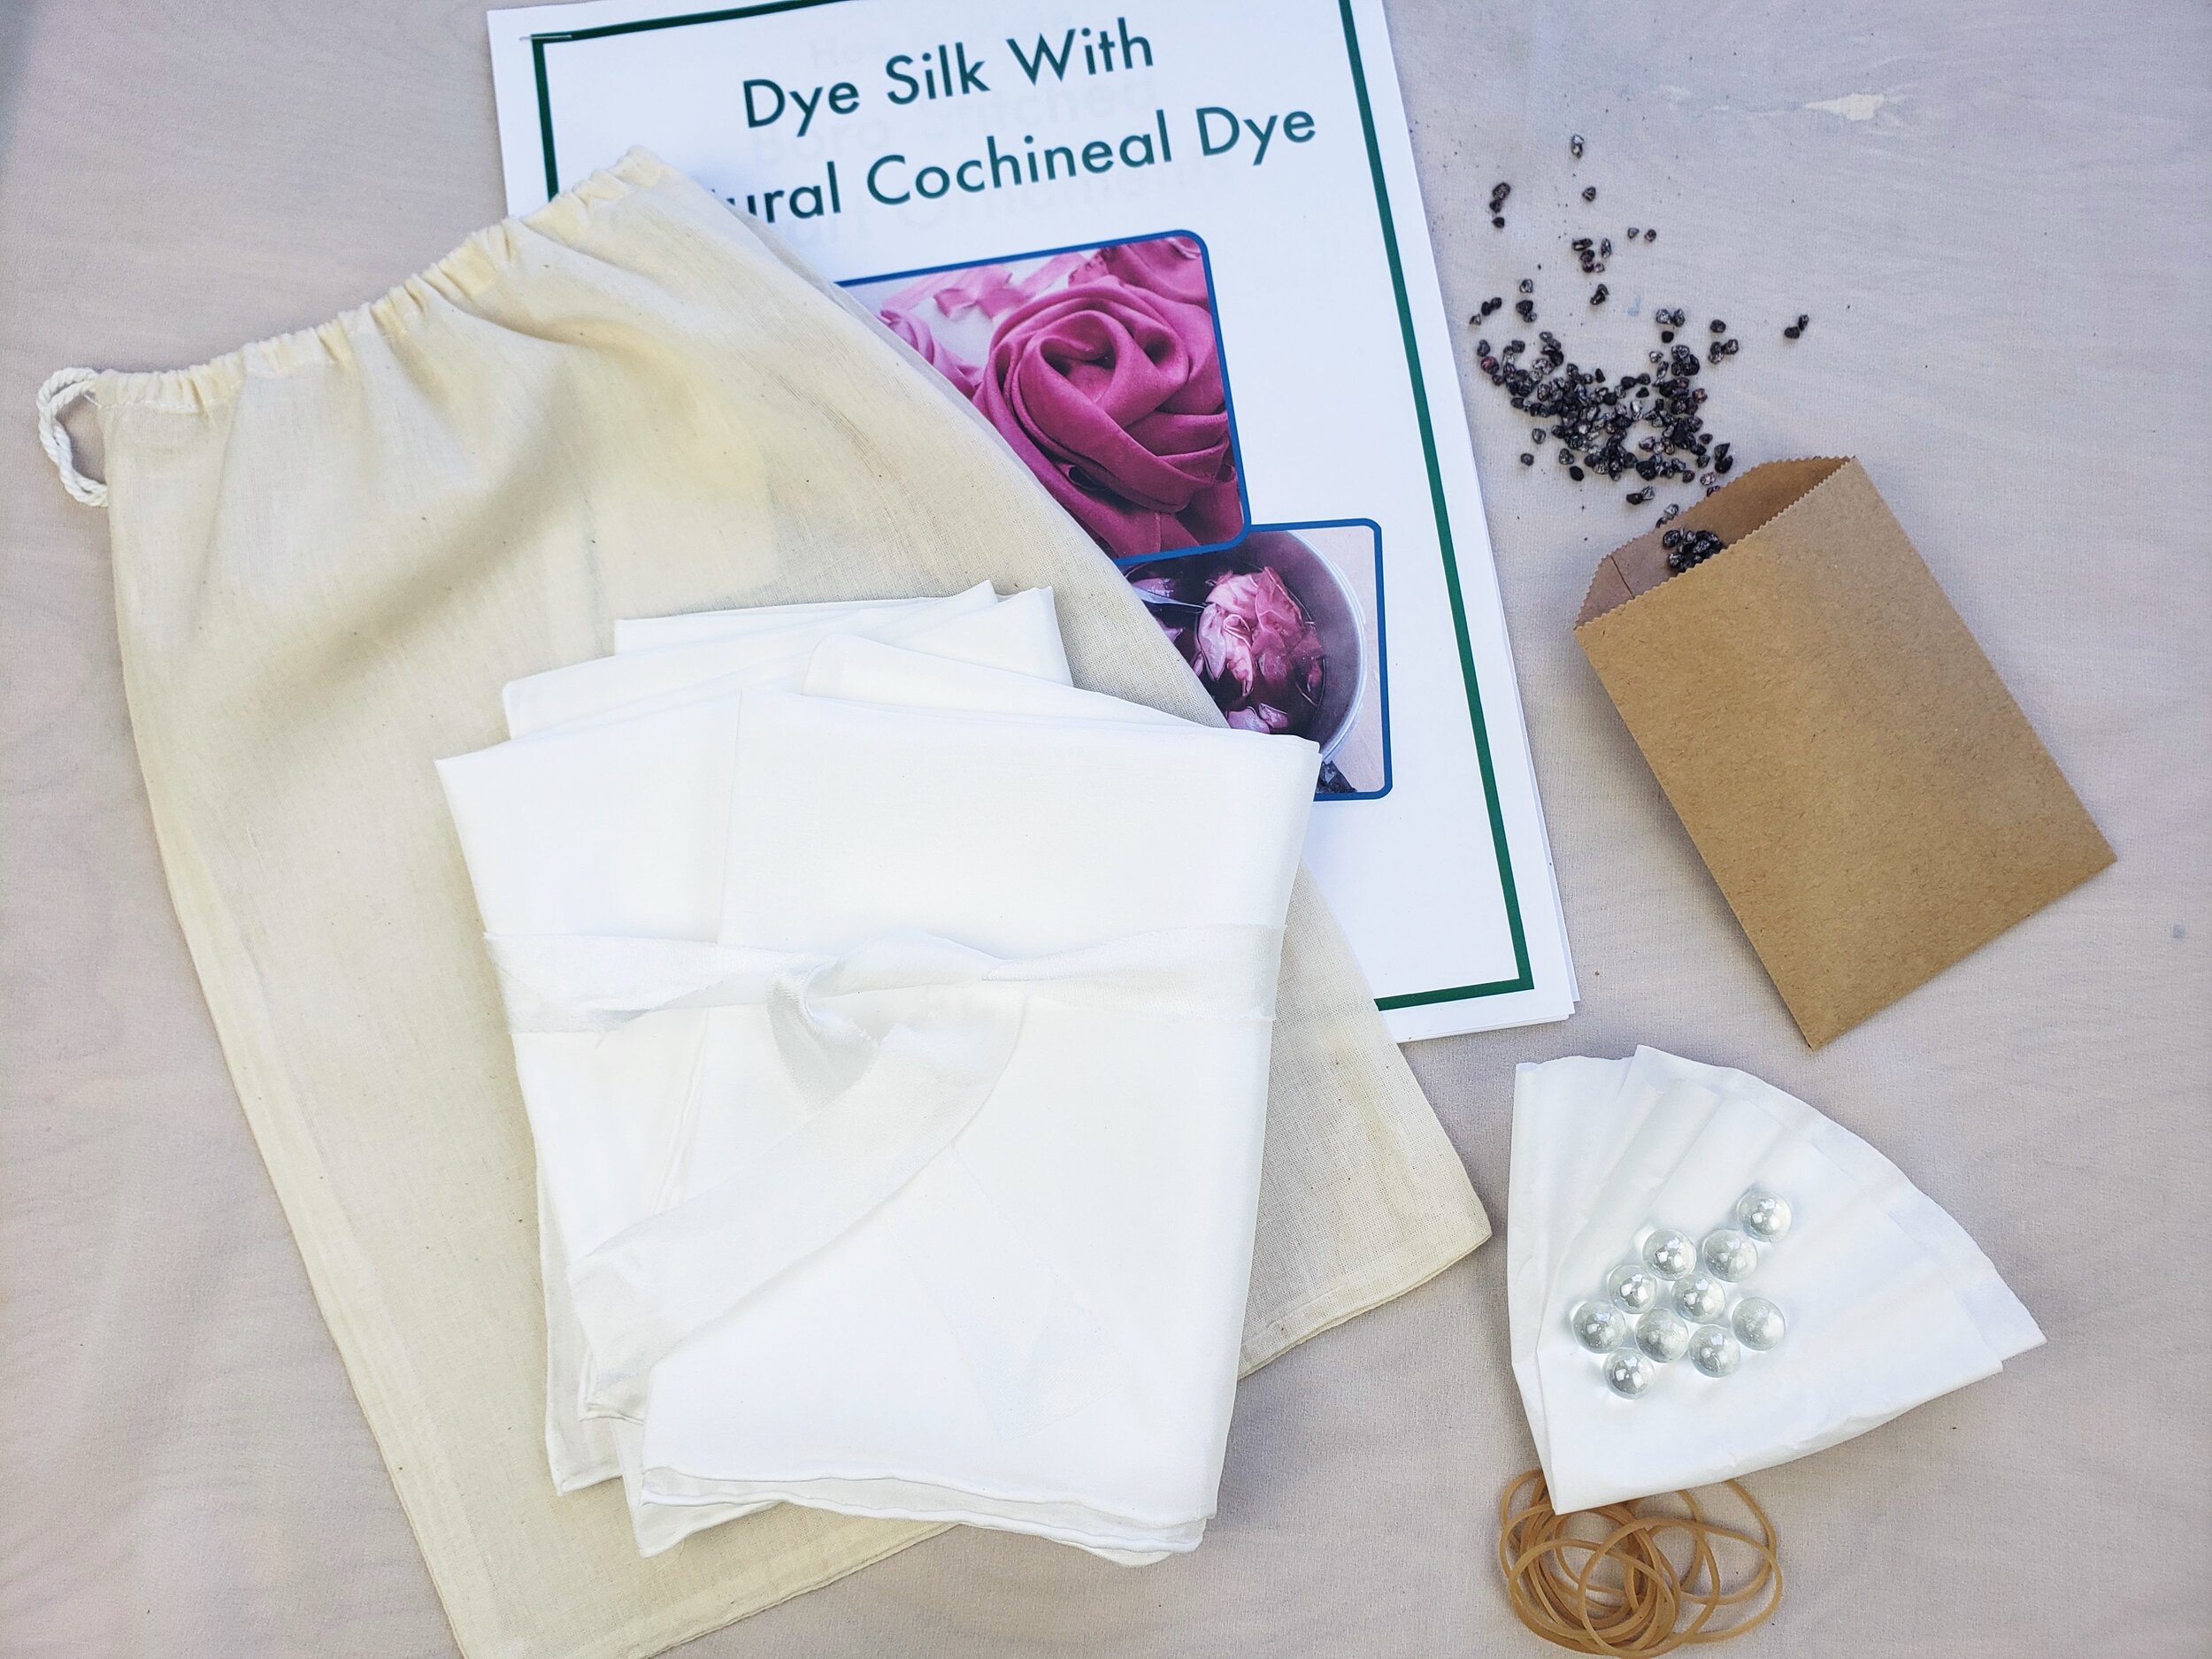
For folks who can’t come here for a natural dye program, February also saw the launch of my first natural dye kit so you can create these beautiful pink colors right at home! It’s a great way to learn about natural dyeing without having to source all the materials and information separately. It went though a lot of testing and fine-tuning and I’m confident you’ll have amazing results.

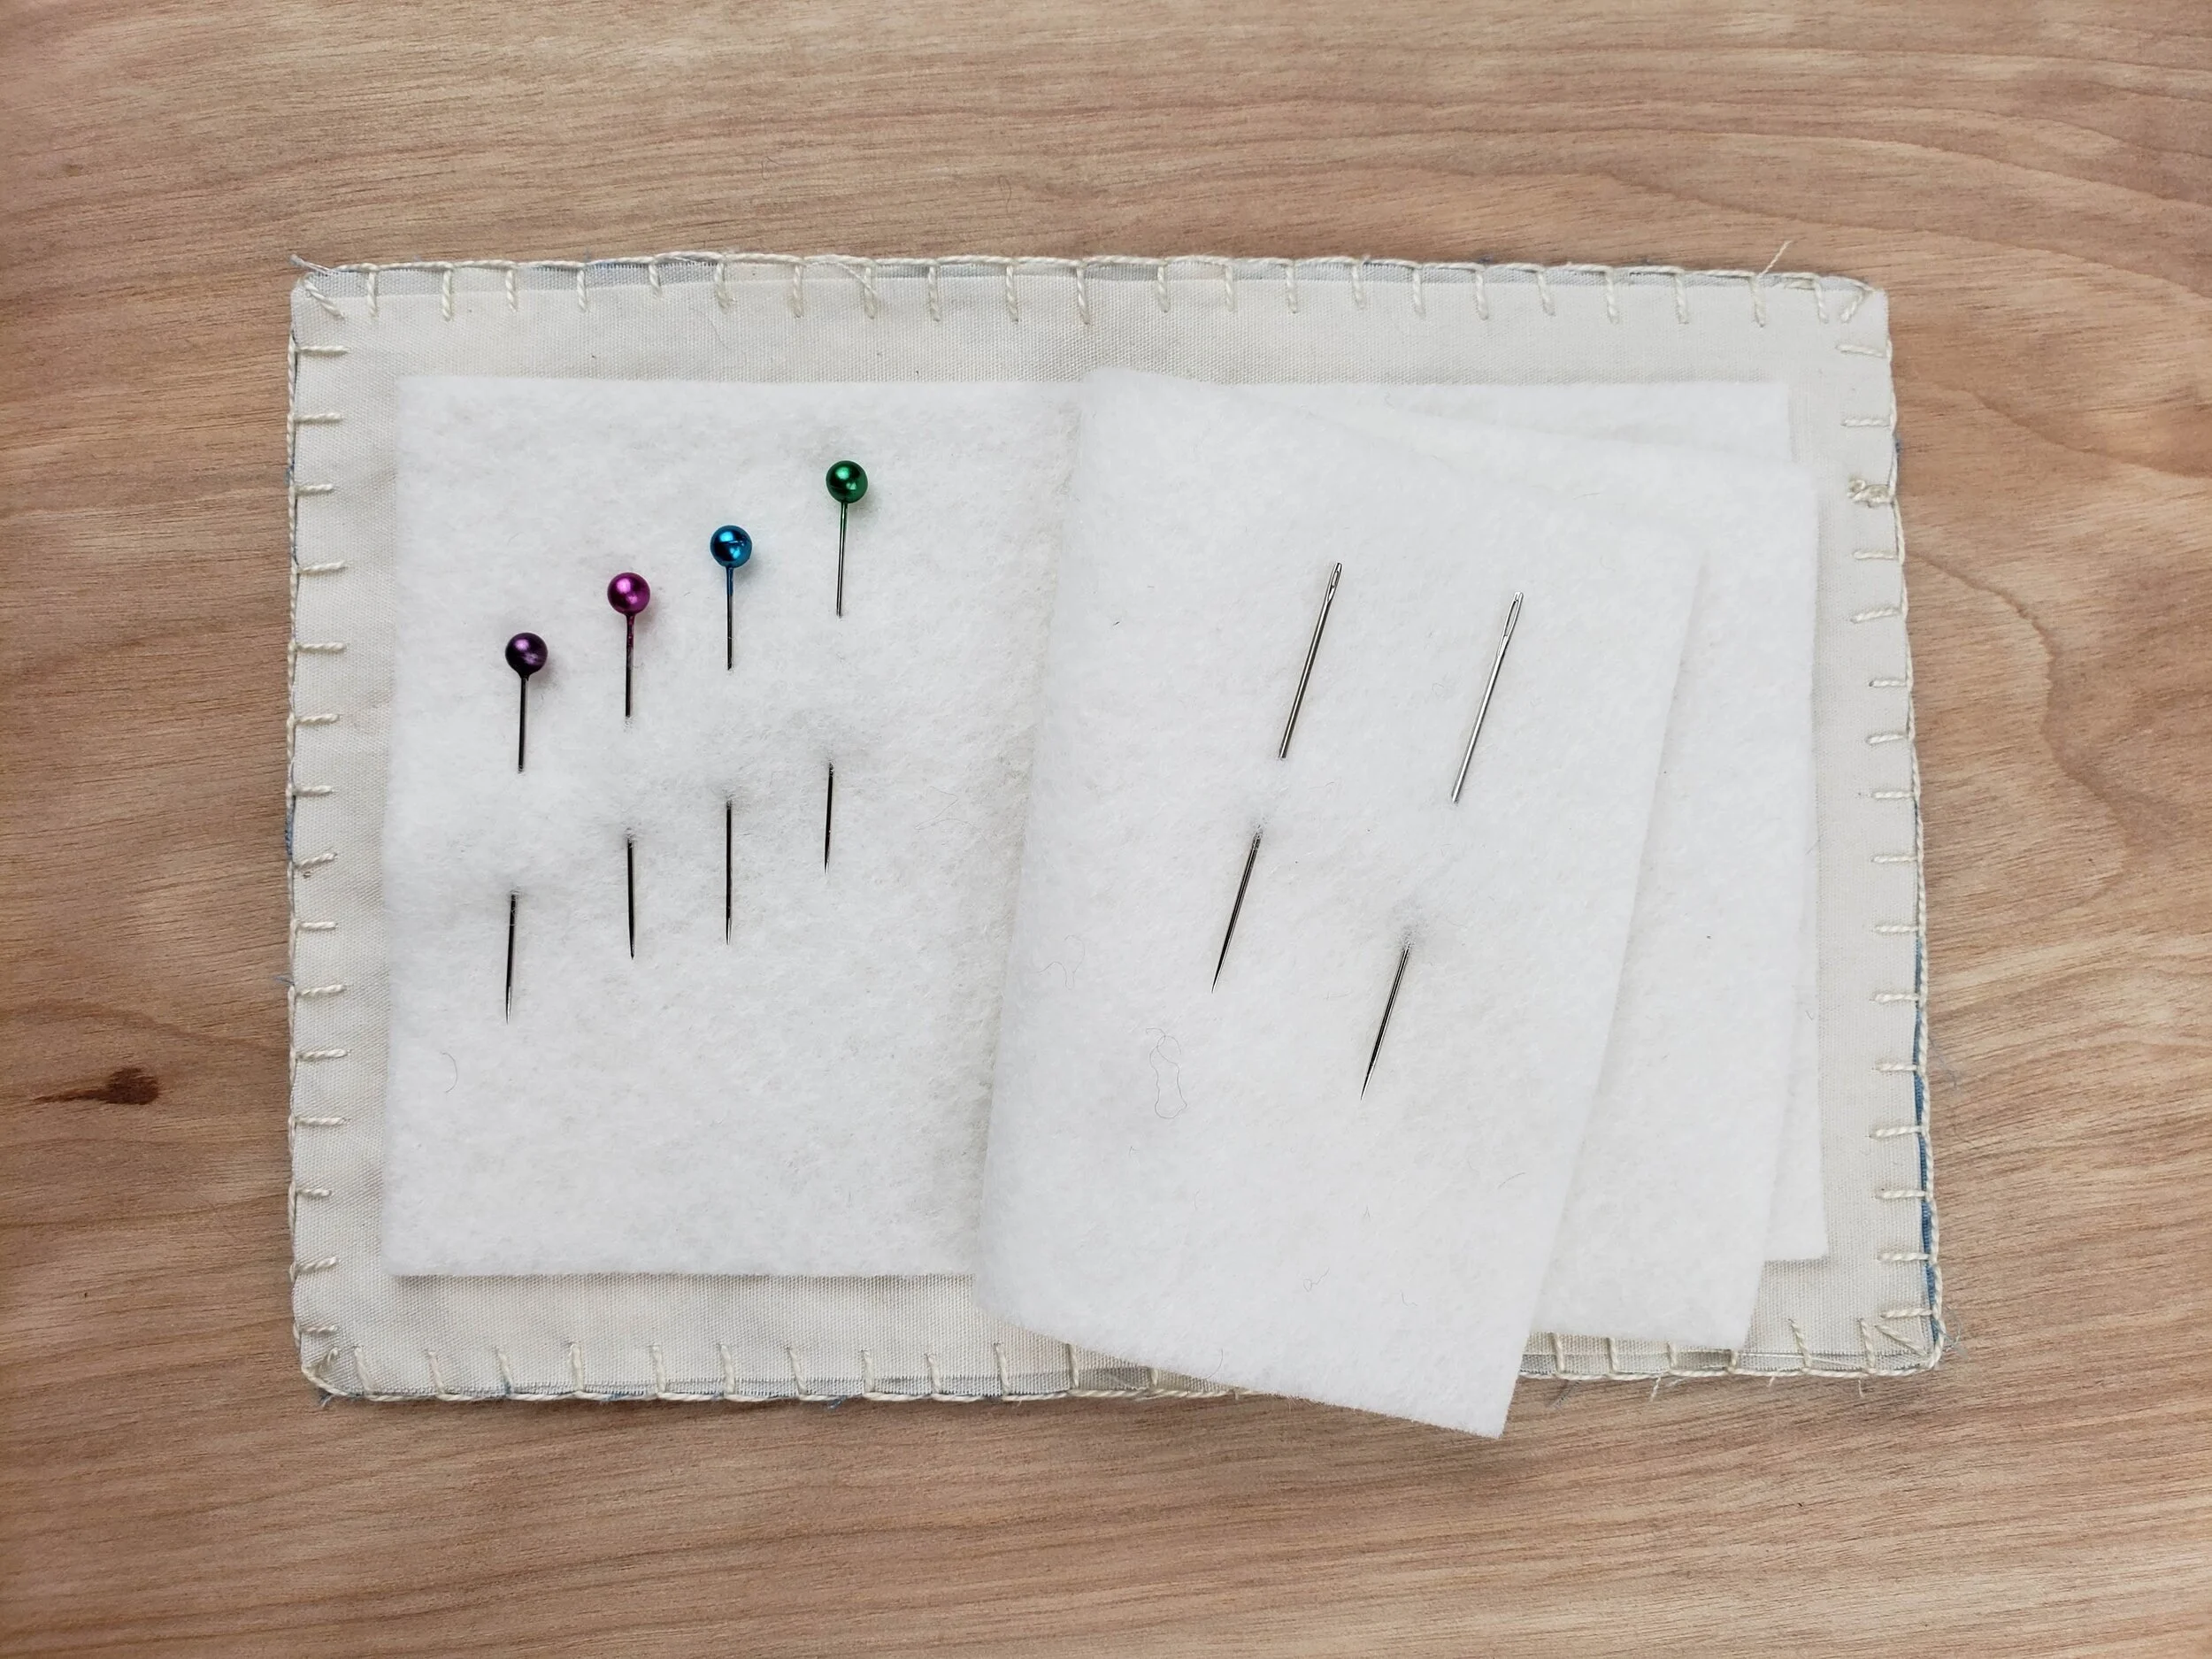
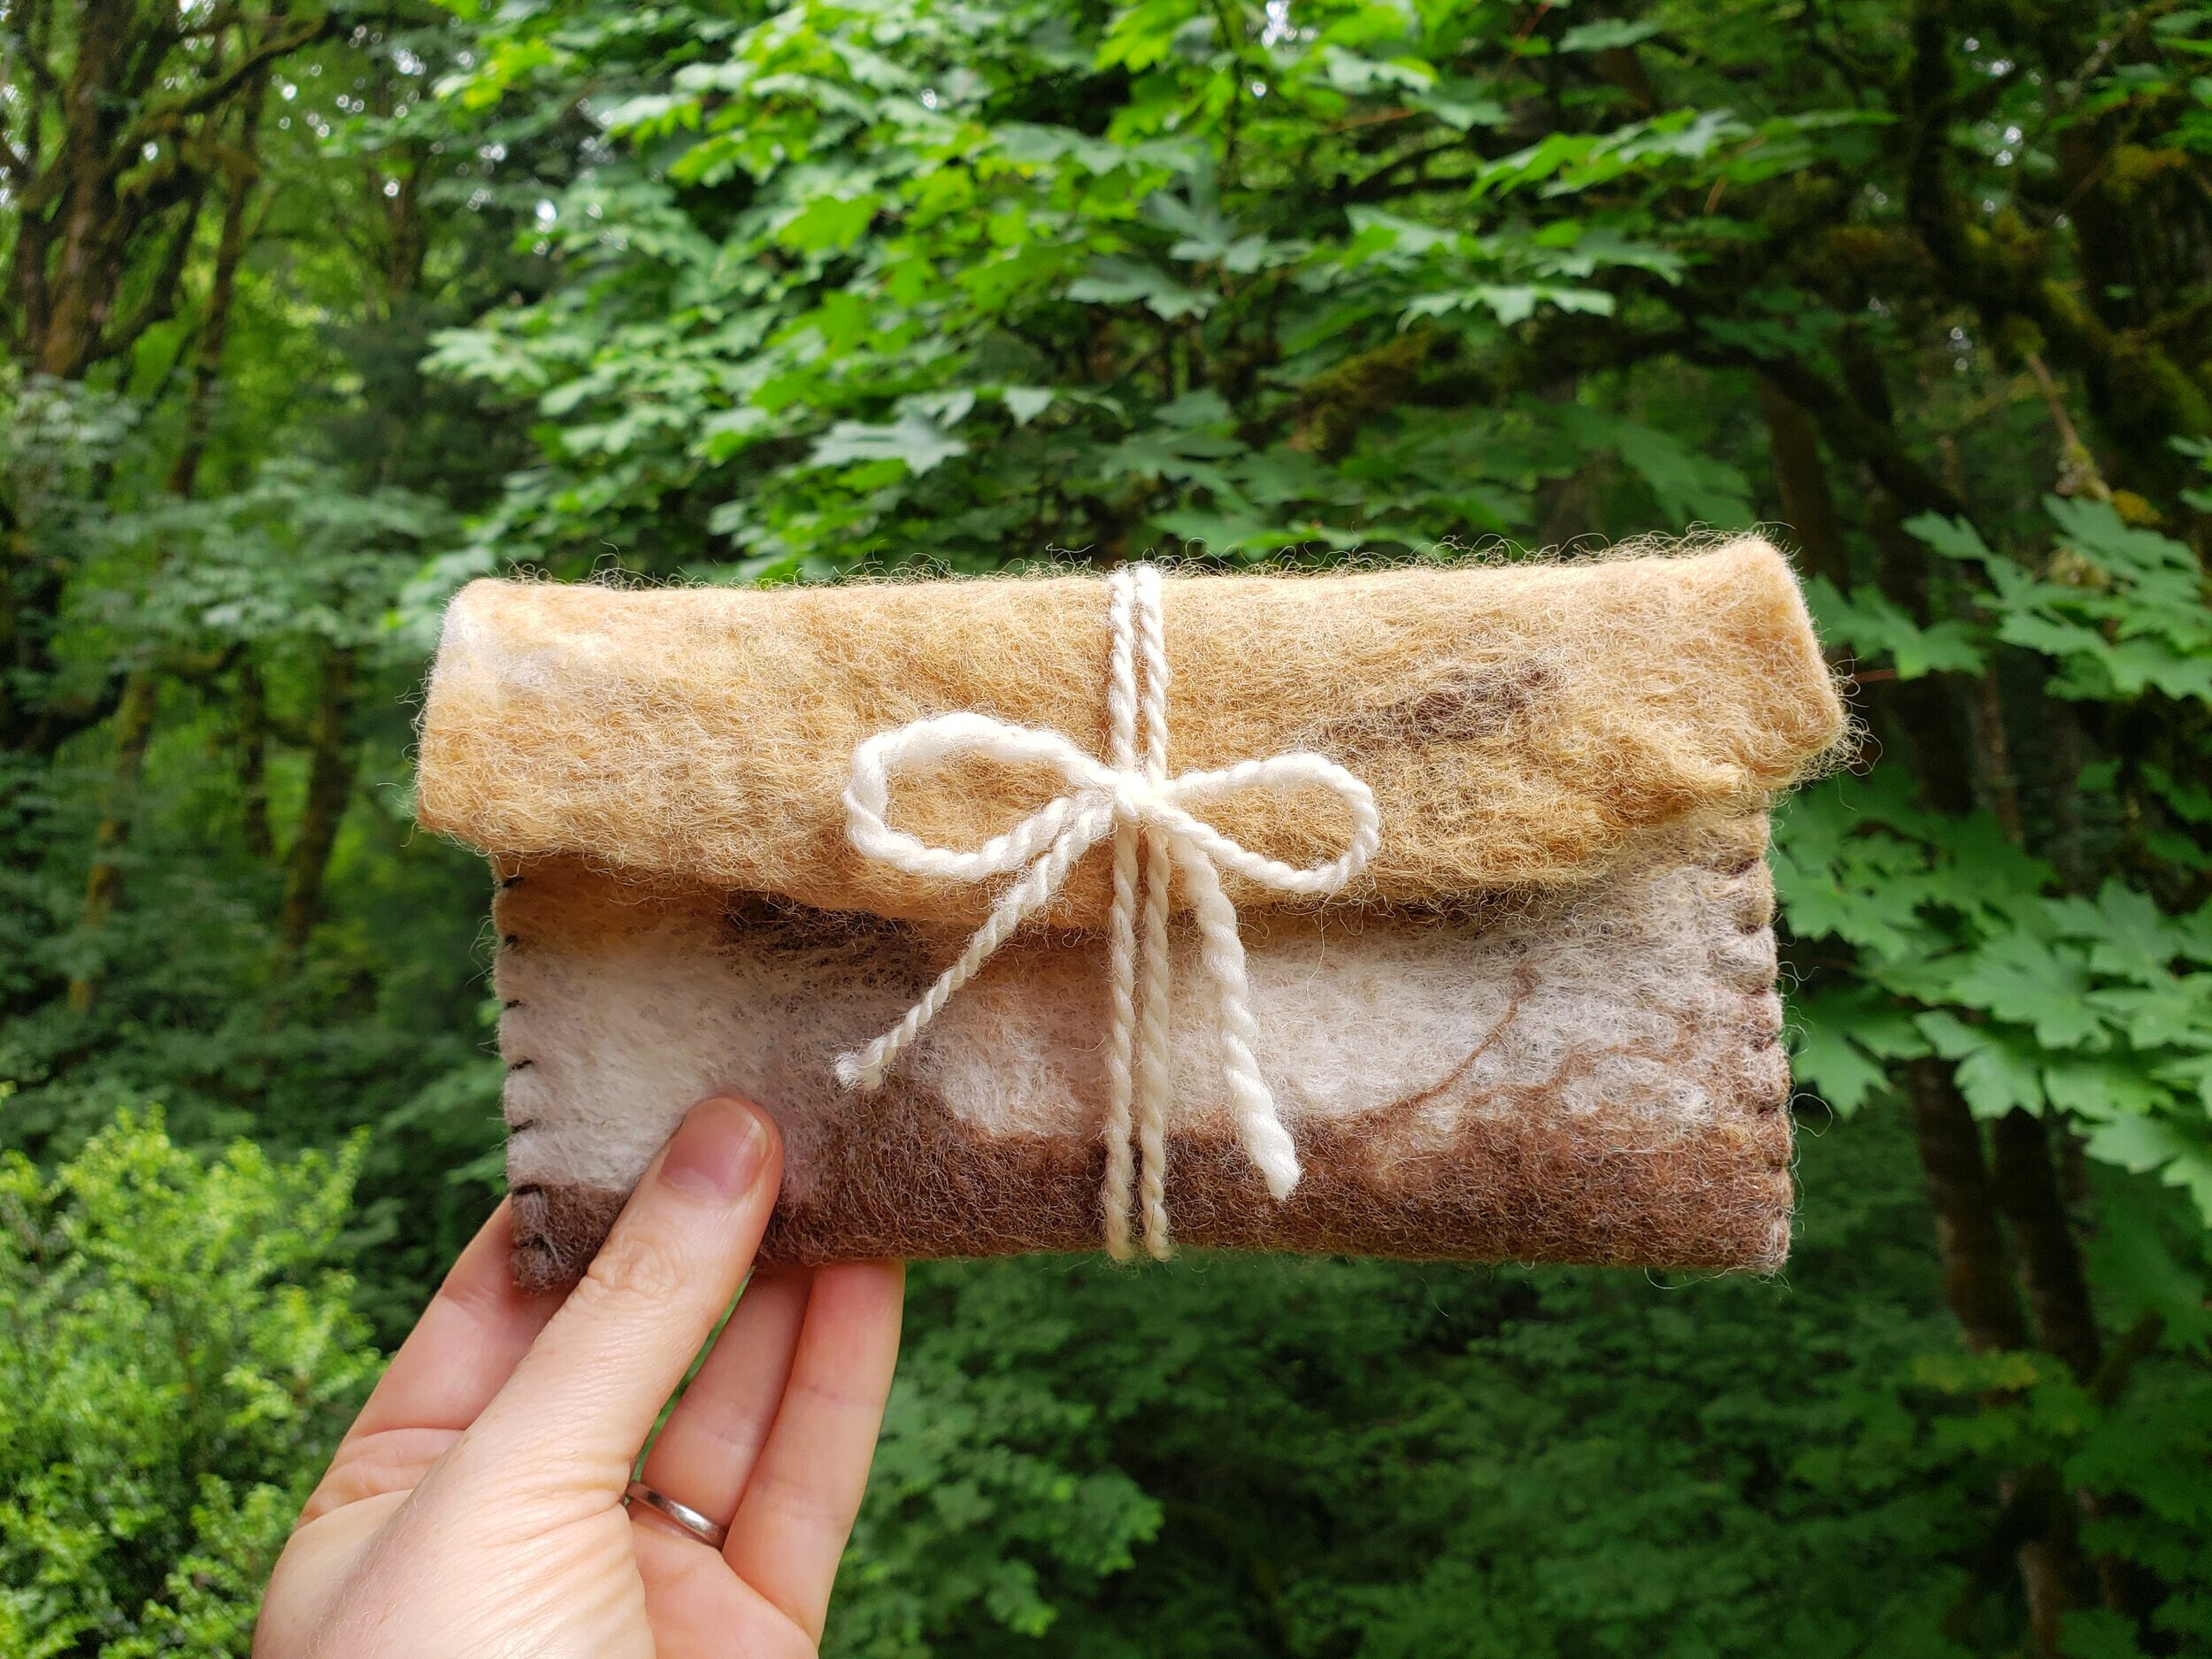
I also spent a good part of February testing earring materials! I love wearing earrings and knew there had to be a way for me to combine naturally dye with earrings. It was quite a learning curve to figure out everything from the best metals are for earring wires to finding the perfect wool felt to combine with these beautiful wood shapes. It was fun to stretch my creative energy in a new direction!

(Update: They’re finished and tested and available in my shop!)

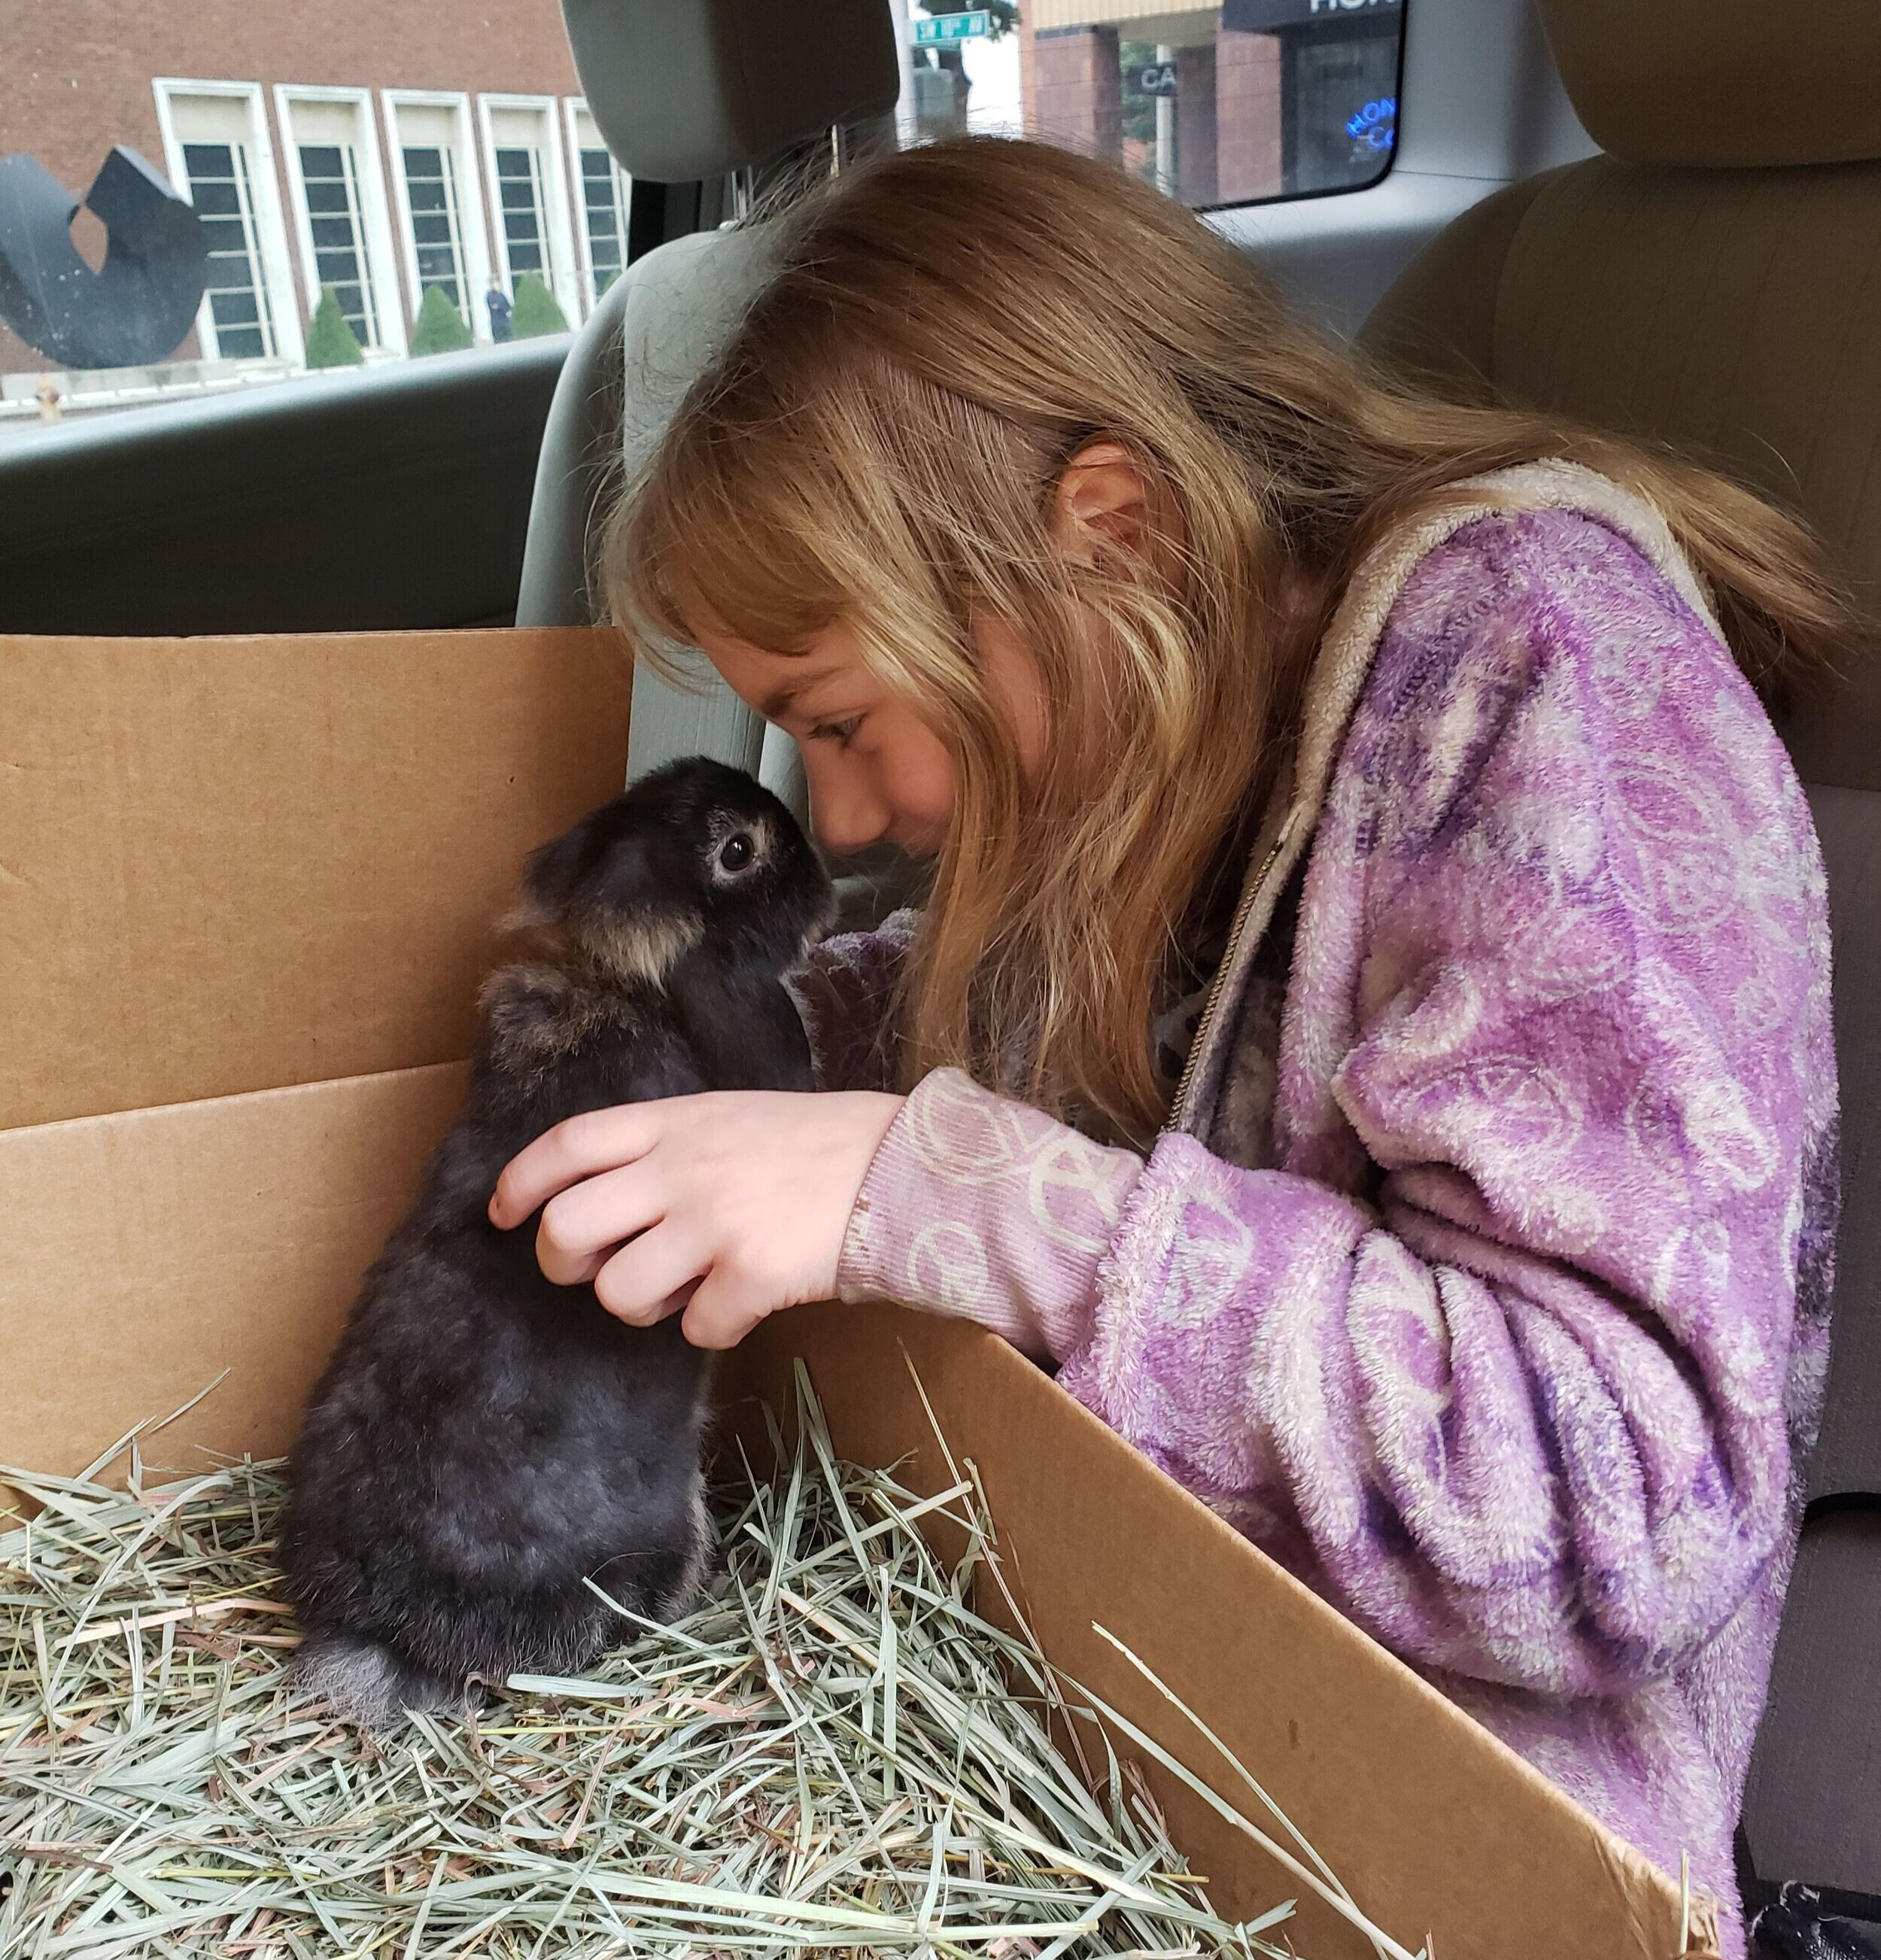
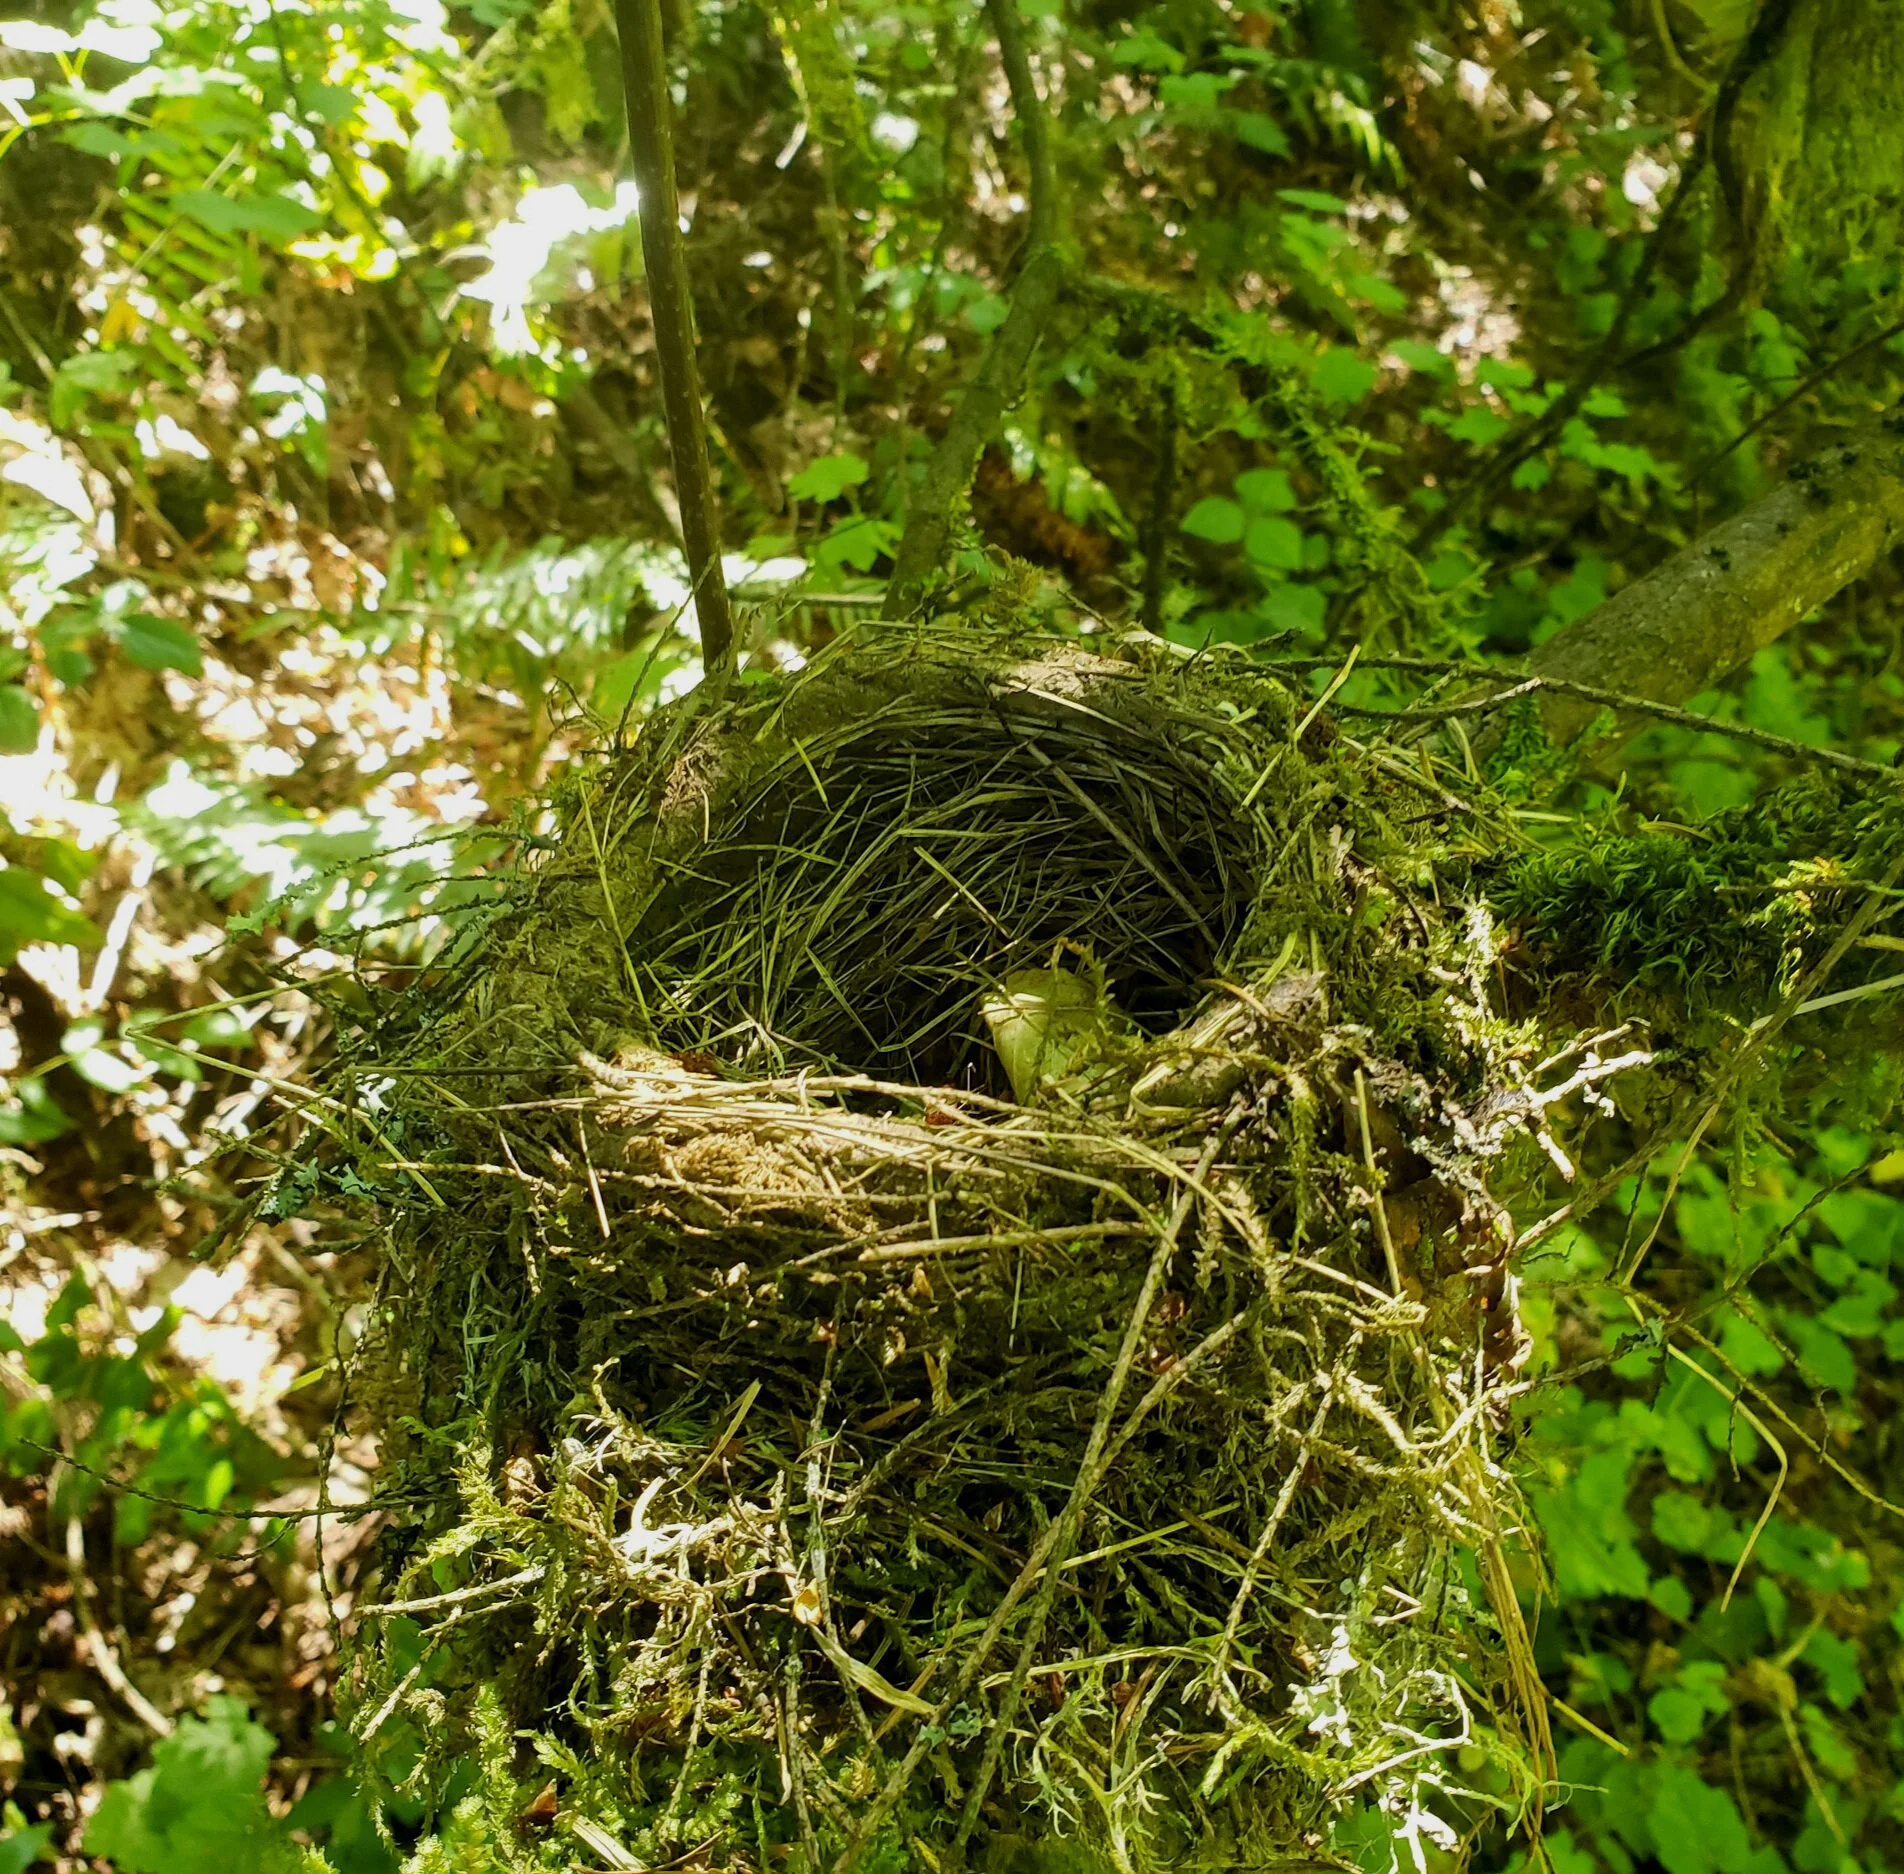
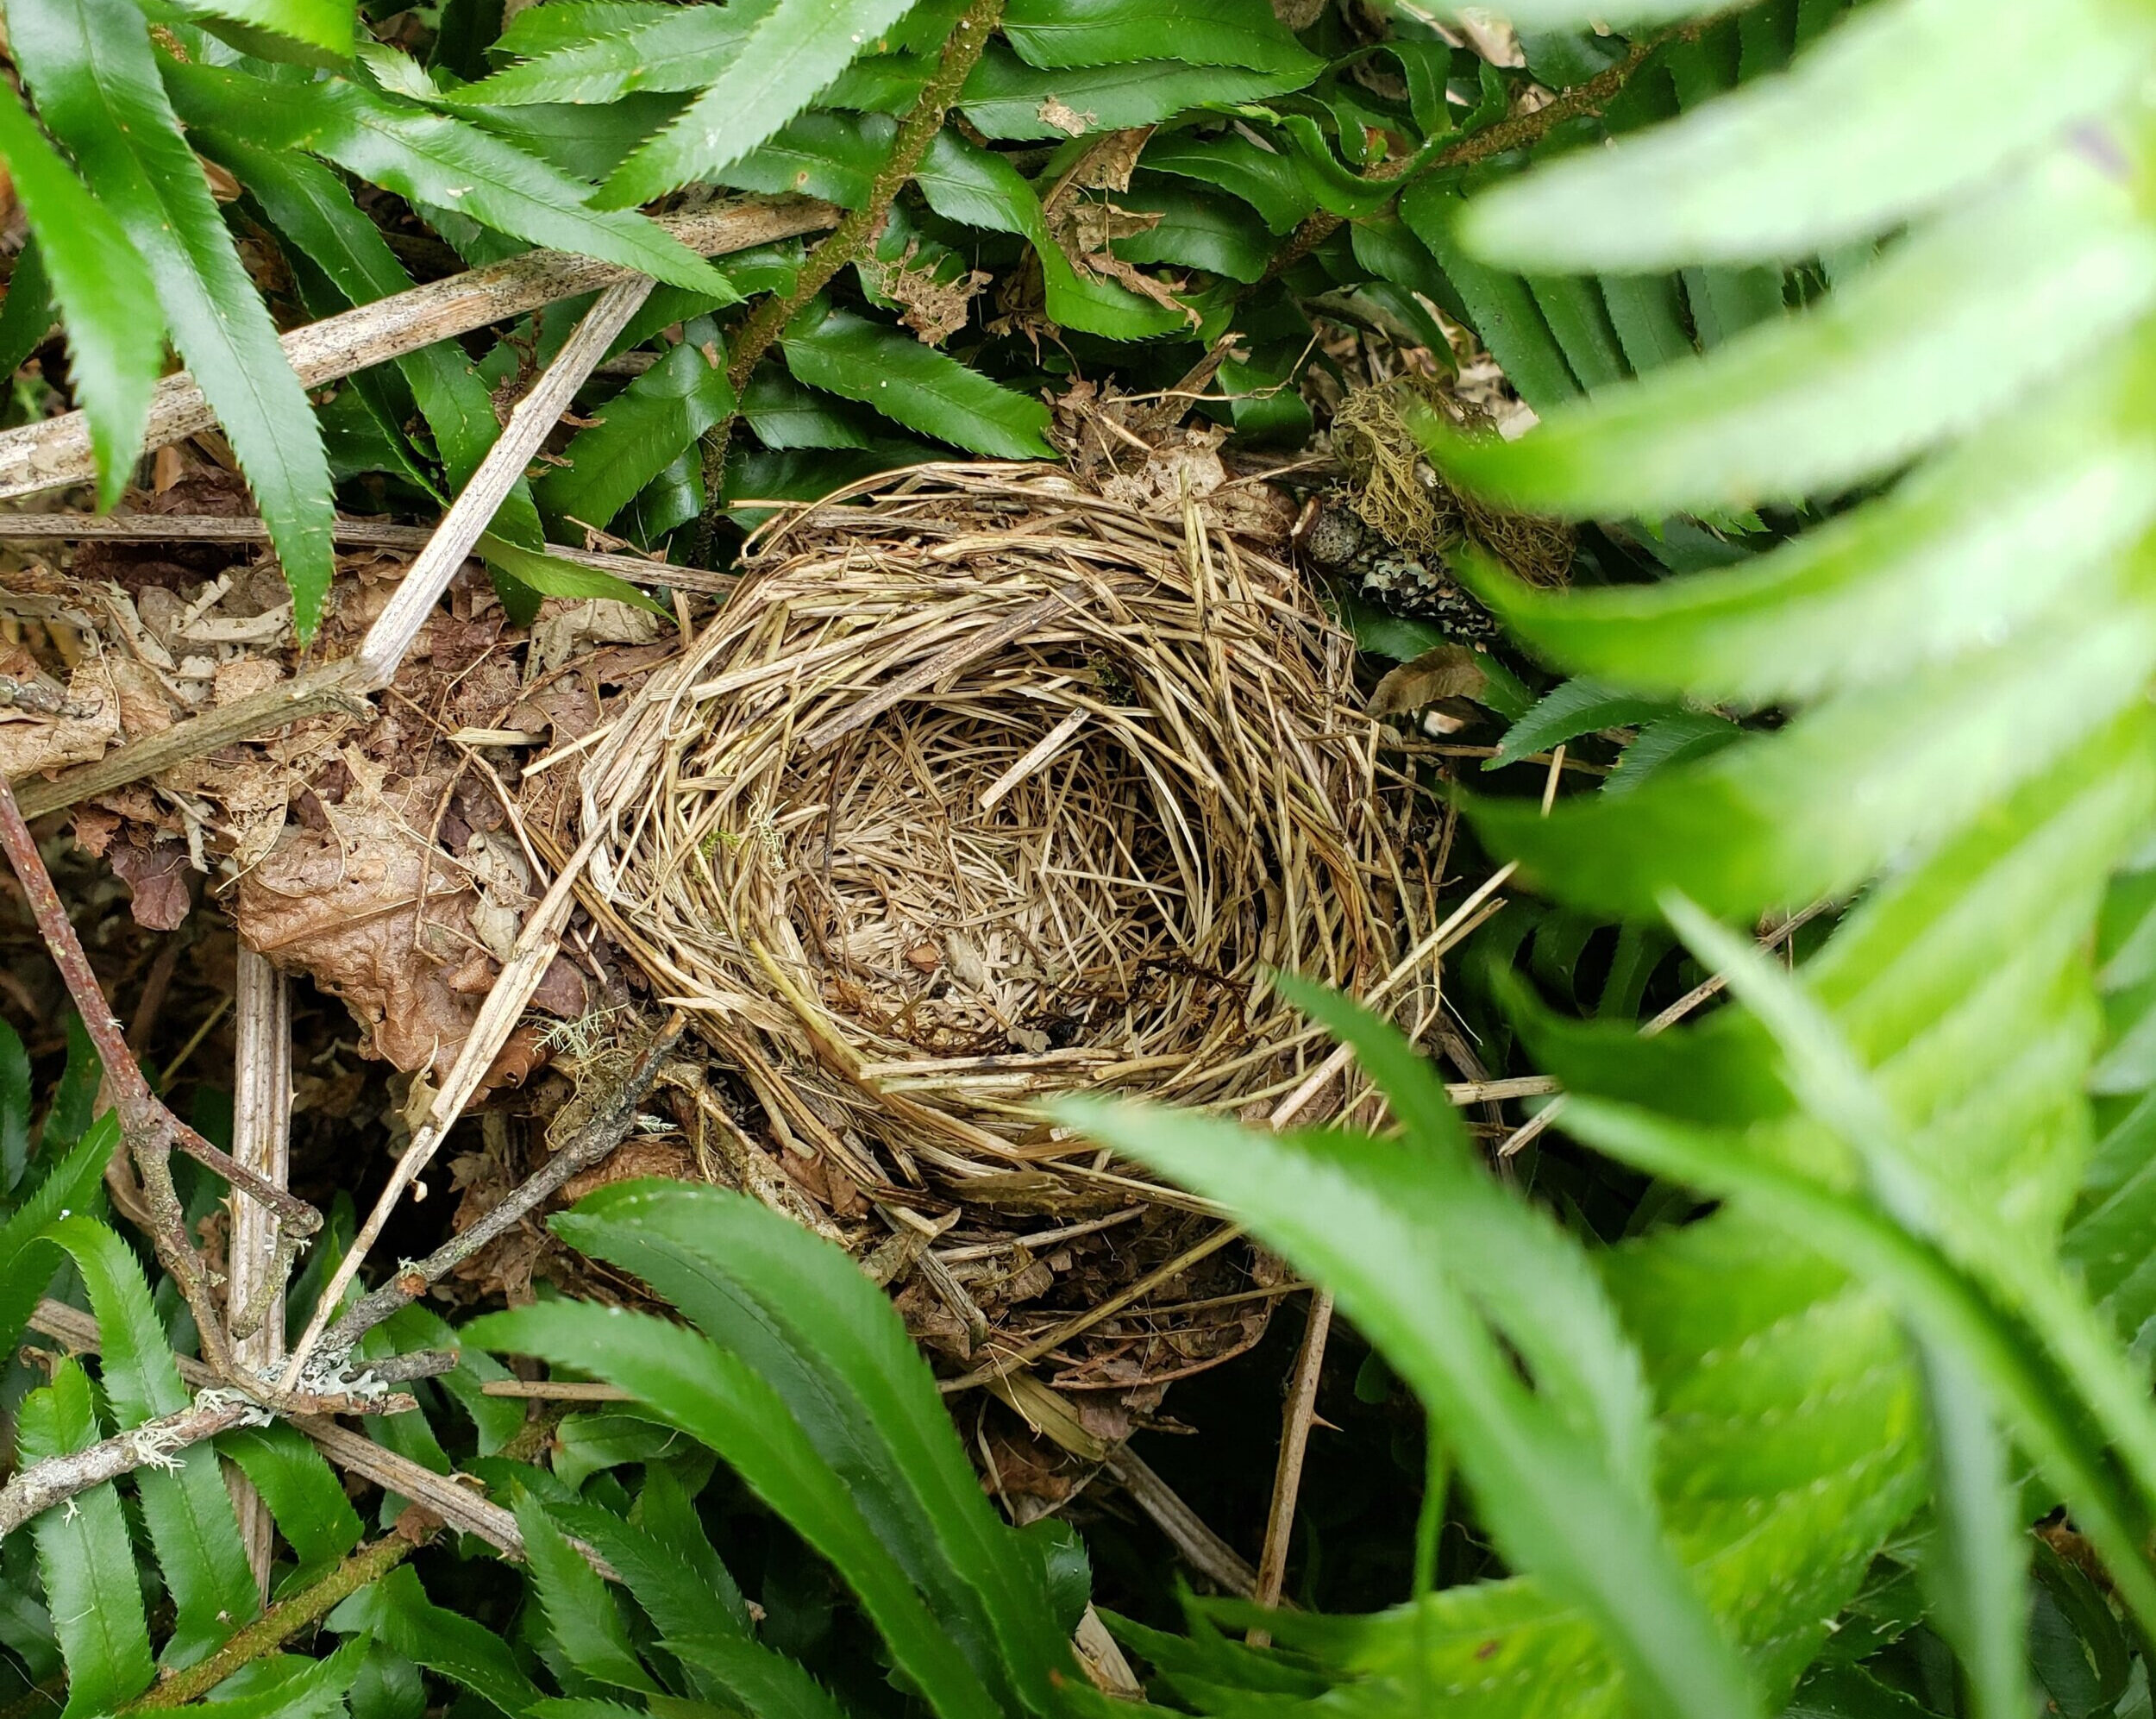
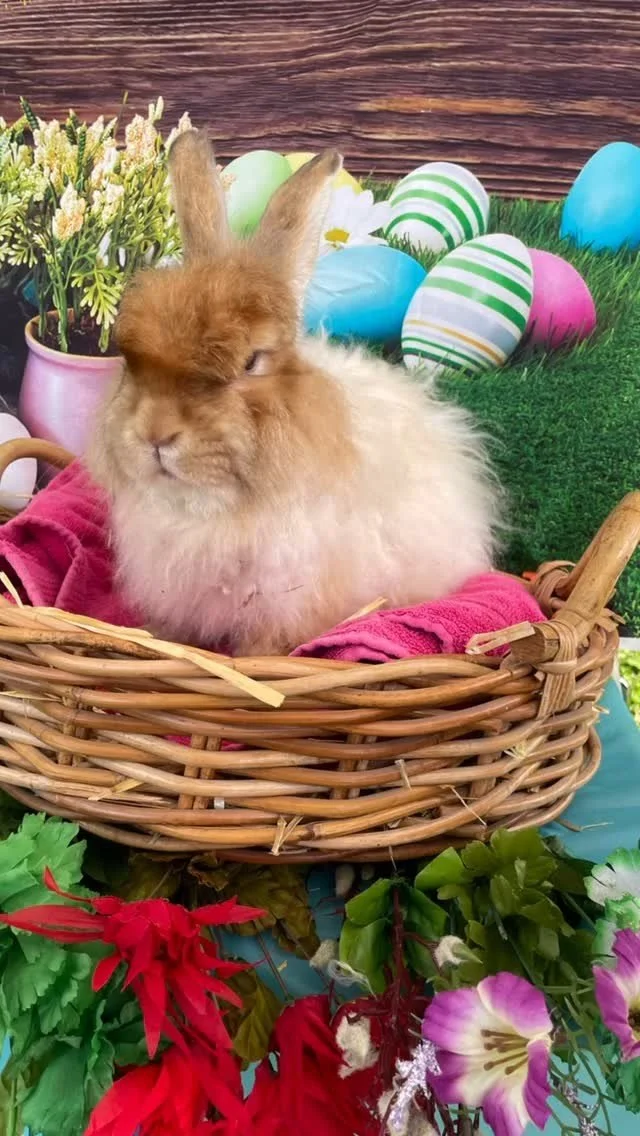
Unlike last month where we shared some significant downsizing of our animals here at Cedar Dell, this month we added a few. Inky, our Holland Lop doe we got in December had 4 adorable babies on February 23. Rabbits often don’t have successful litters their first time so we are especially thrilled (and relieved) that Inky had 4 healthy babies and is doing a fantastic job taking care of them. The fluff in the nest is fur that Inky pulled from her chest to make a cozy, warm spot for her babies. It’s a normal process and doesn’t hurt her because the fur loosens on her body so she can pull it out easily. They may not look too cute when they’re first born but they will be adorable soon! We are looking forward to seeing them grow.

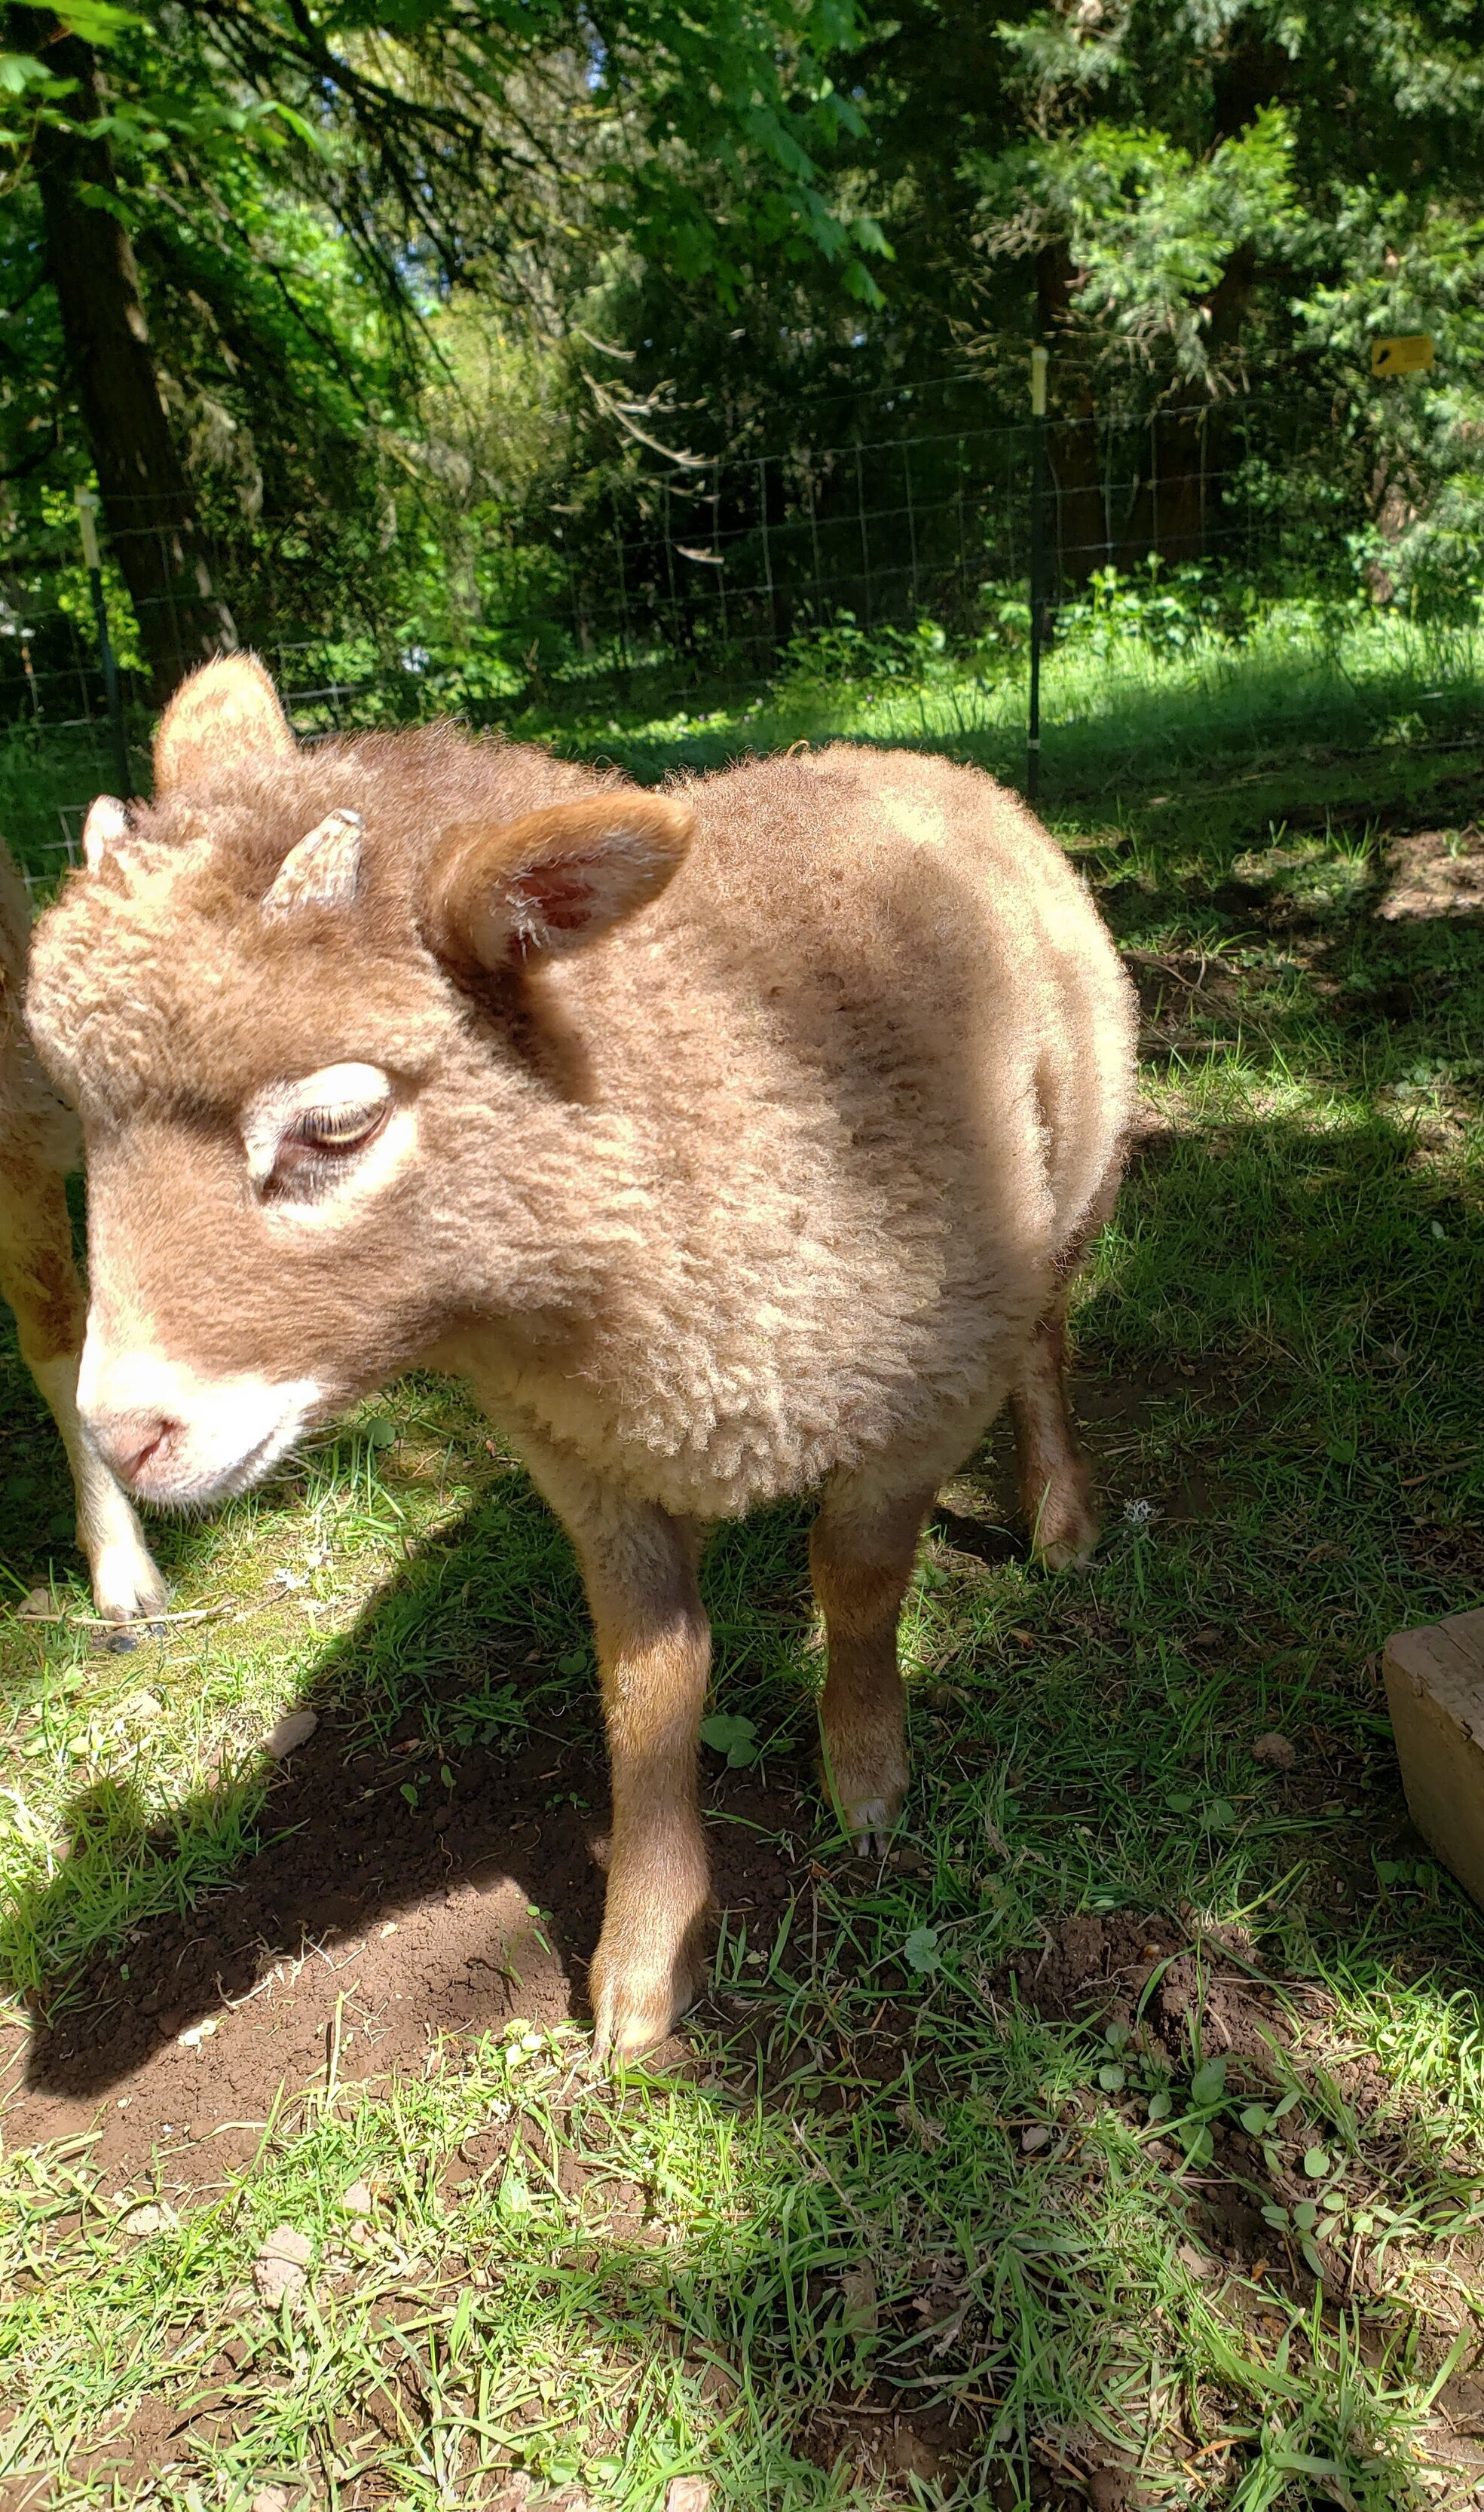
Next month we should have some lambs!

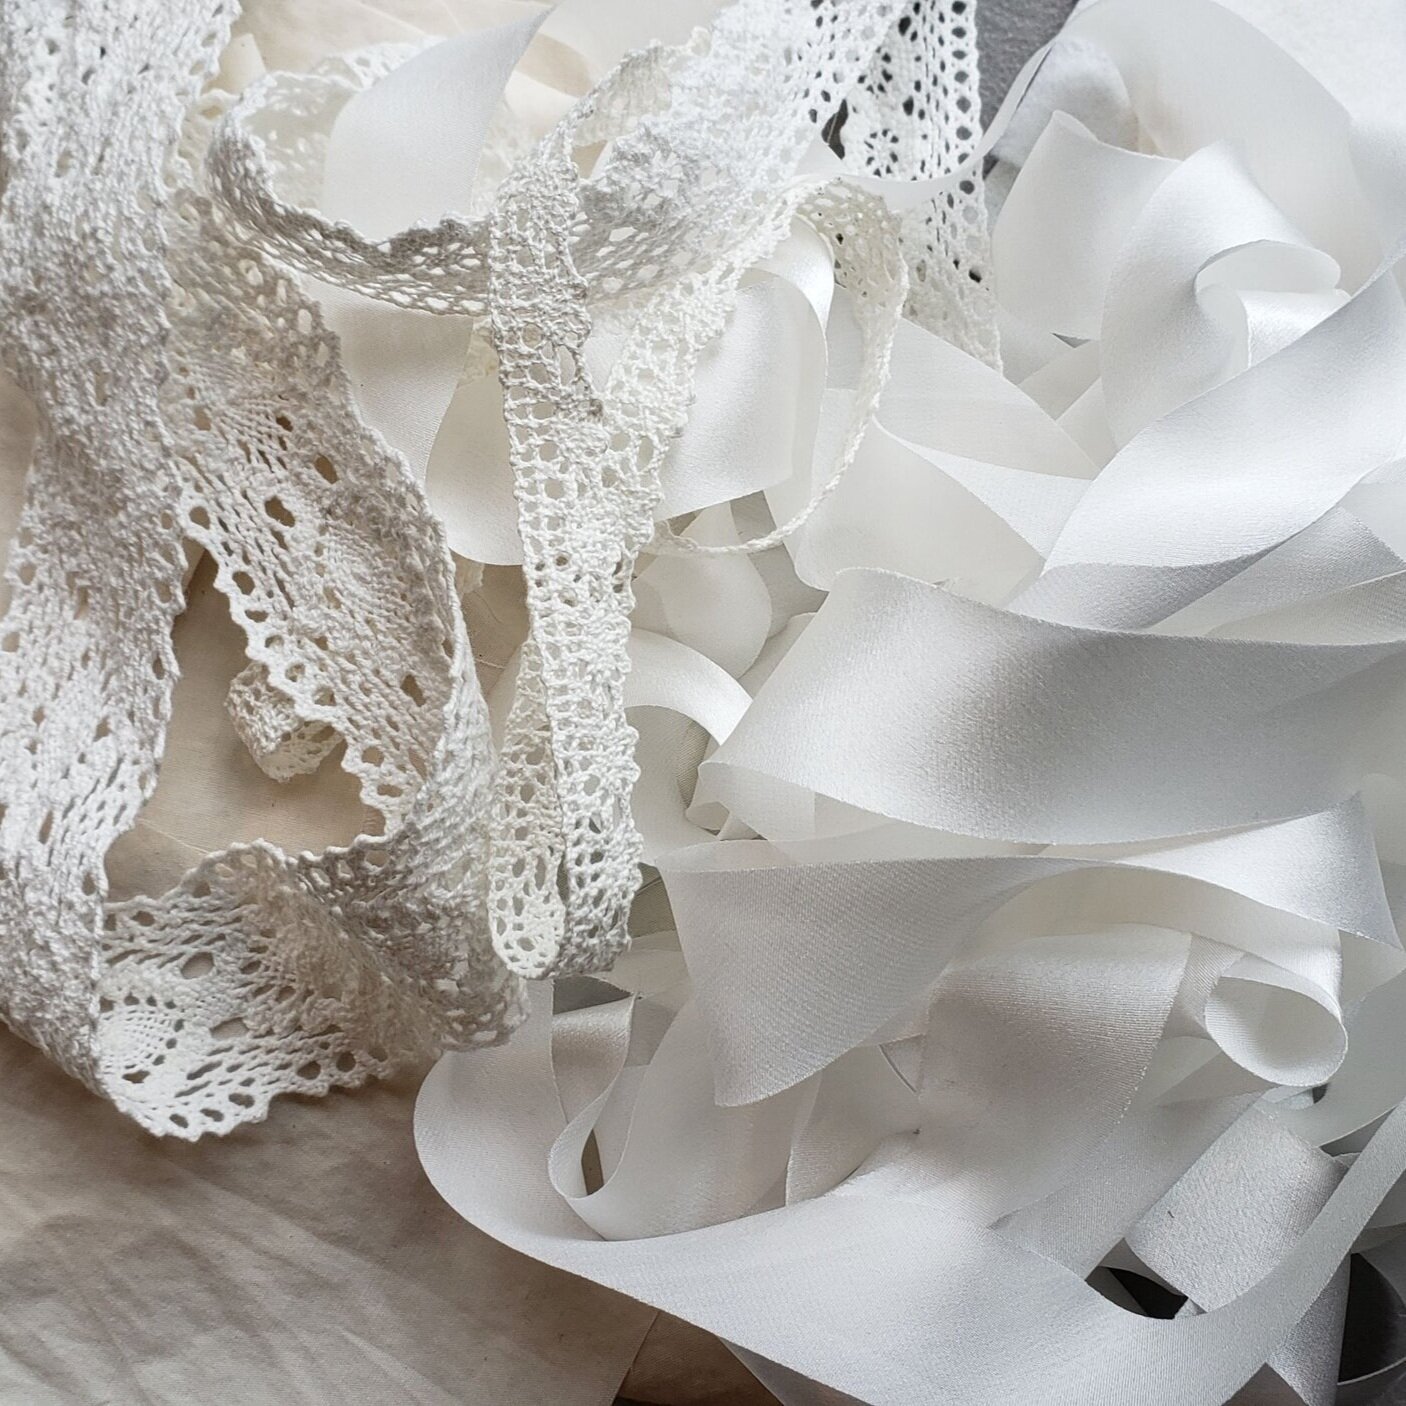
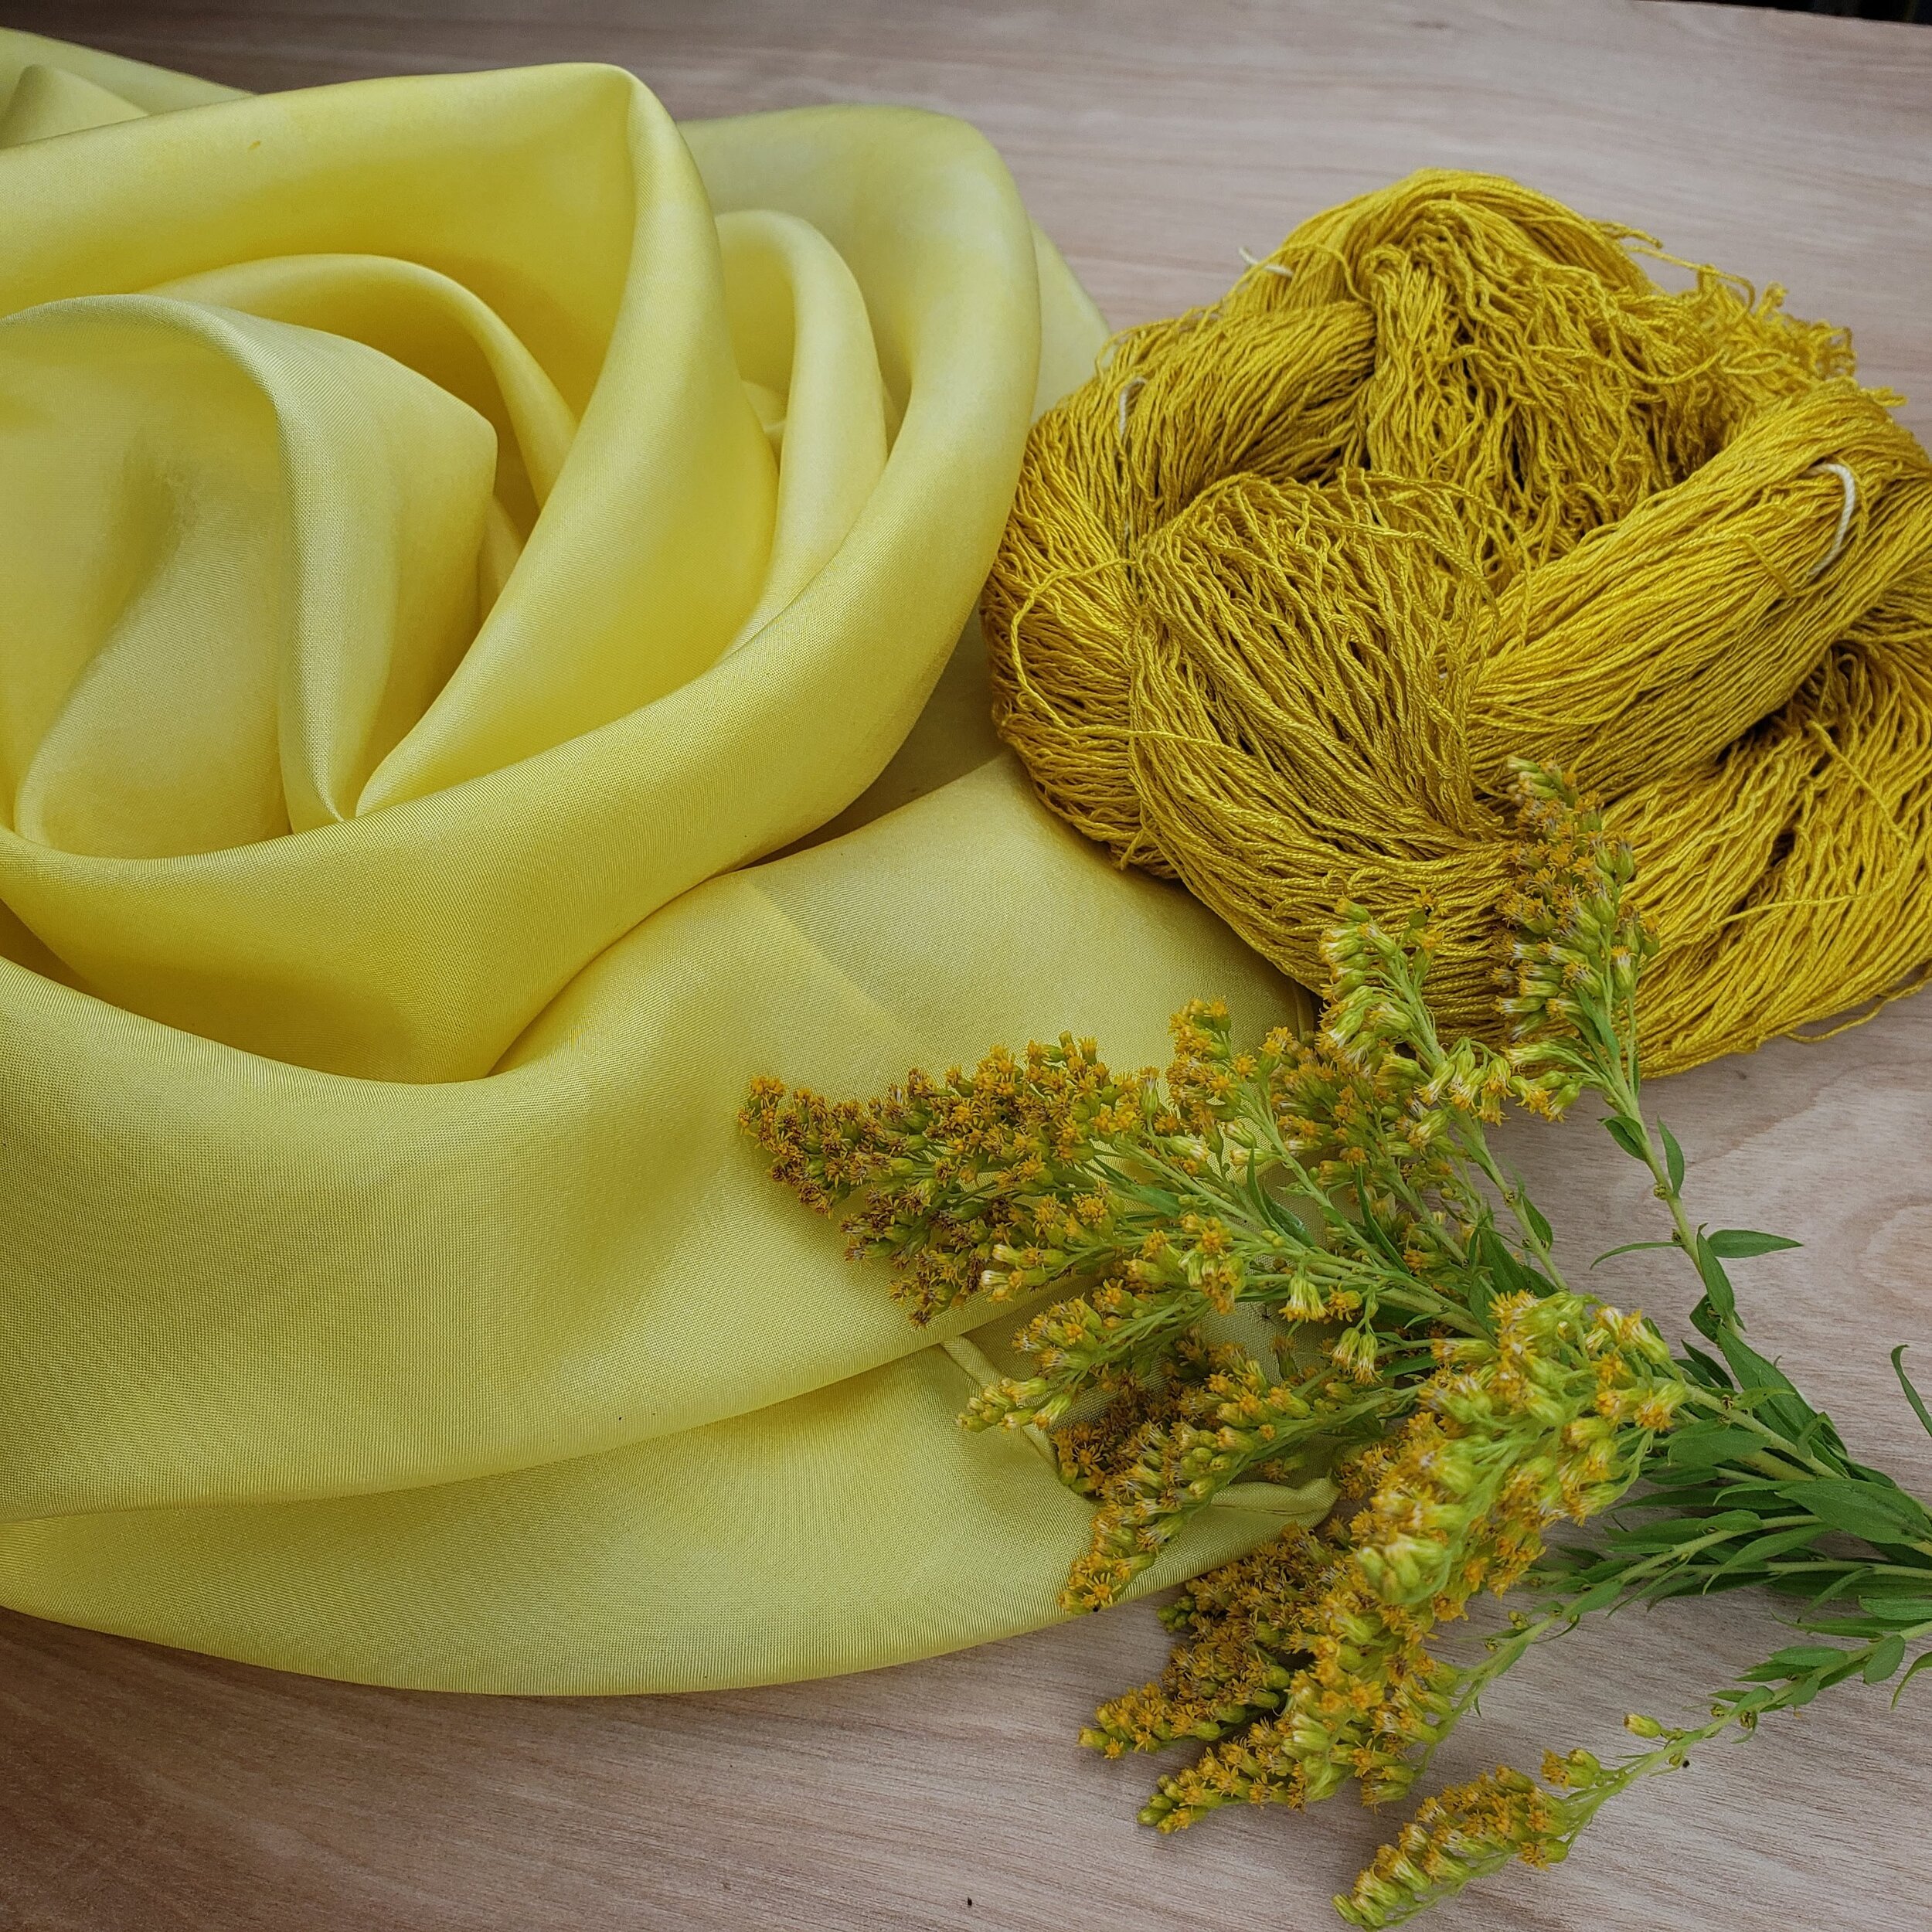
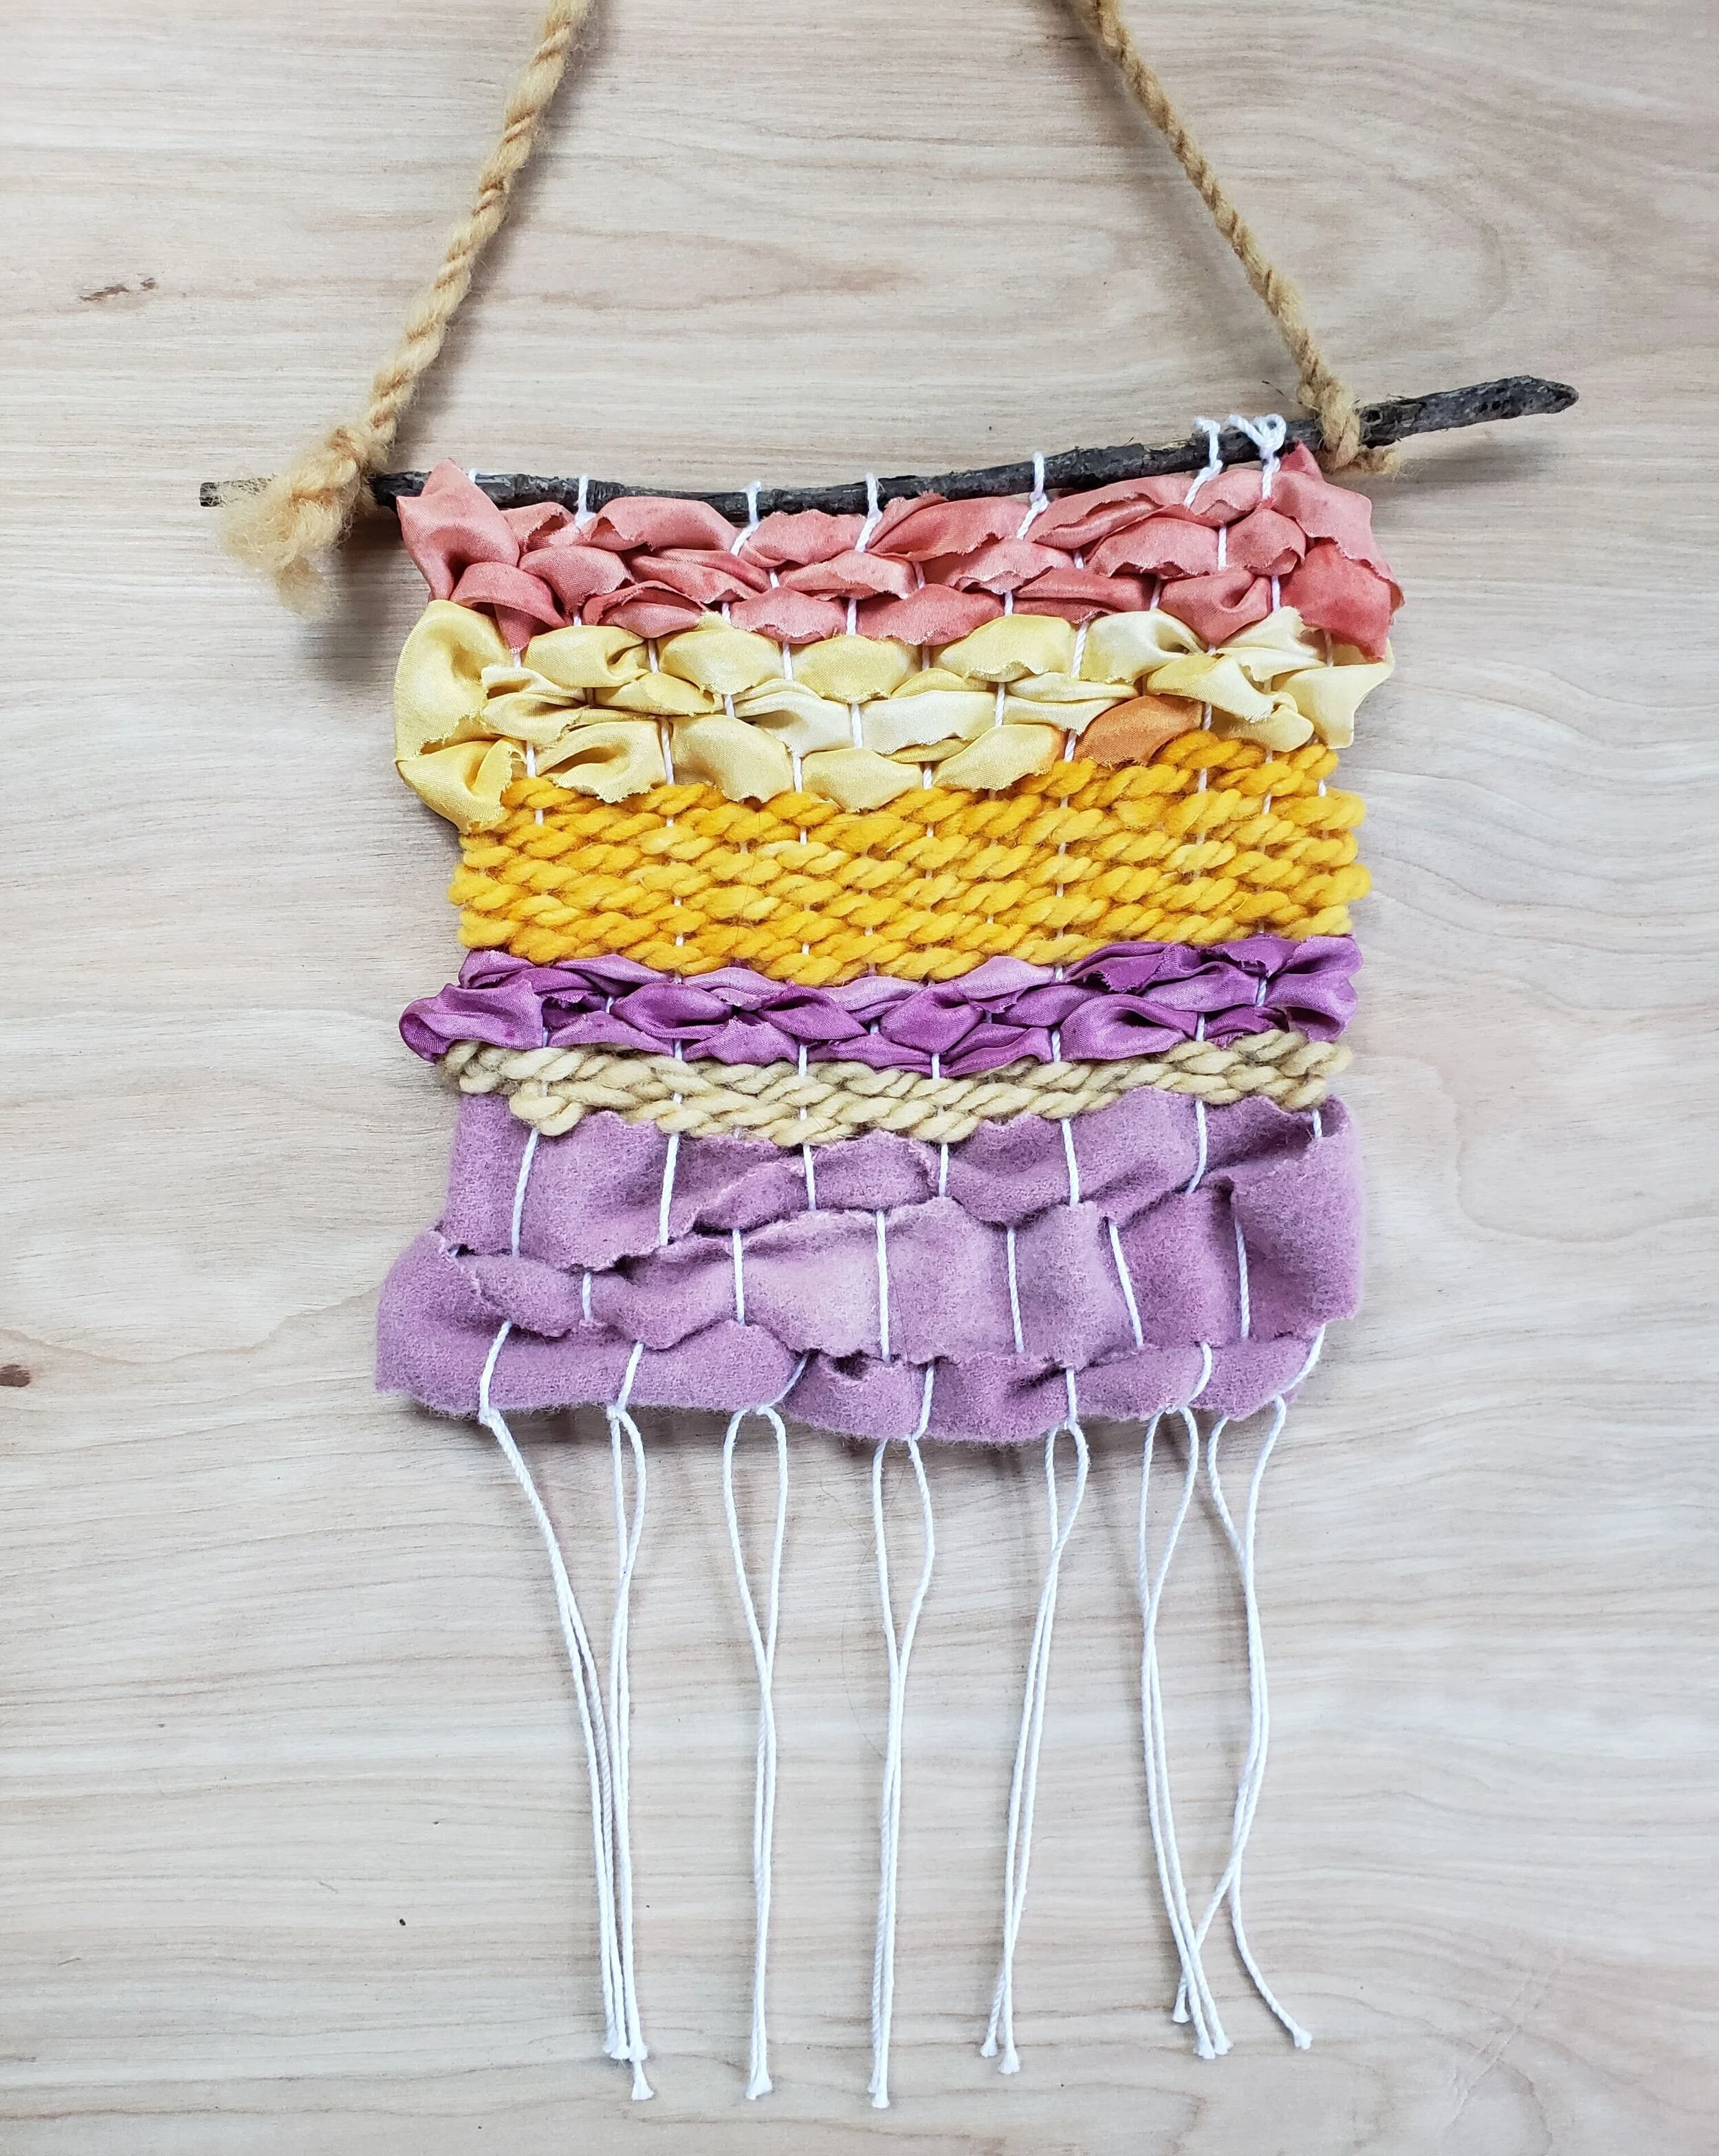
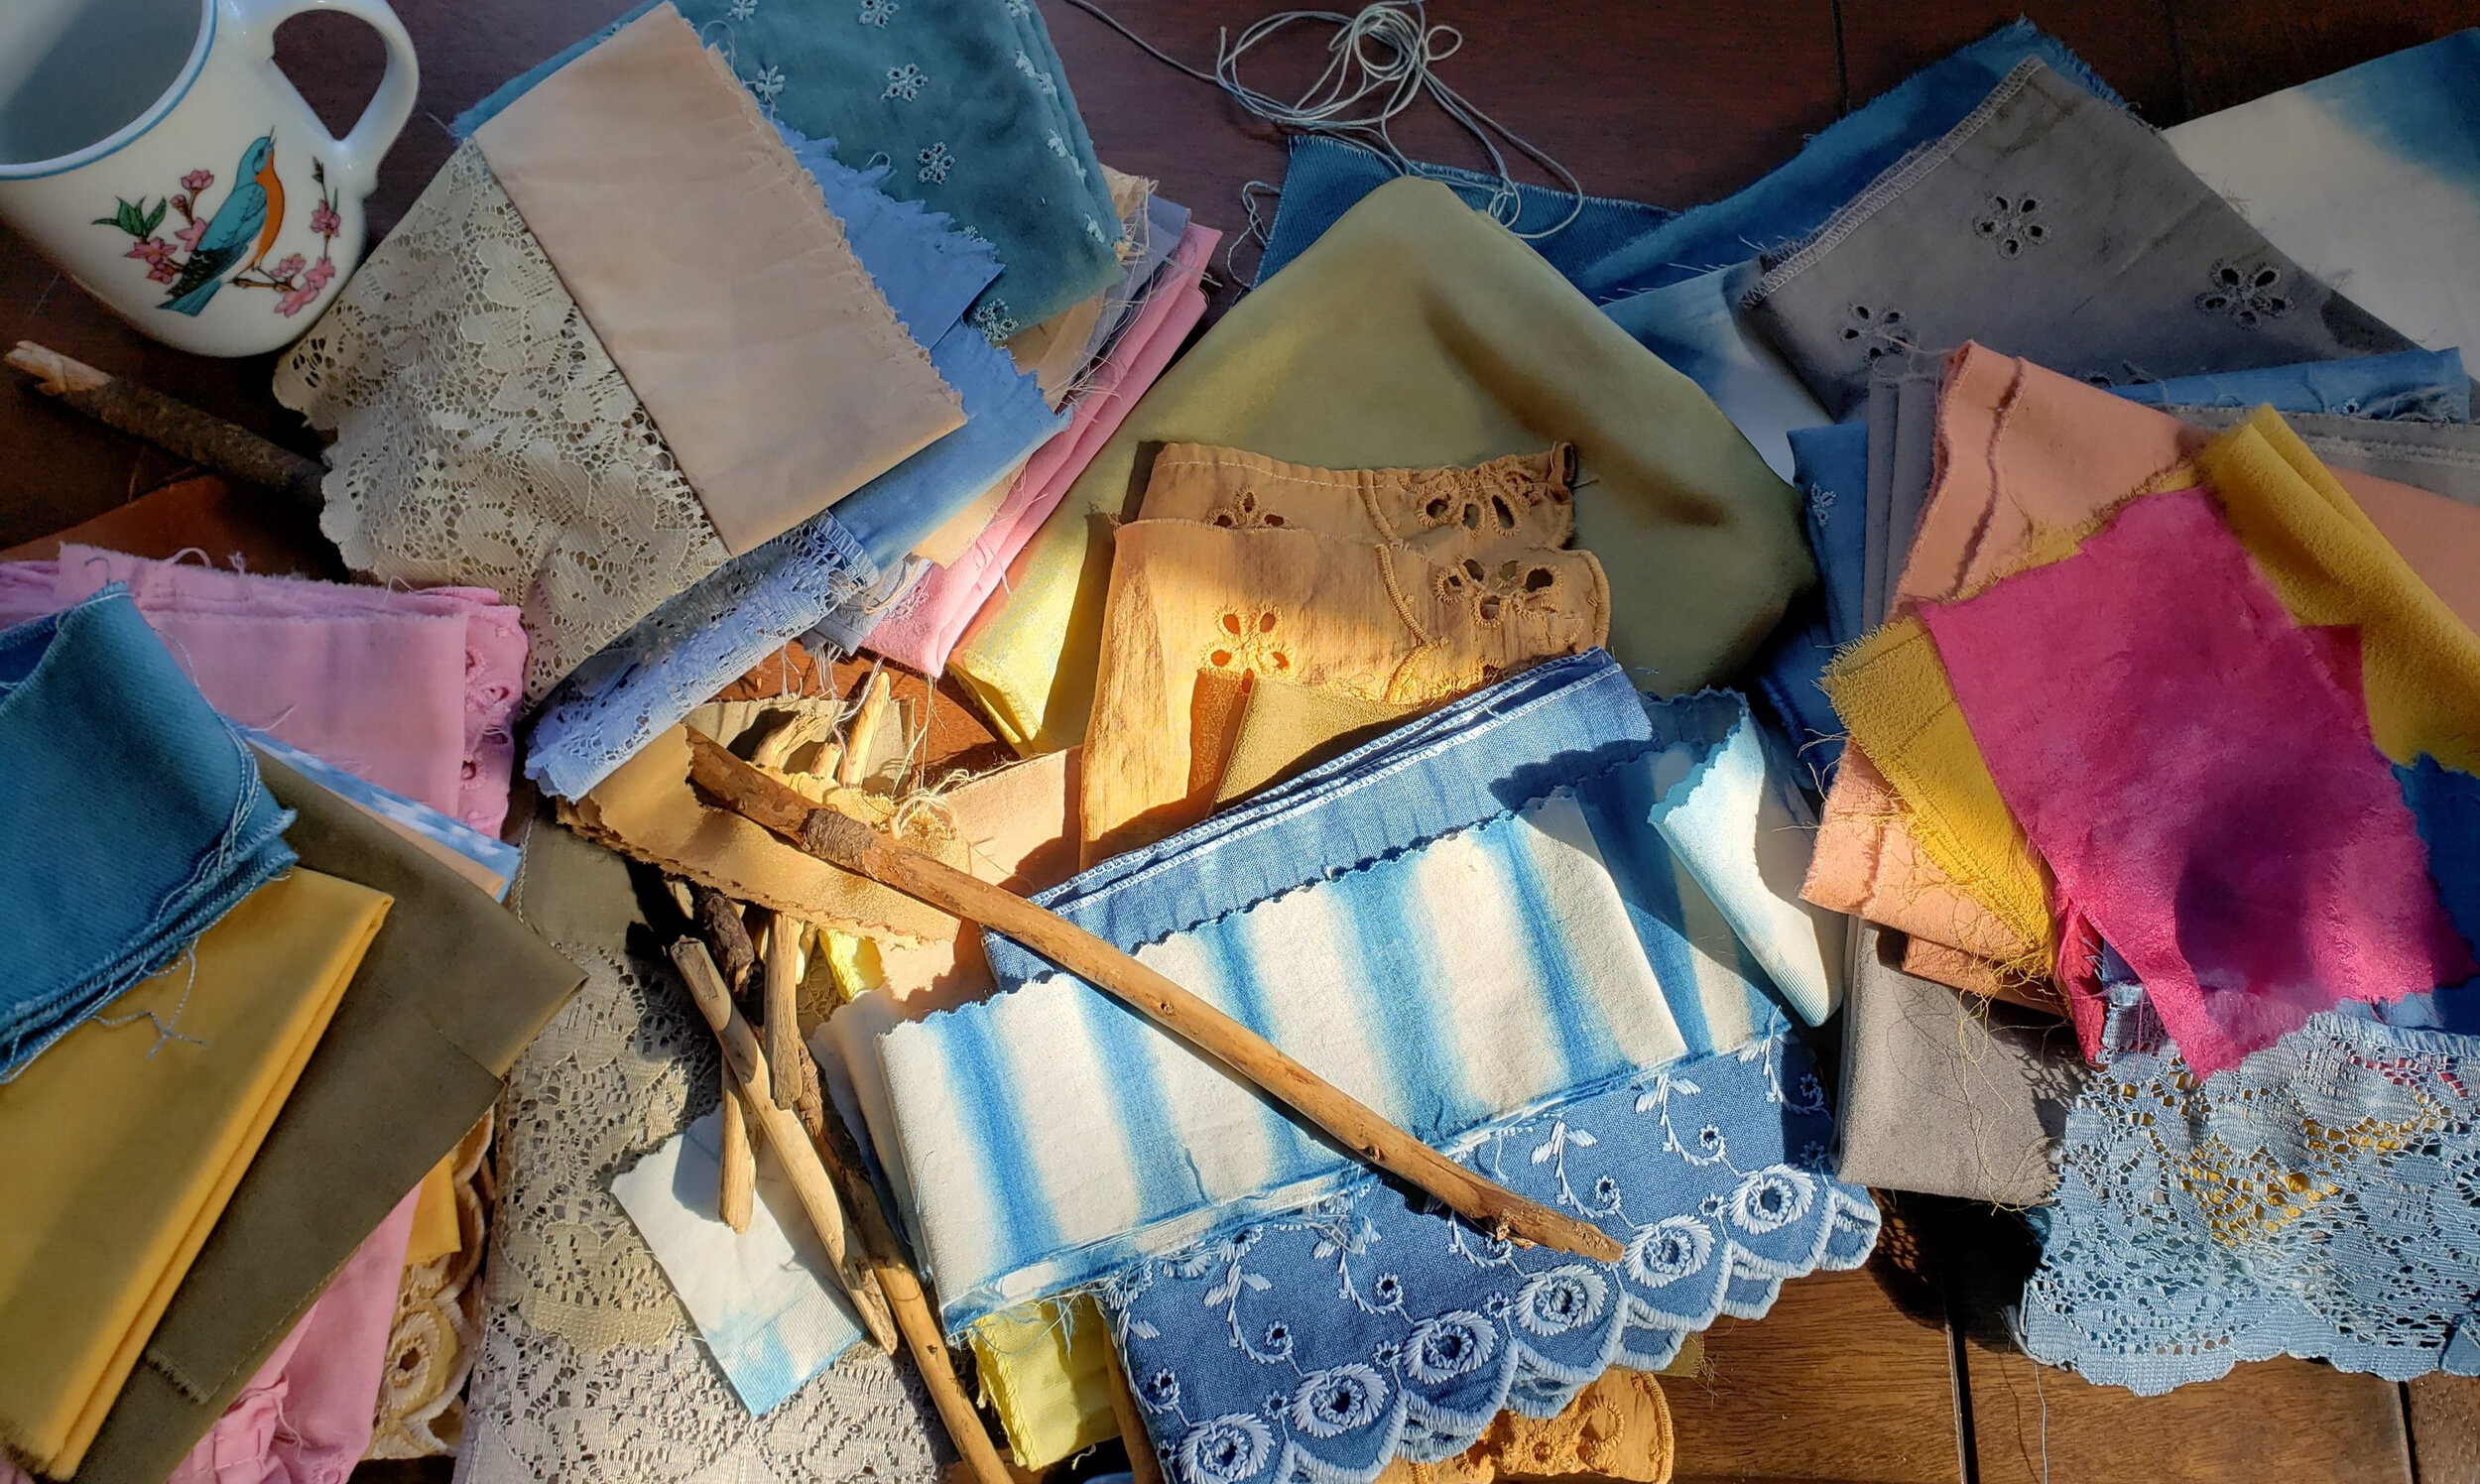
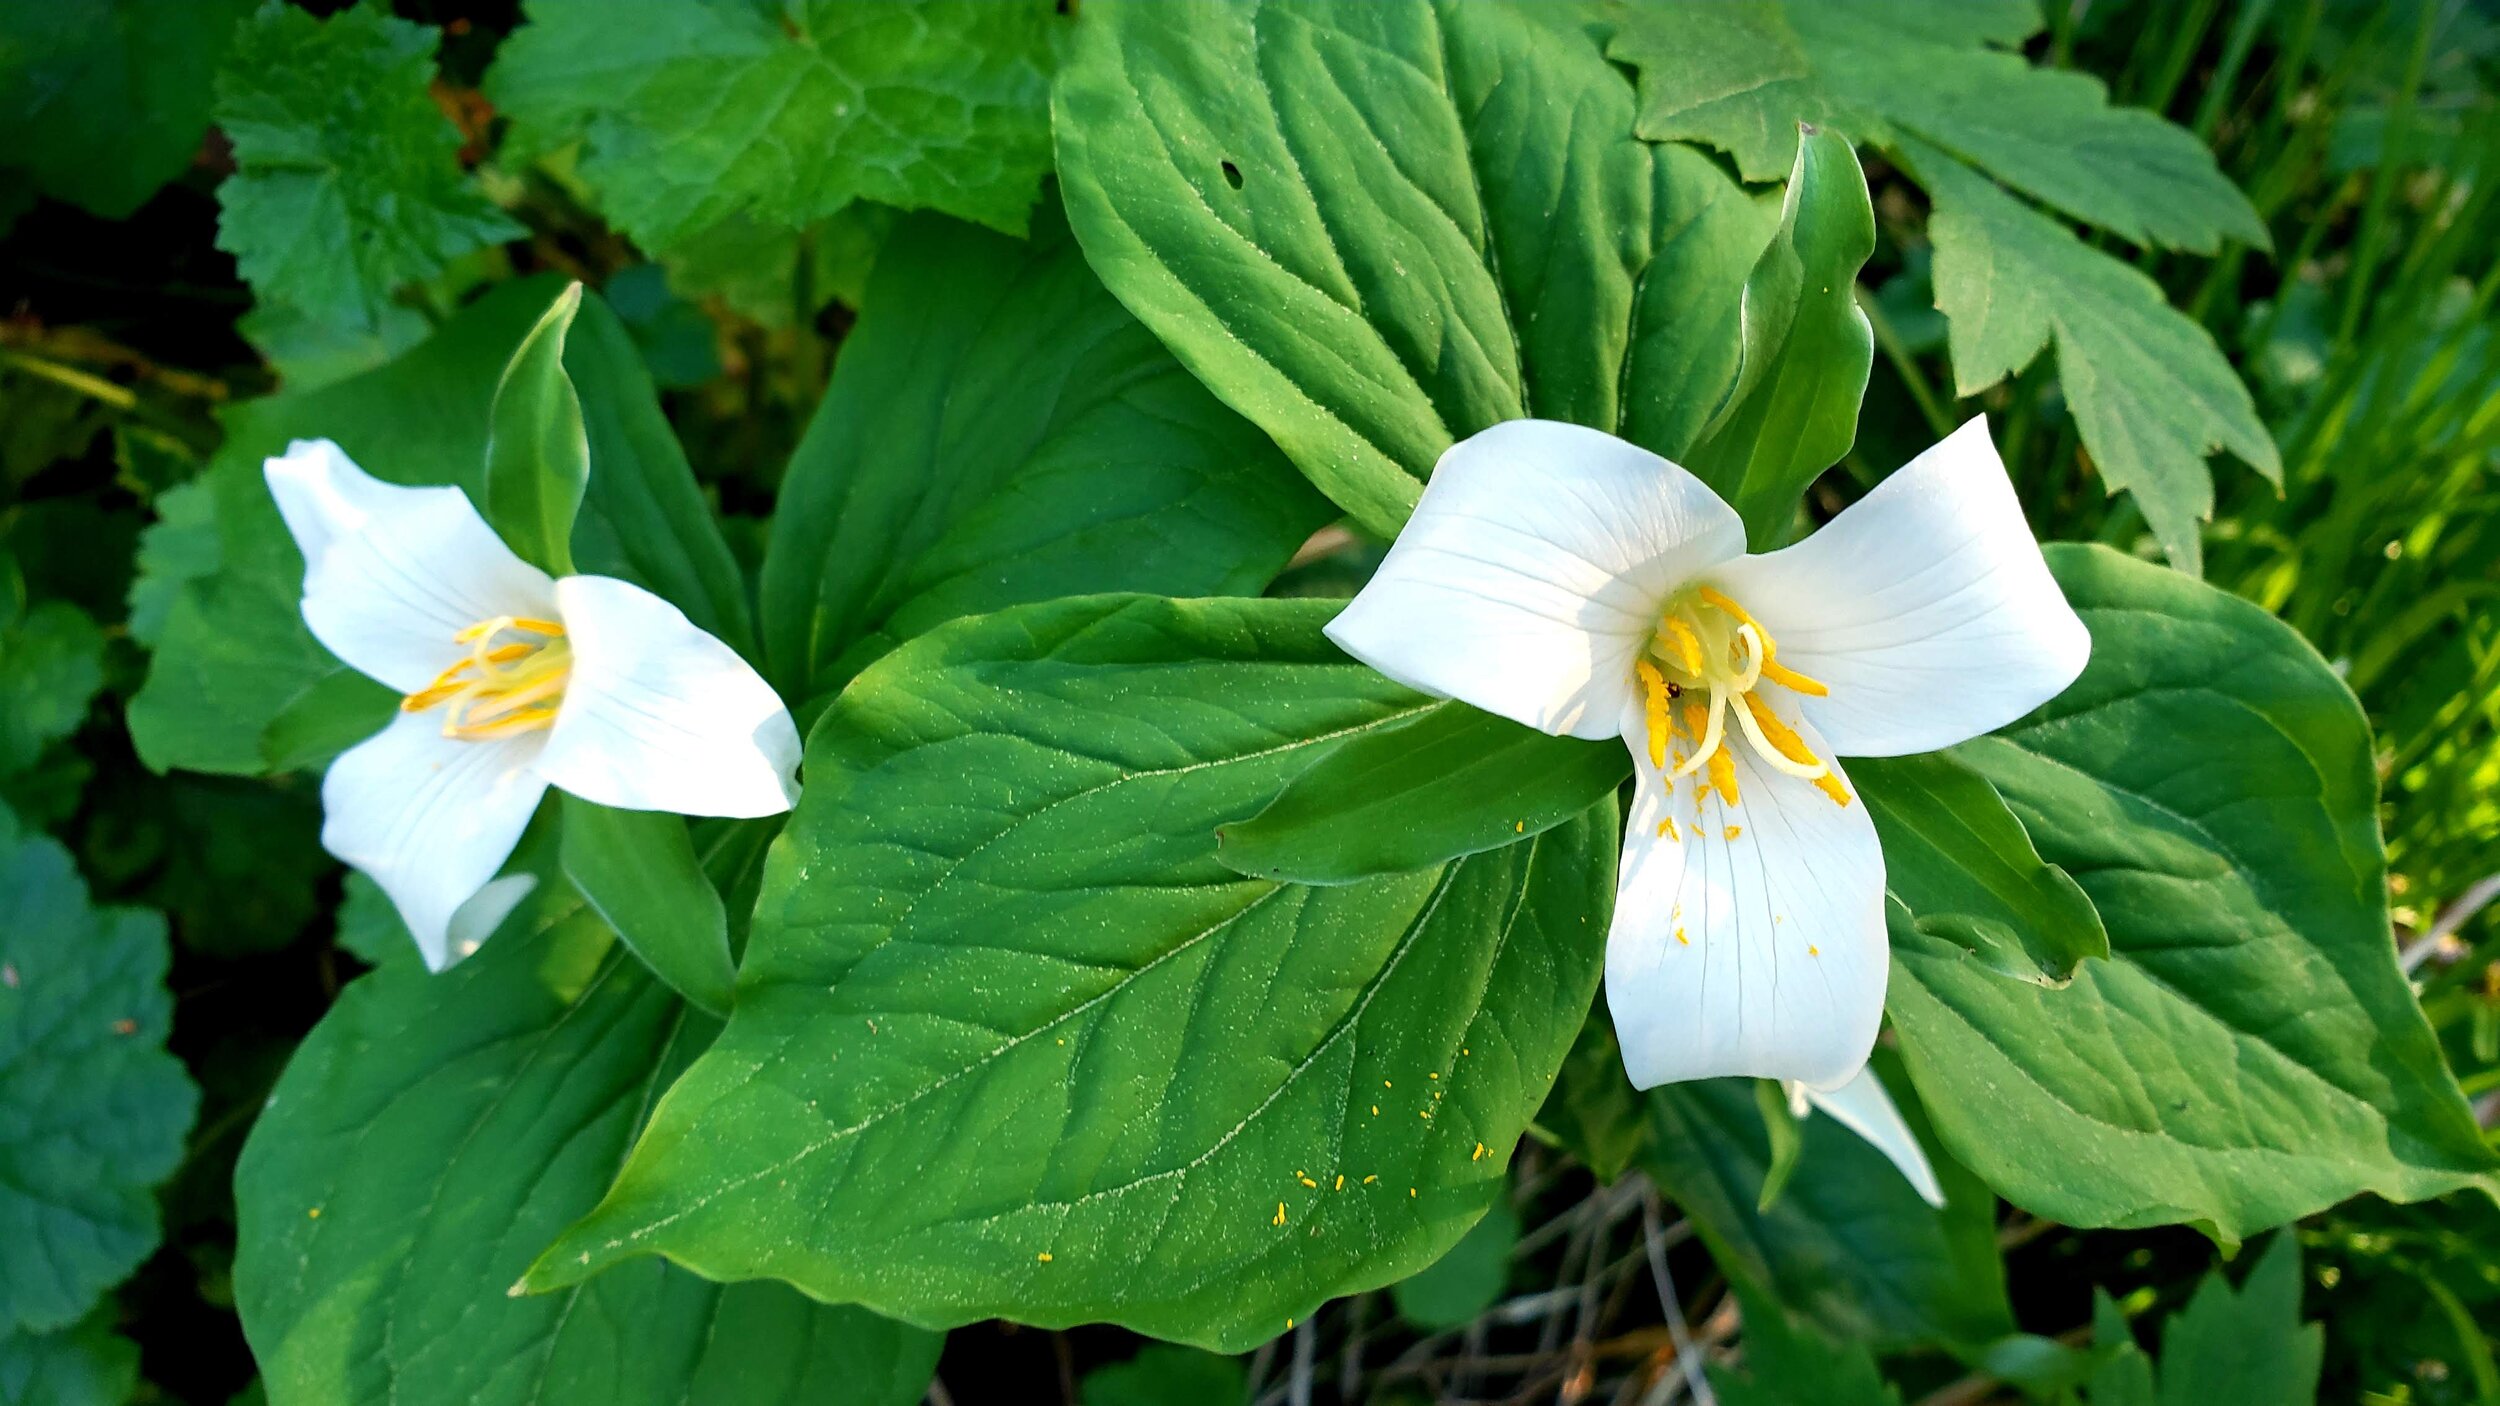
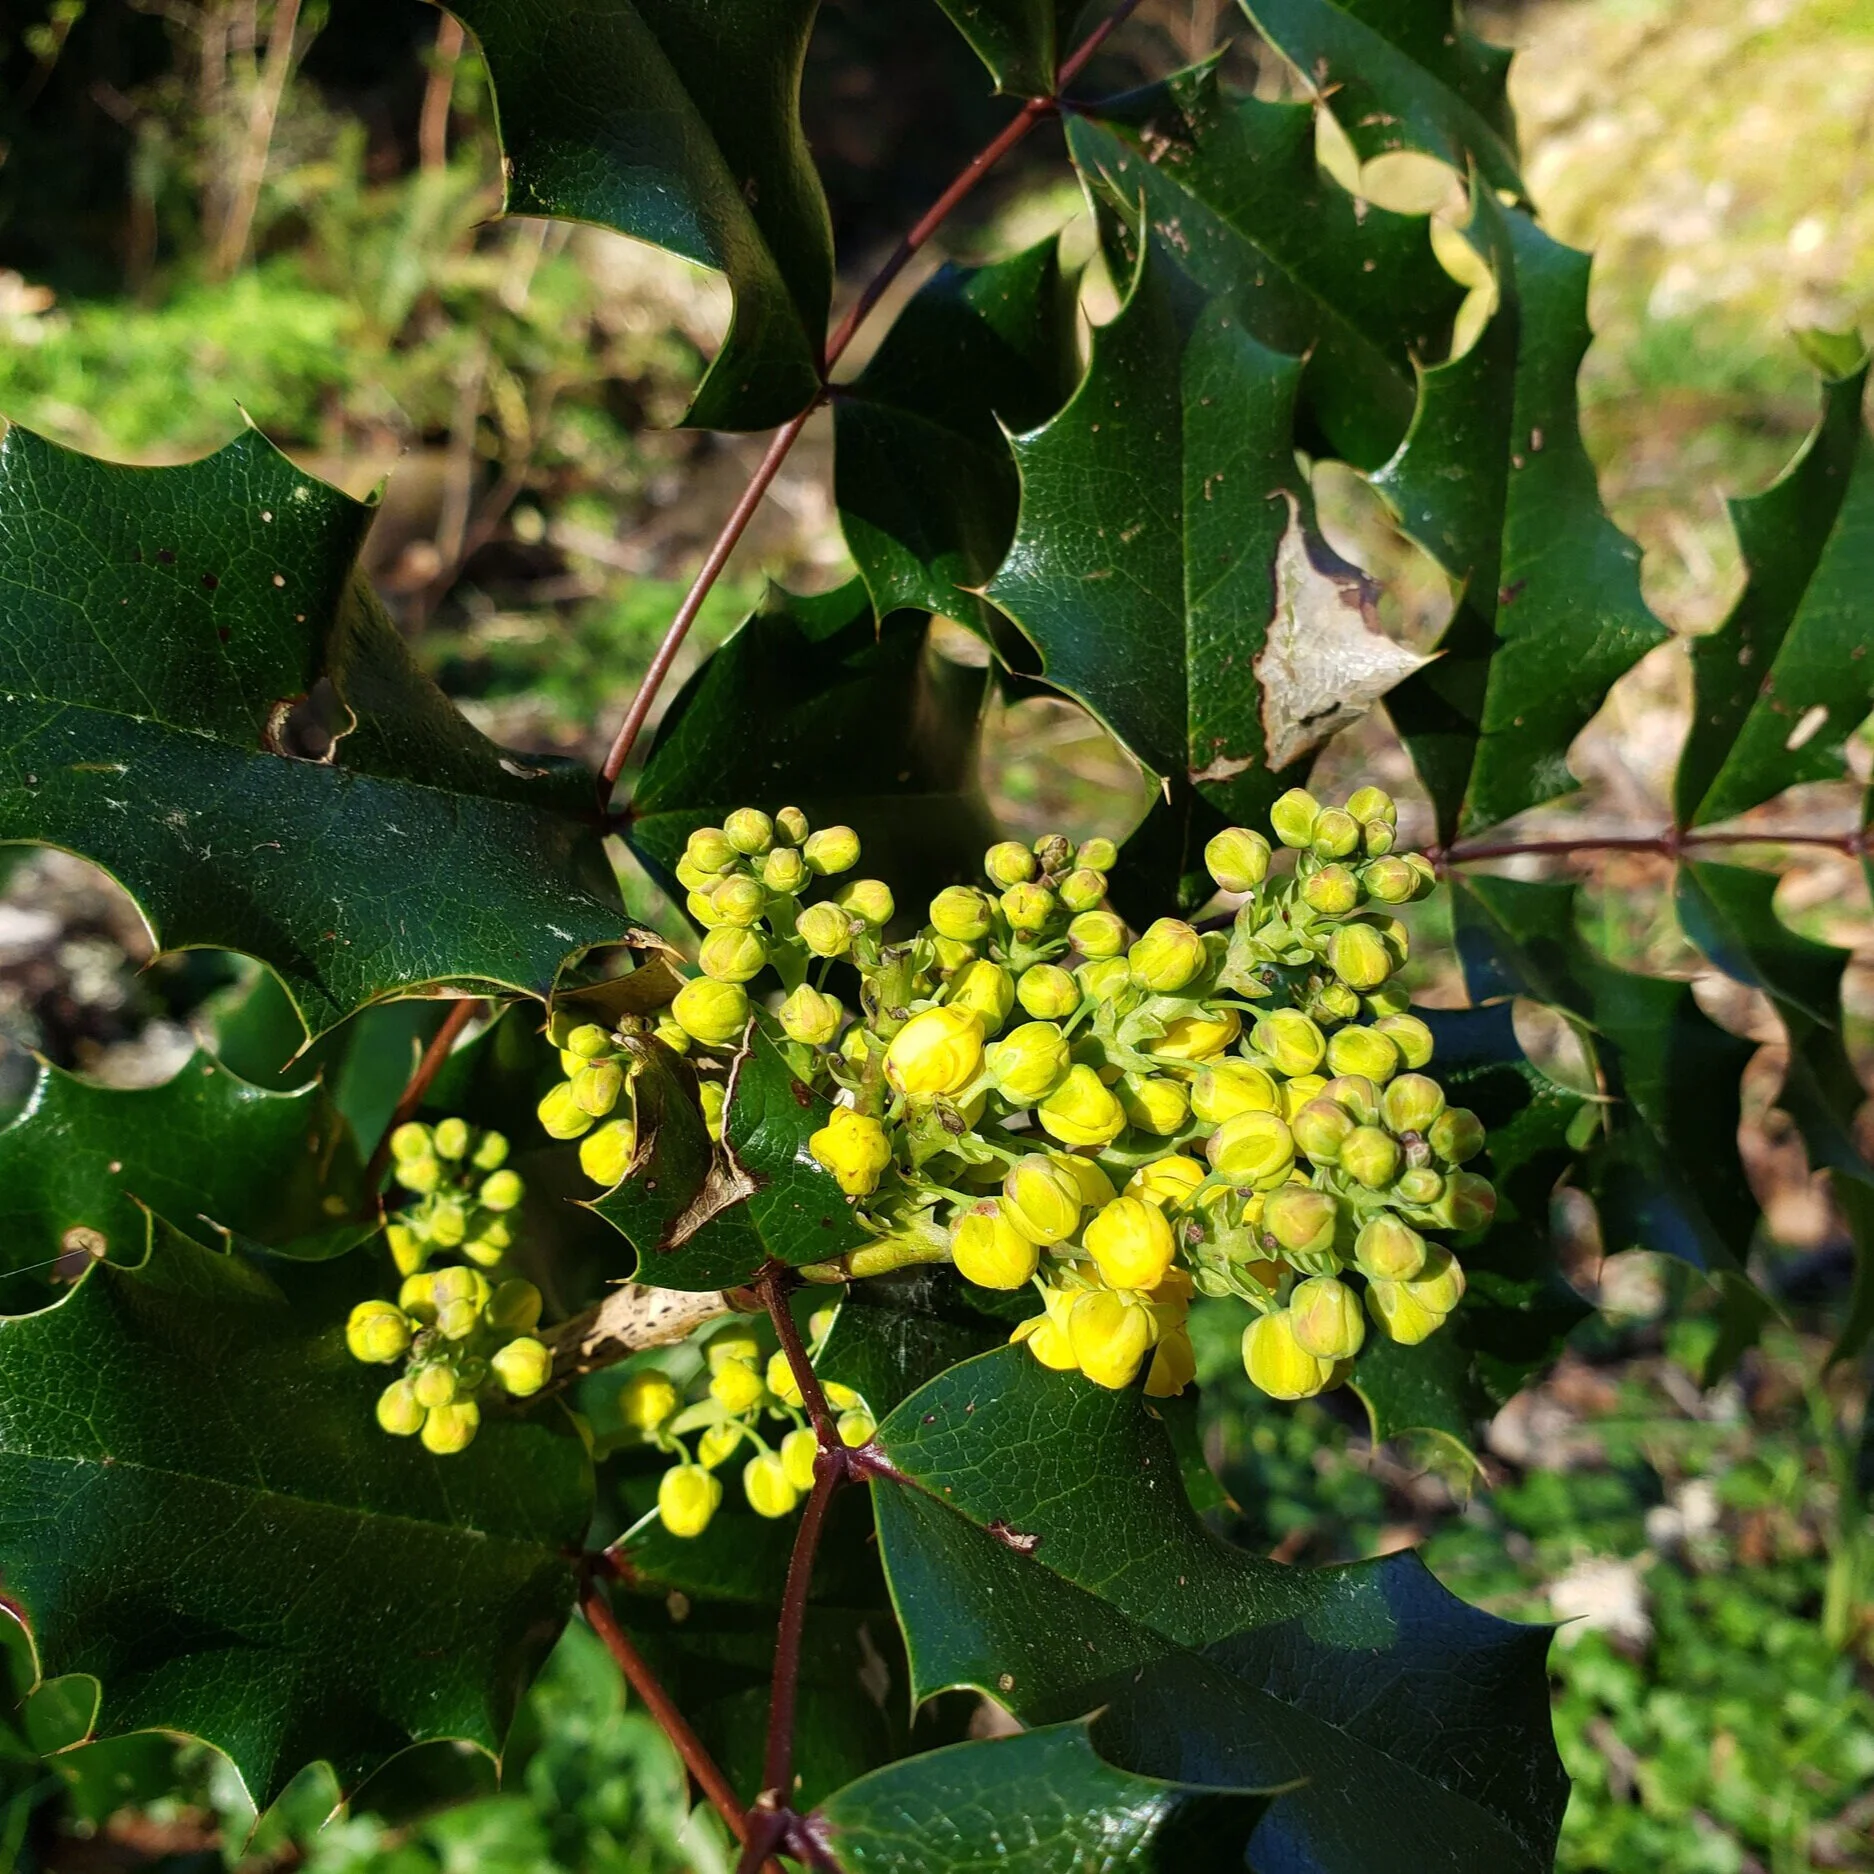
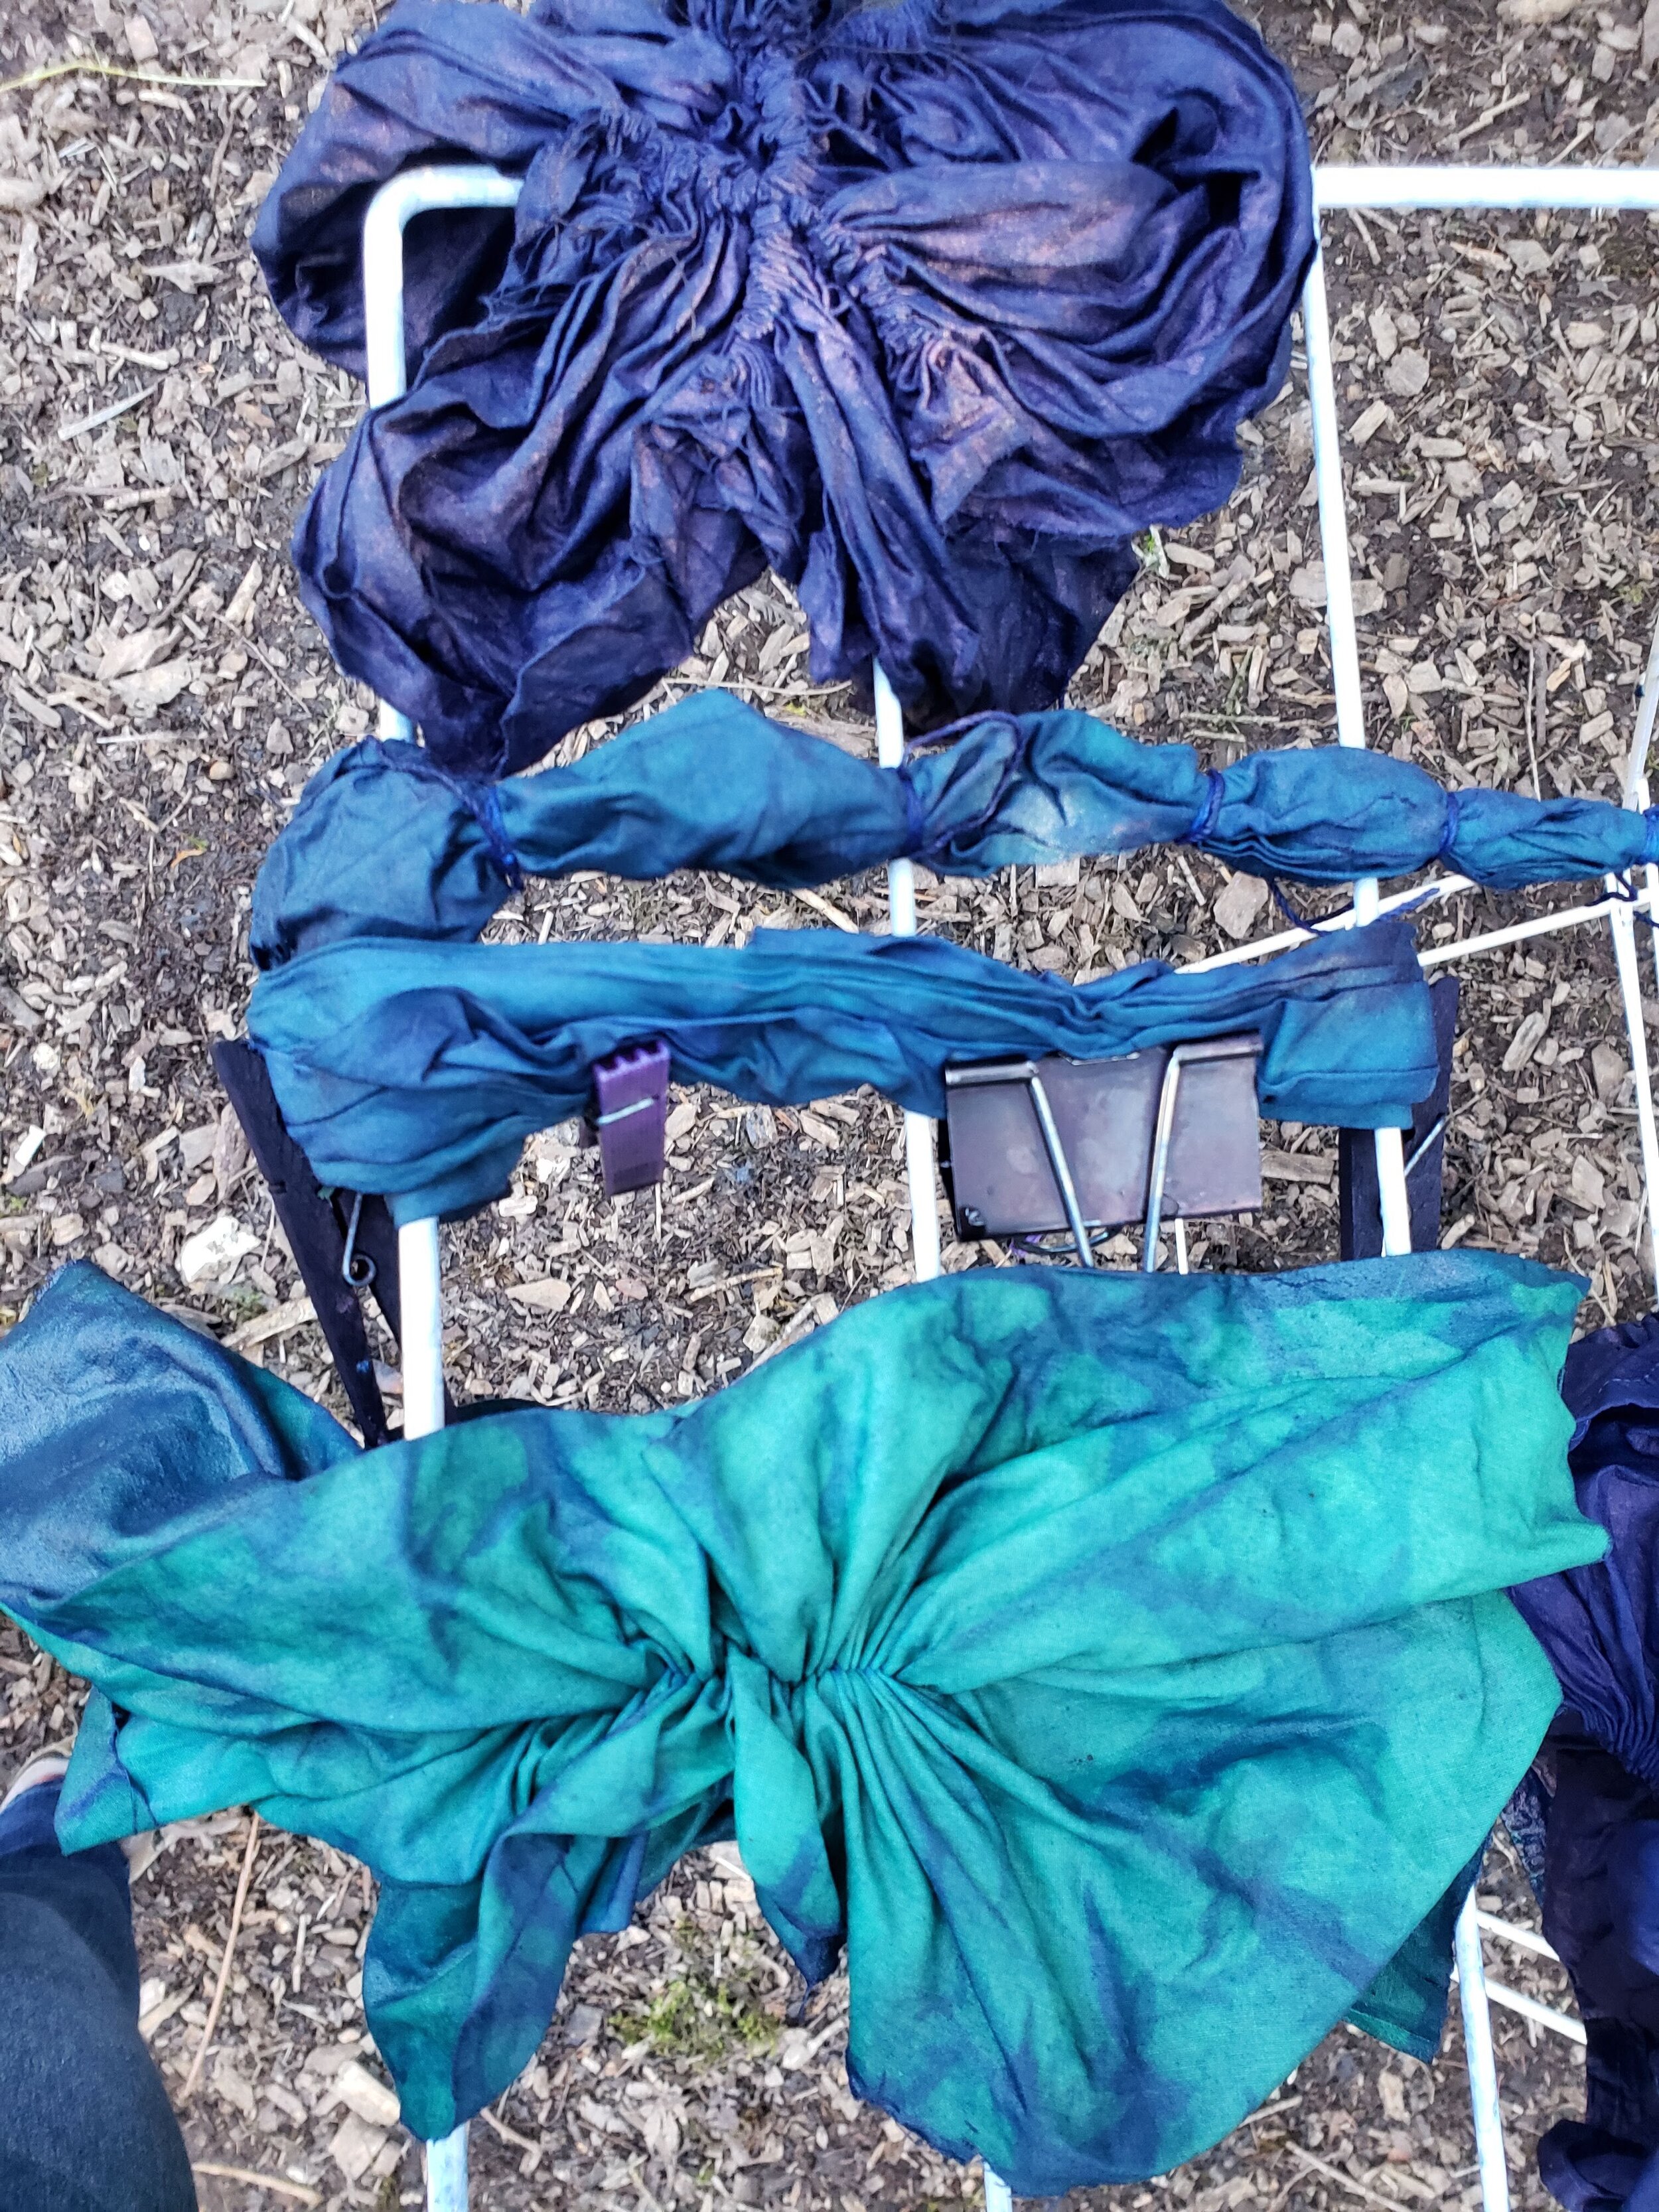
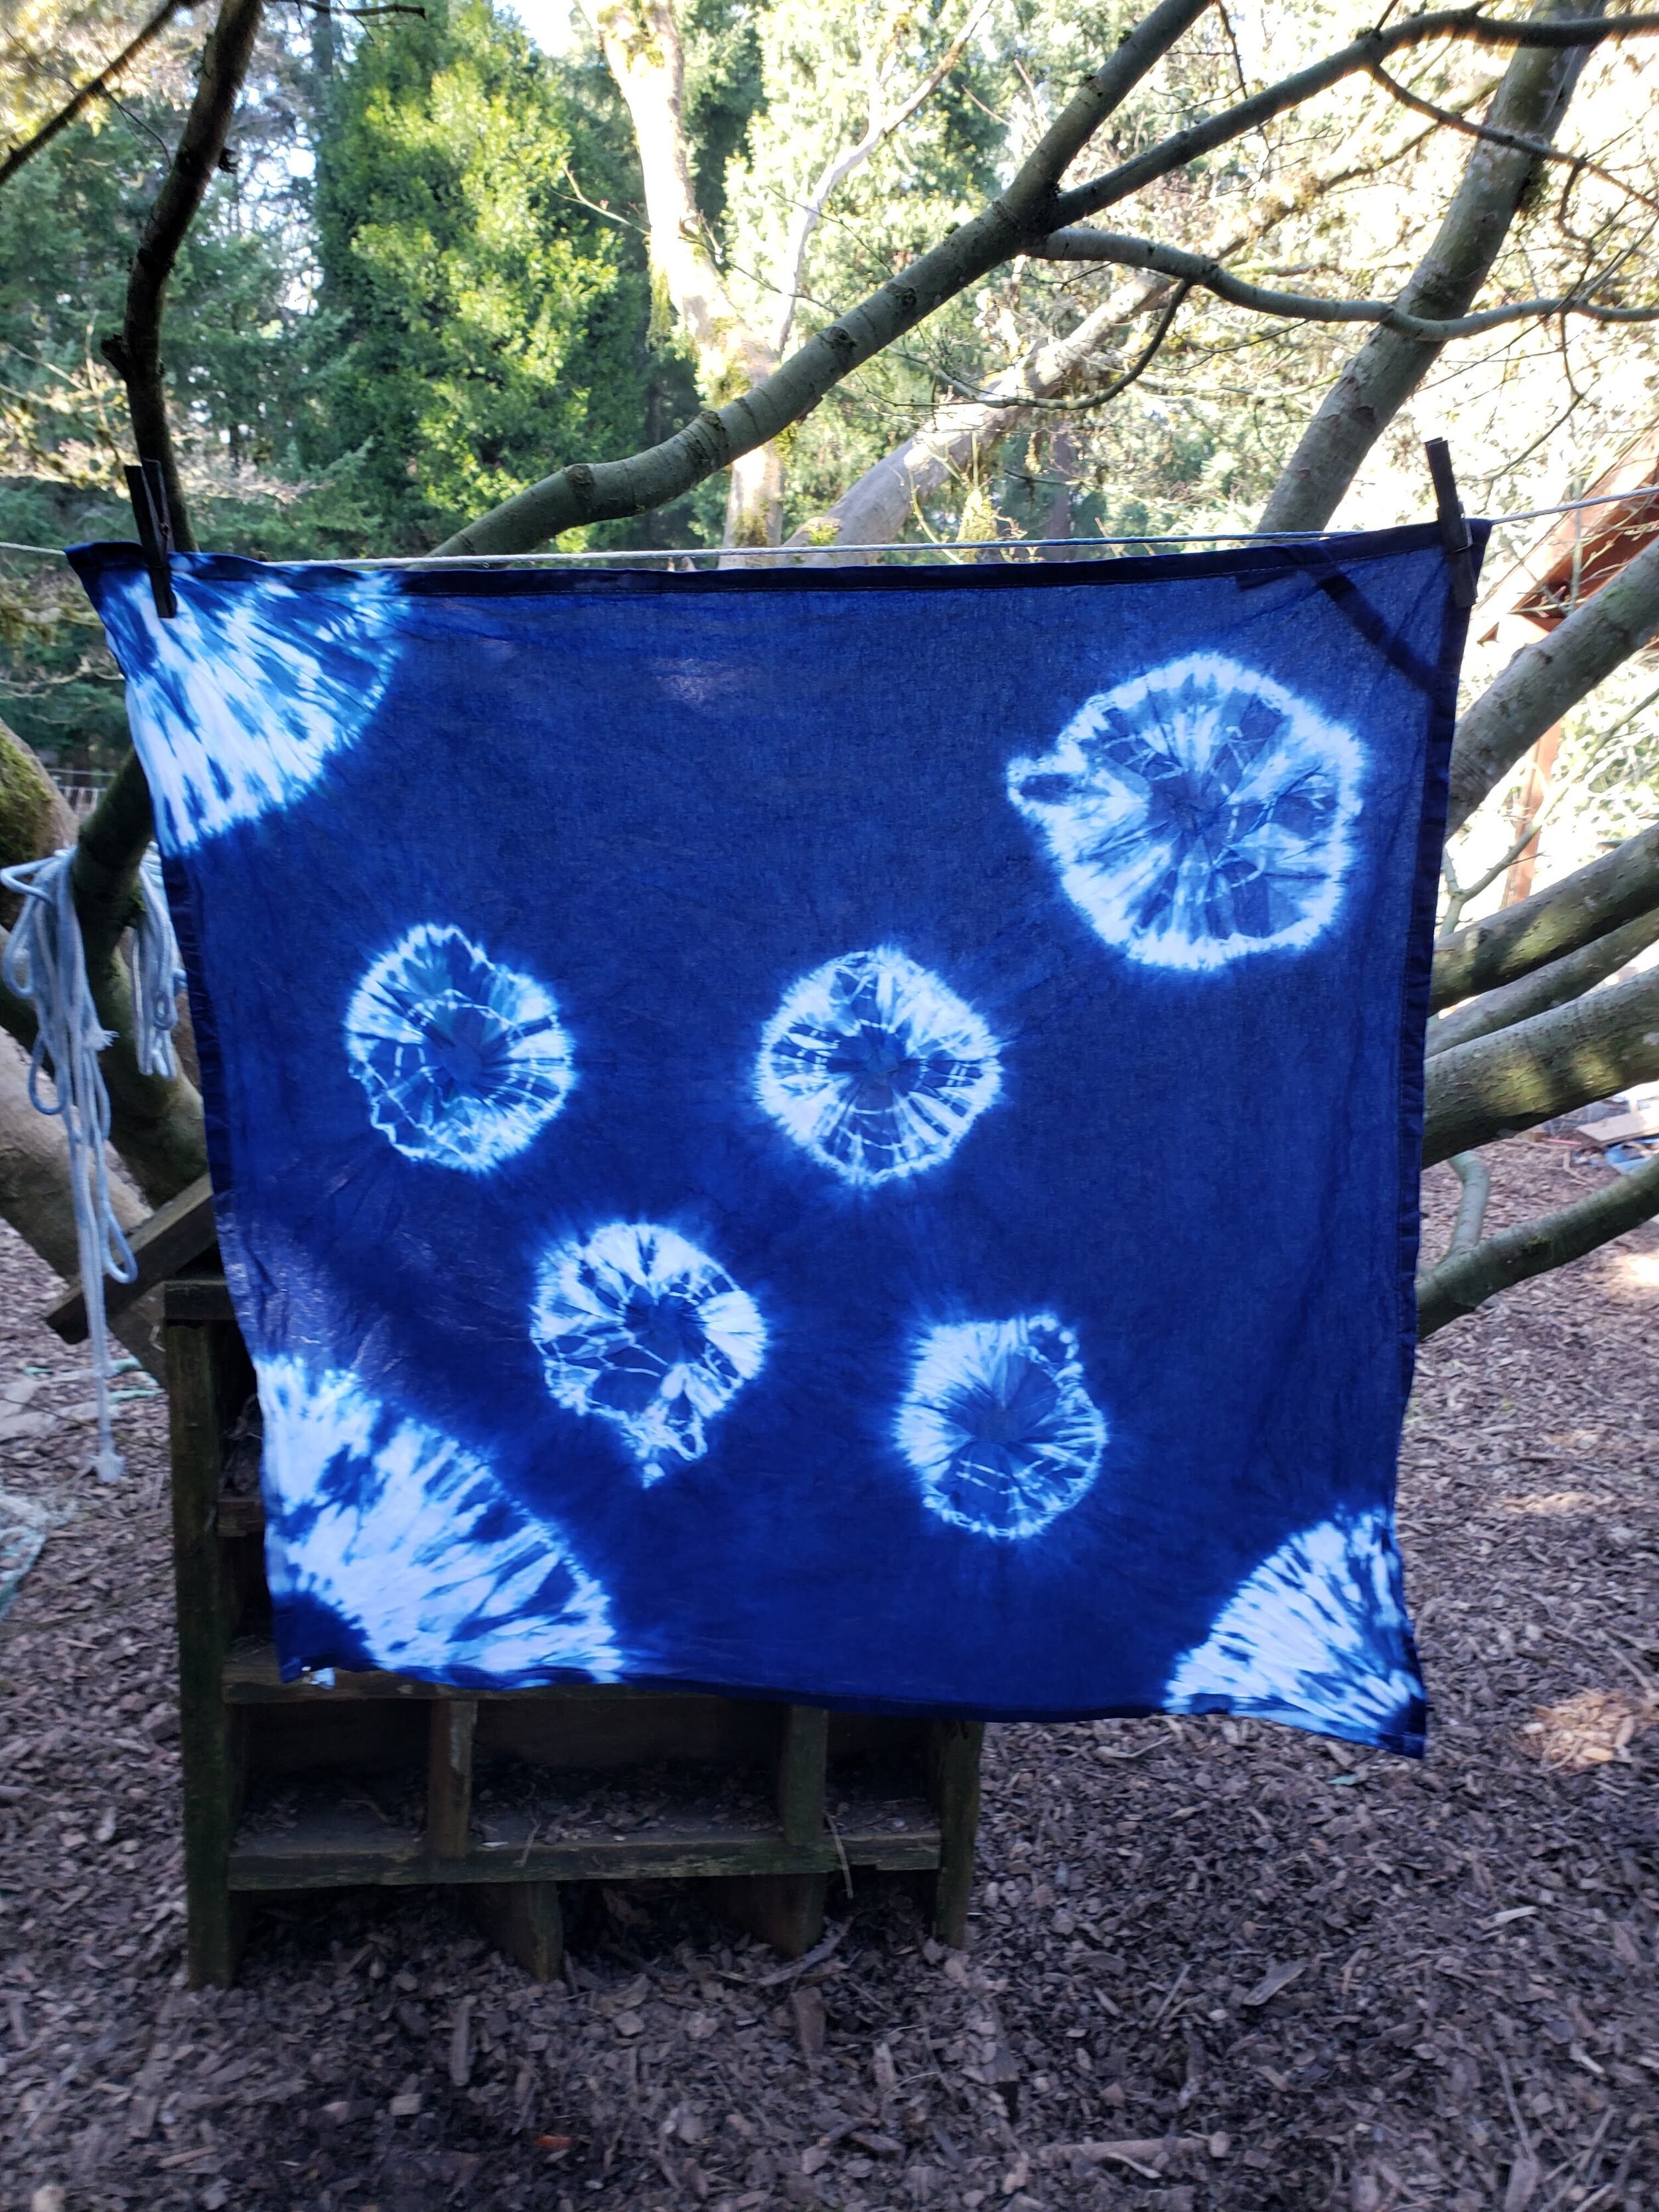
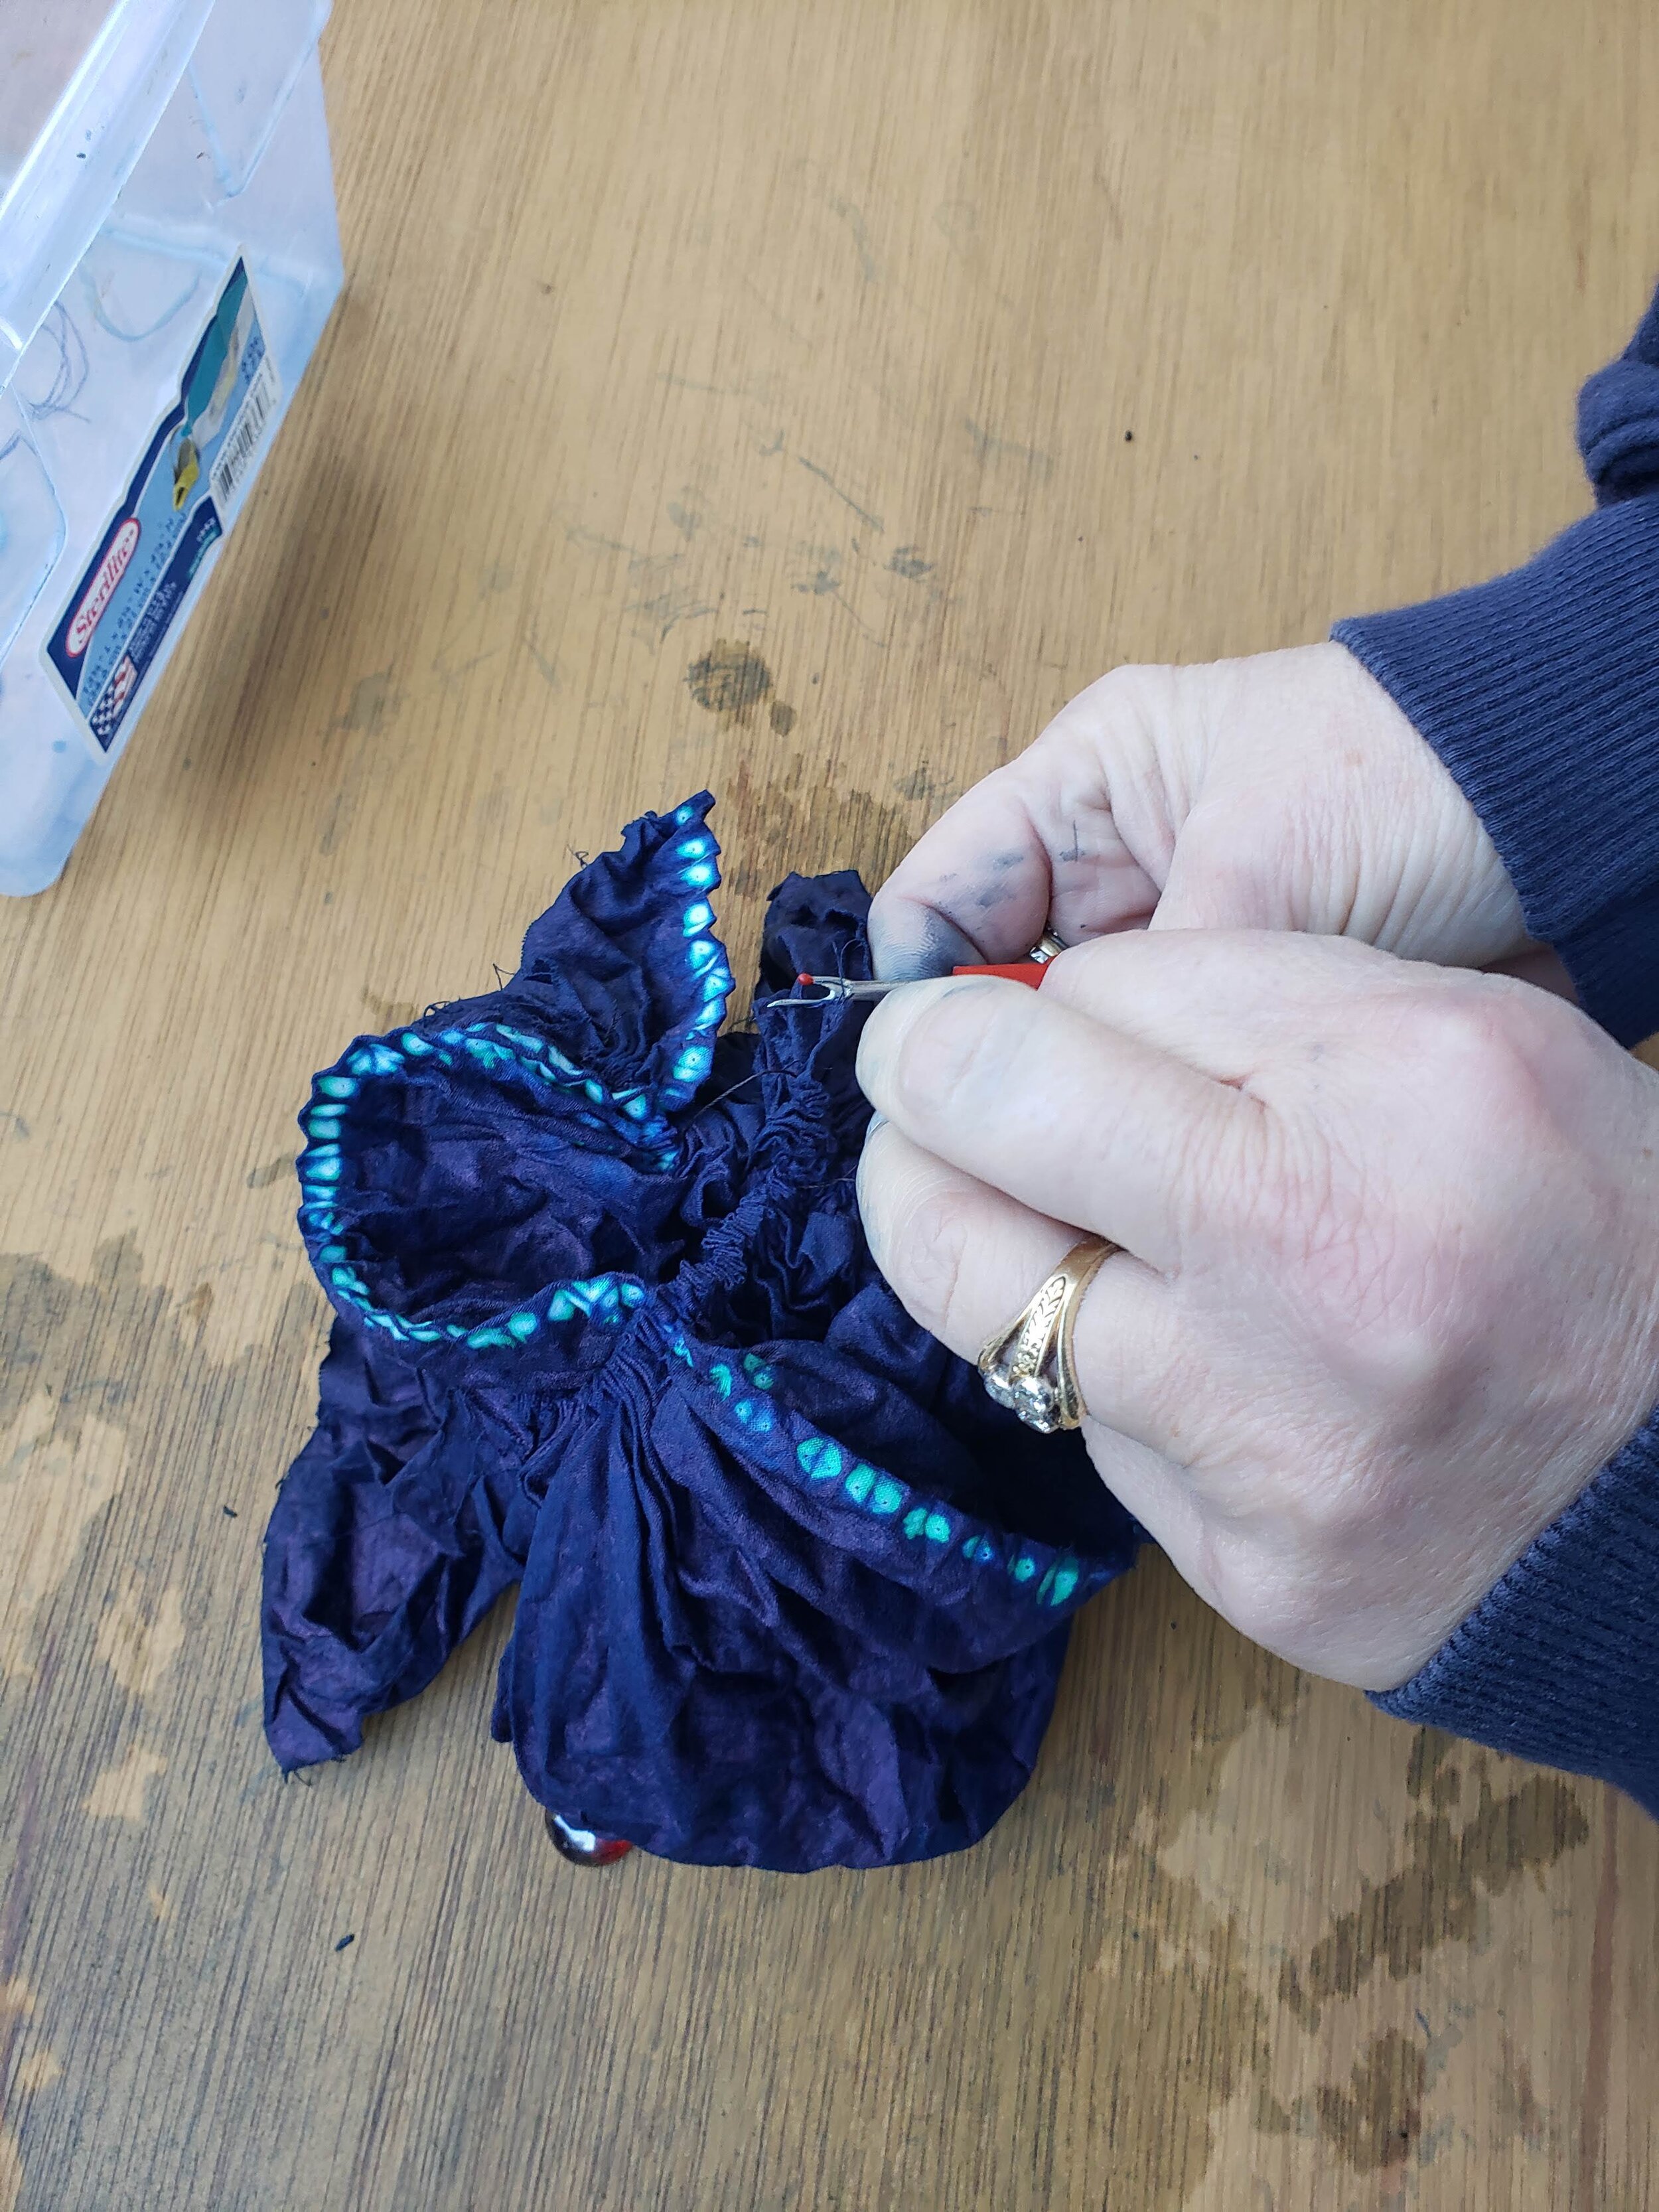
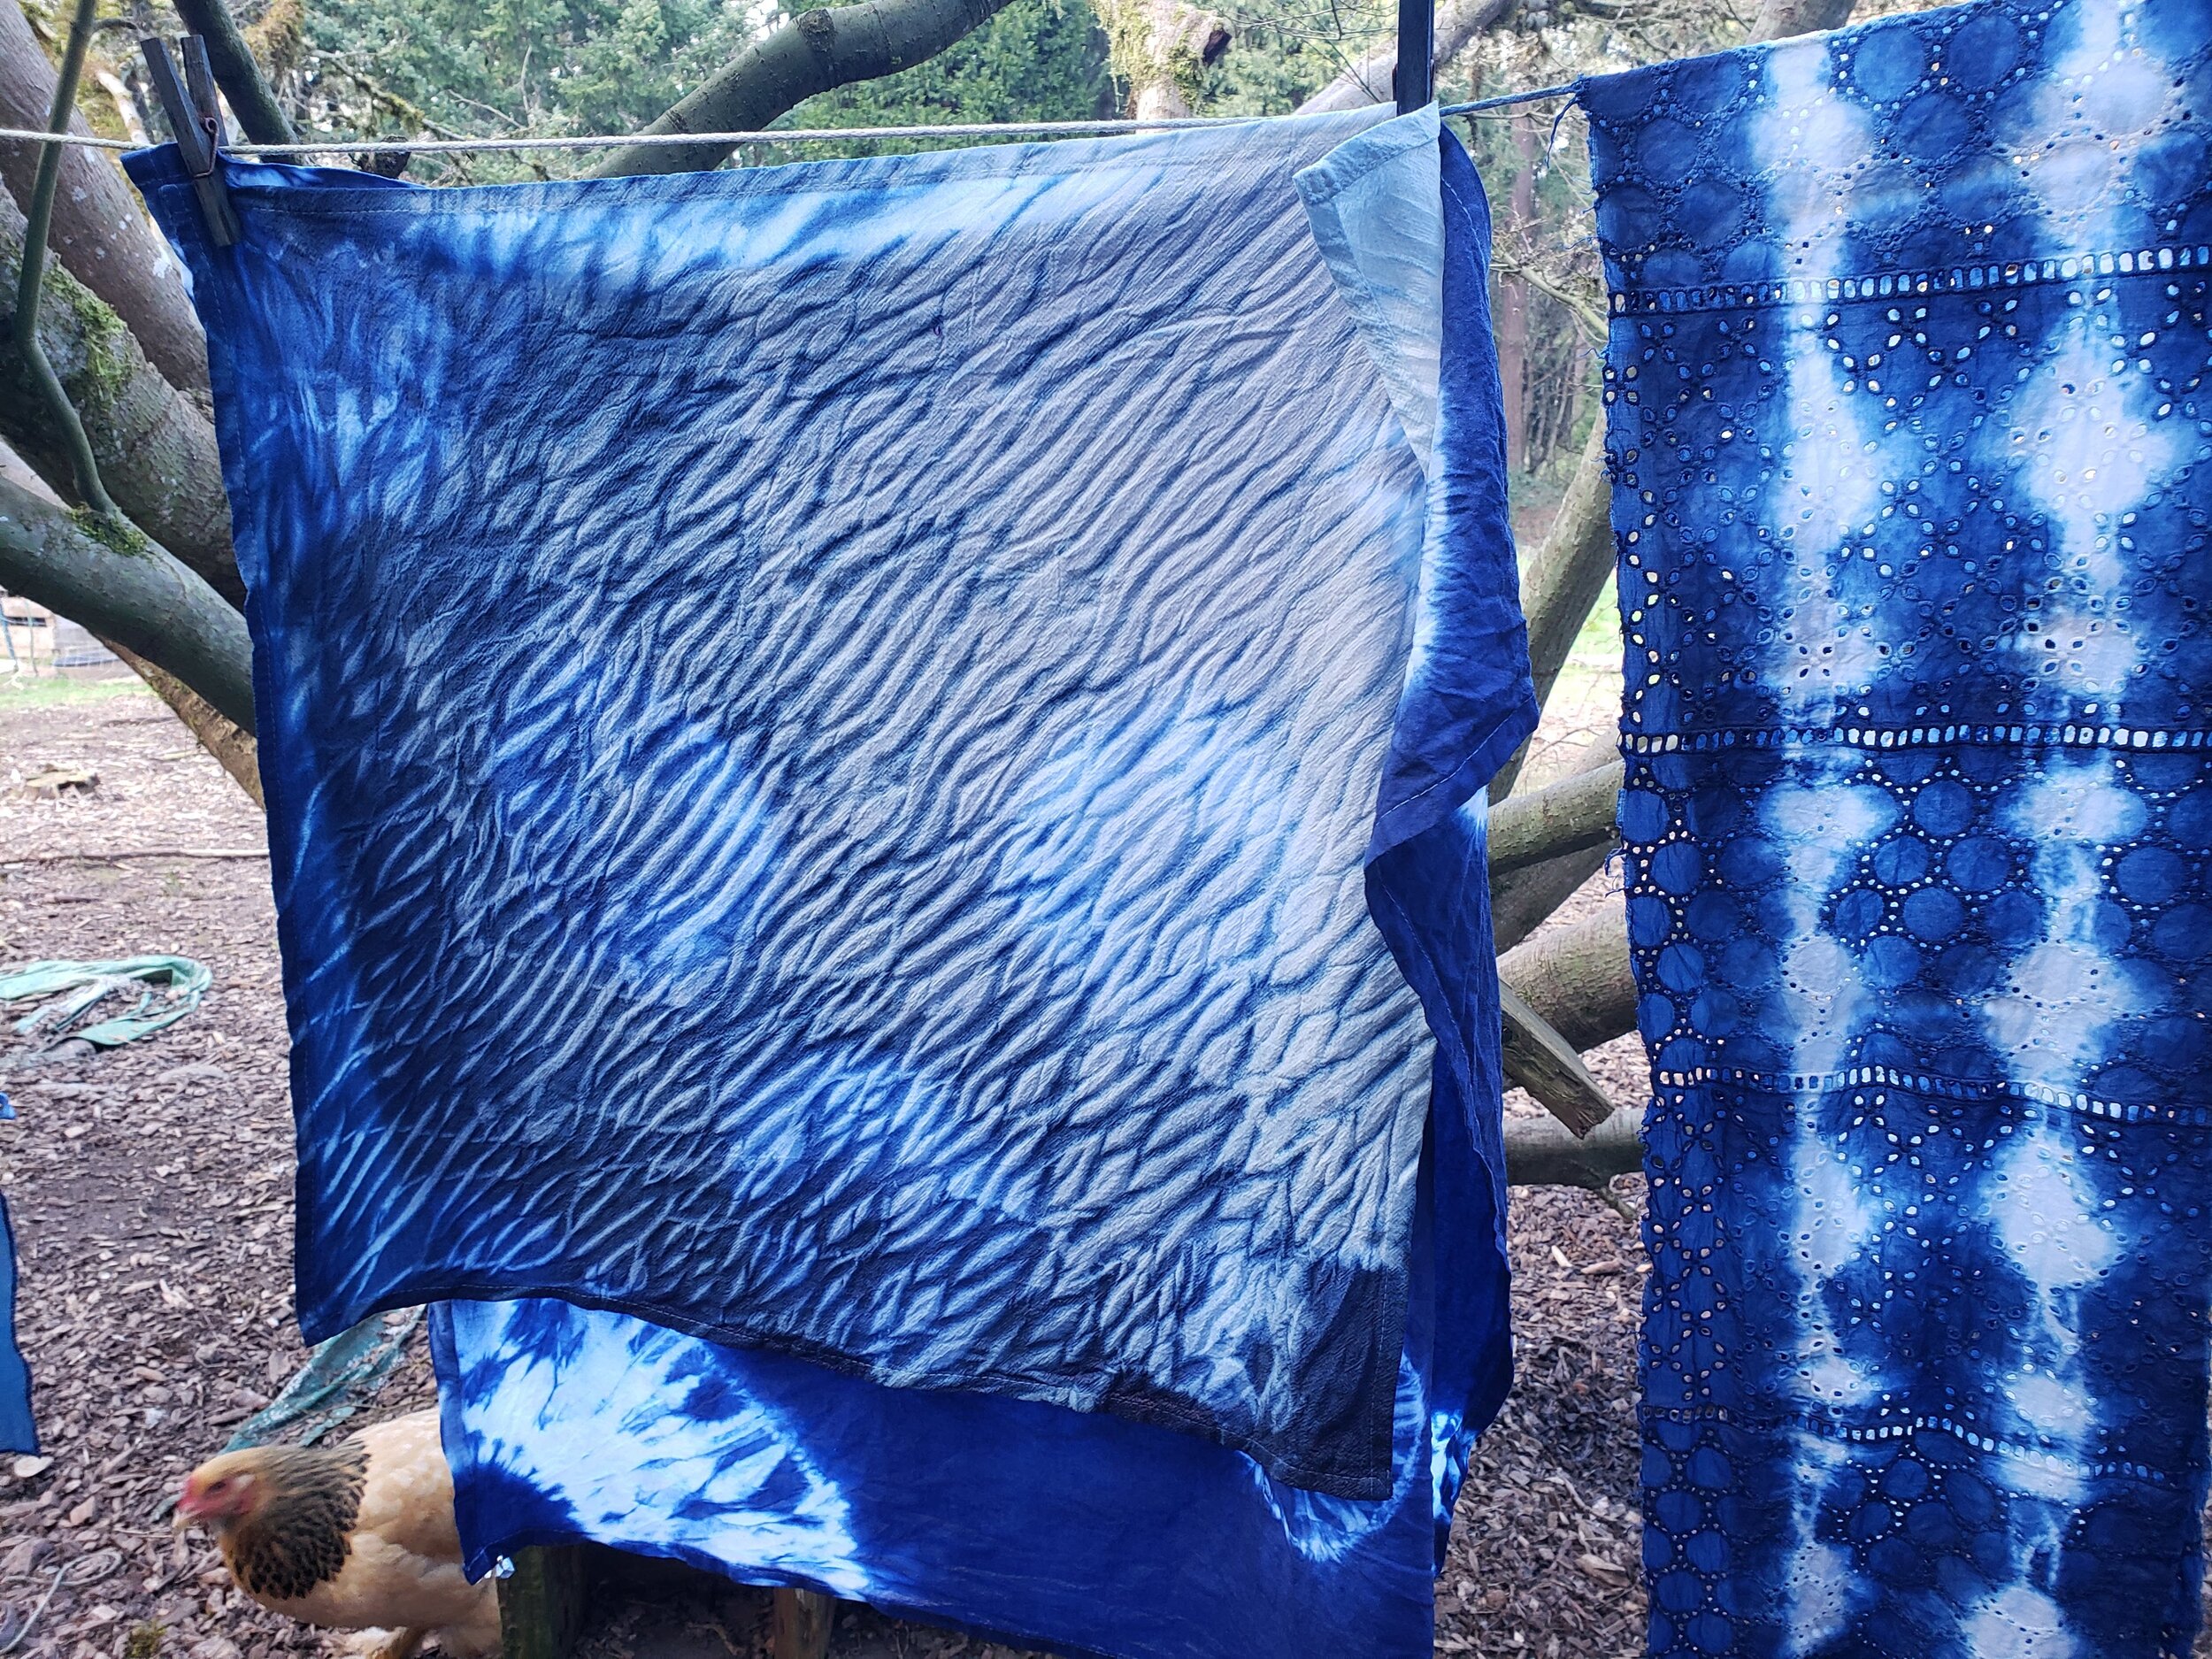
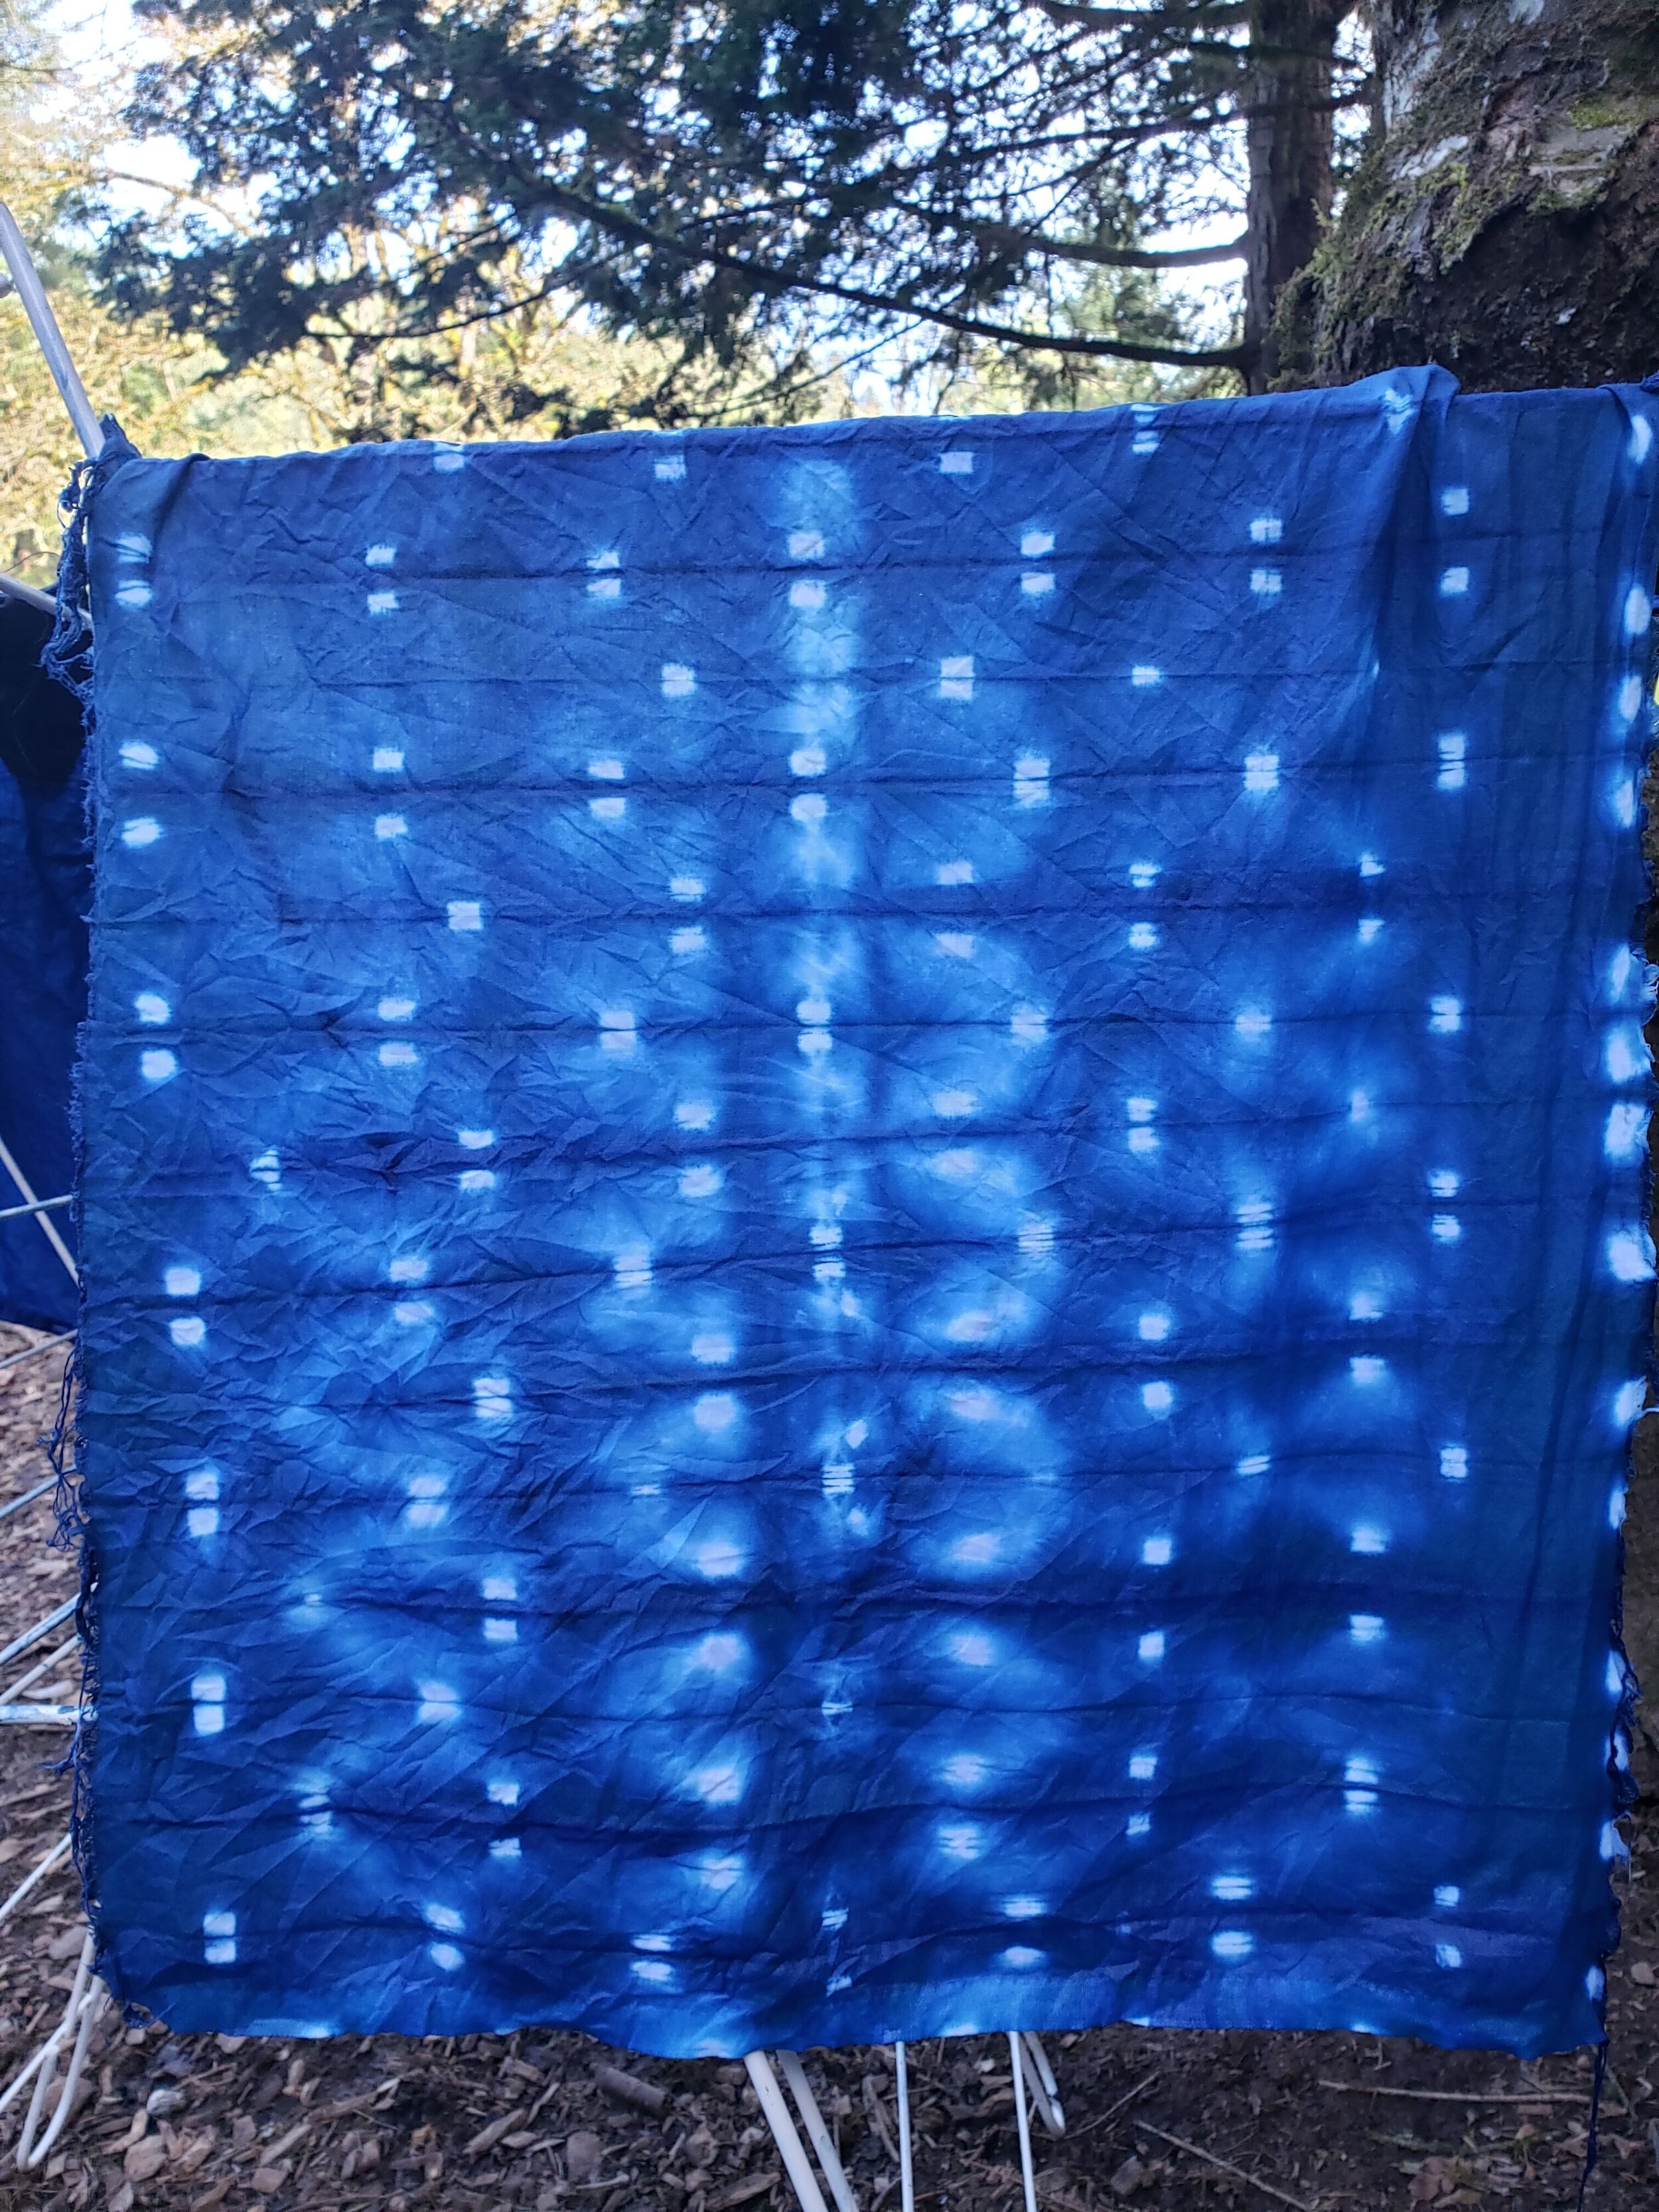
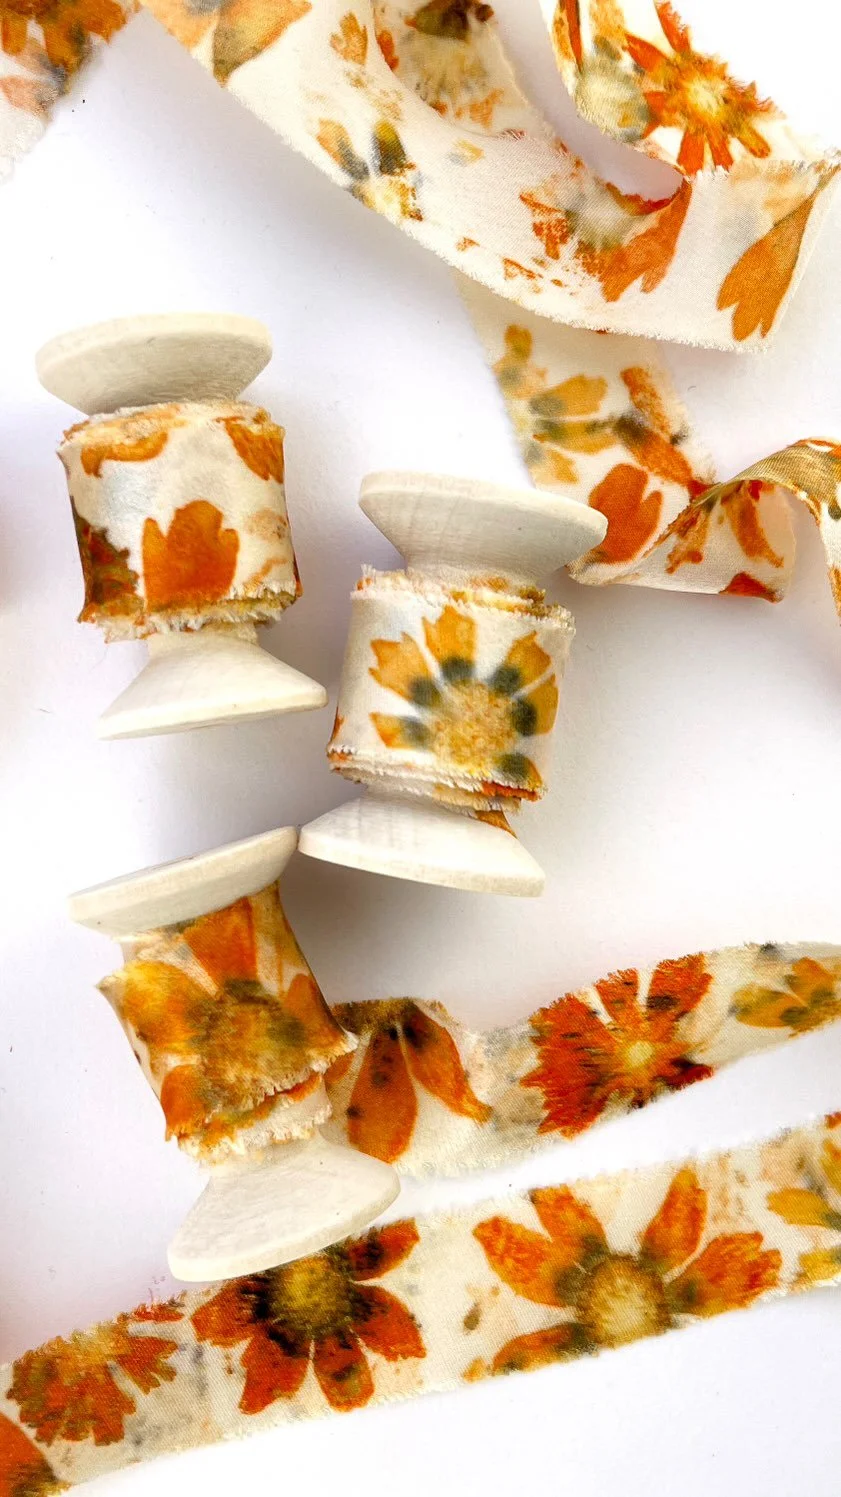
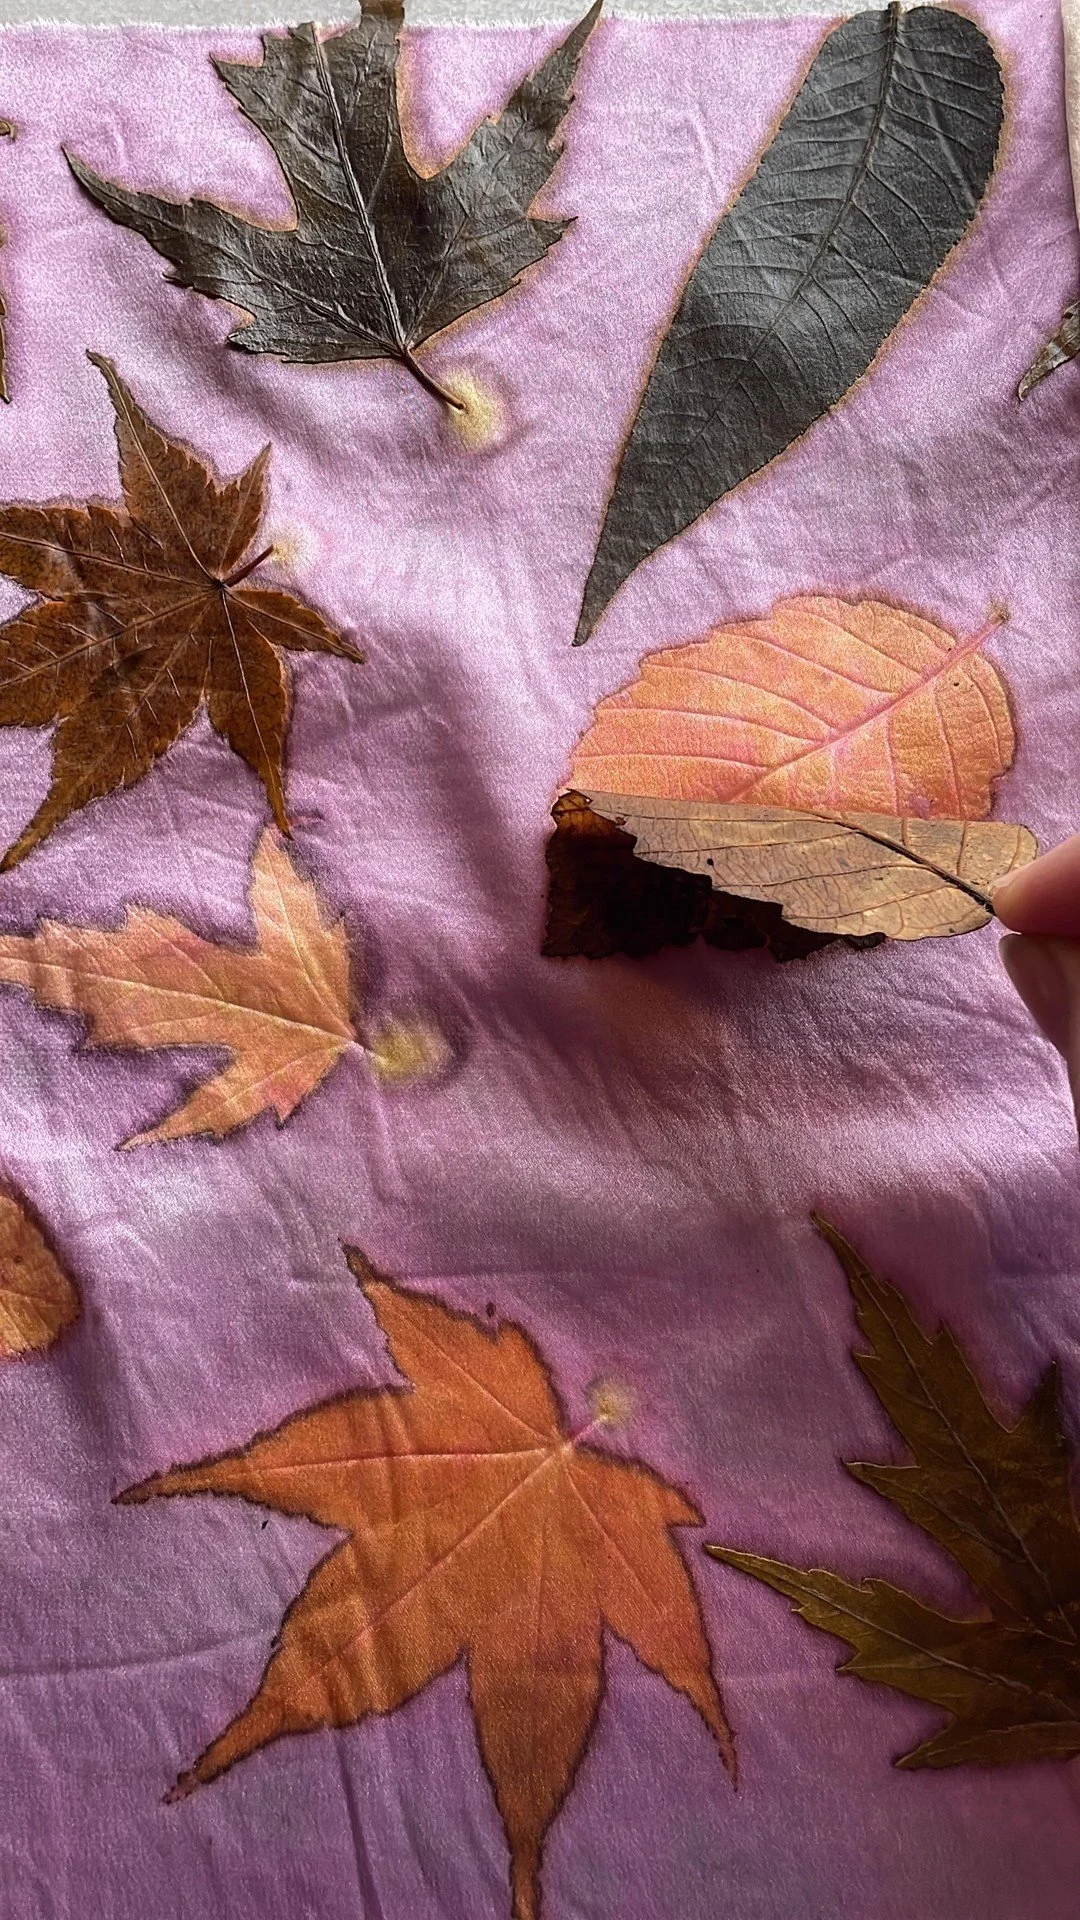
Luckily the weather warmed up quite a bit and it wasn’t so cold when the baby rabbits were born. It was even nice enough to do some fabric dyeing outside. After all the snow and ice I was ready for some springtime colors! These naturally dyed play silks are available at Whimsy Burrow, an adorable kids shop not too far from us.

naturally dyed play silks
plant dyed play silks
naturally dyed play silks
indigo shibori flag bunting

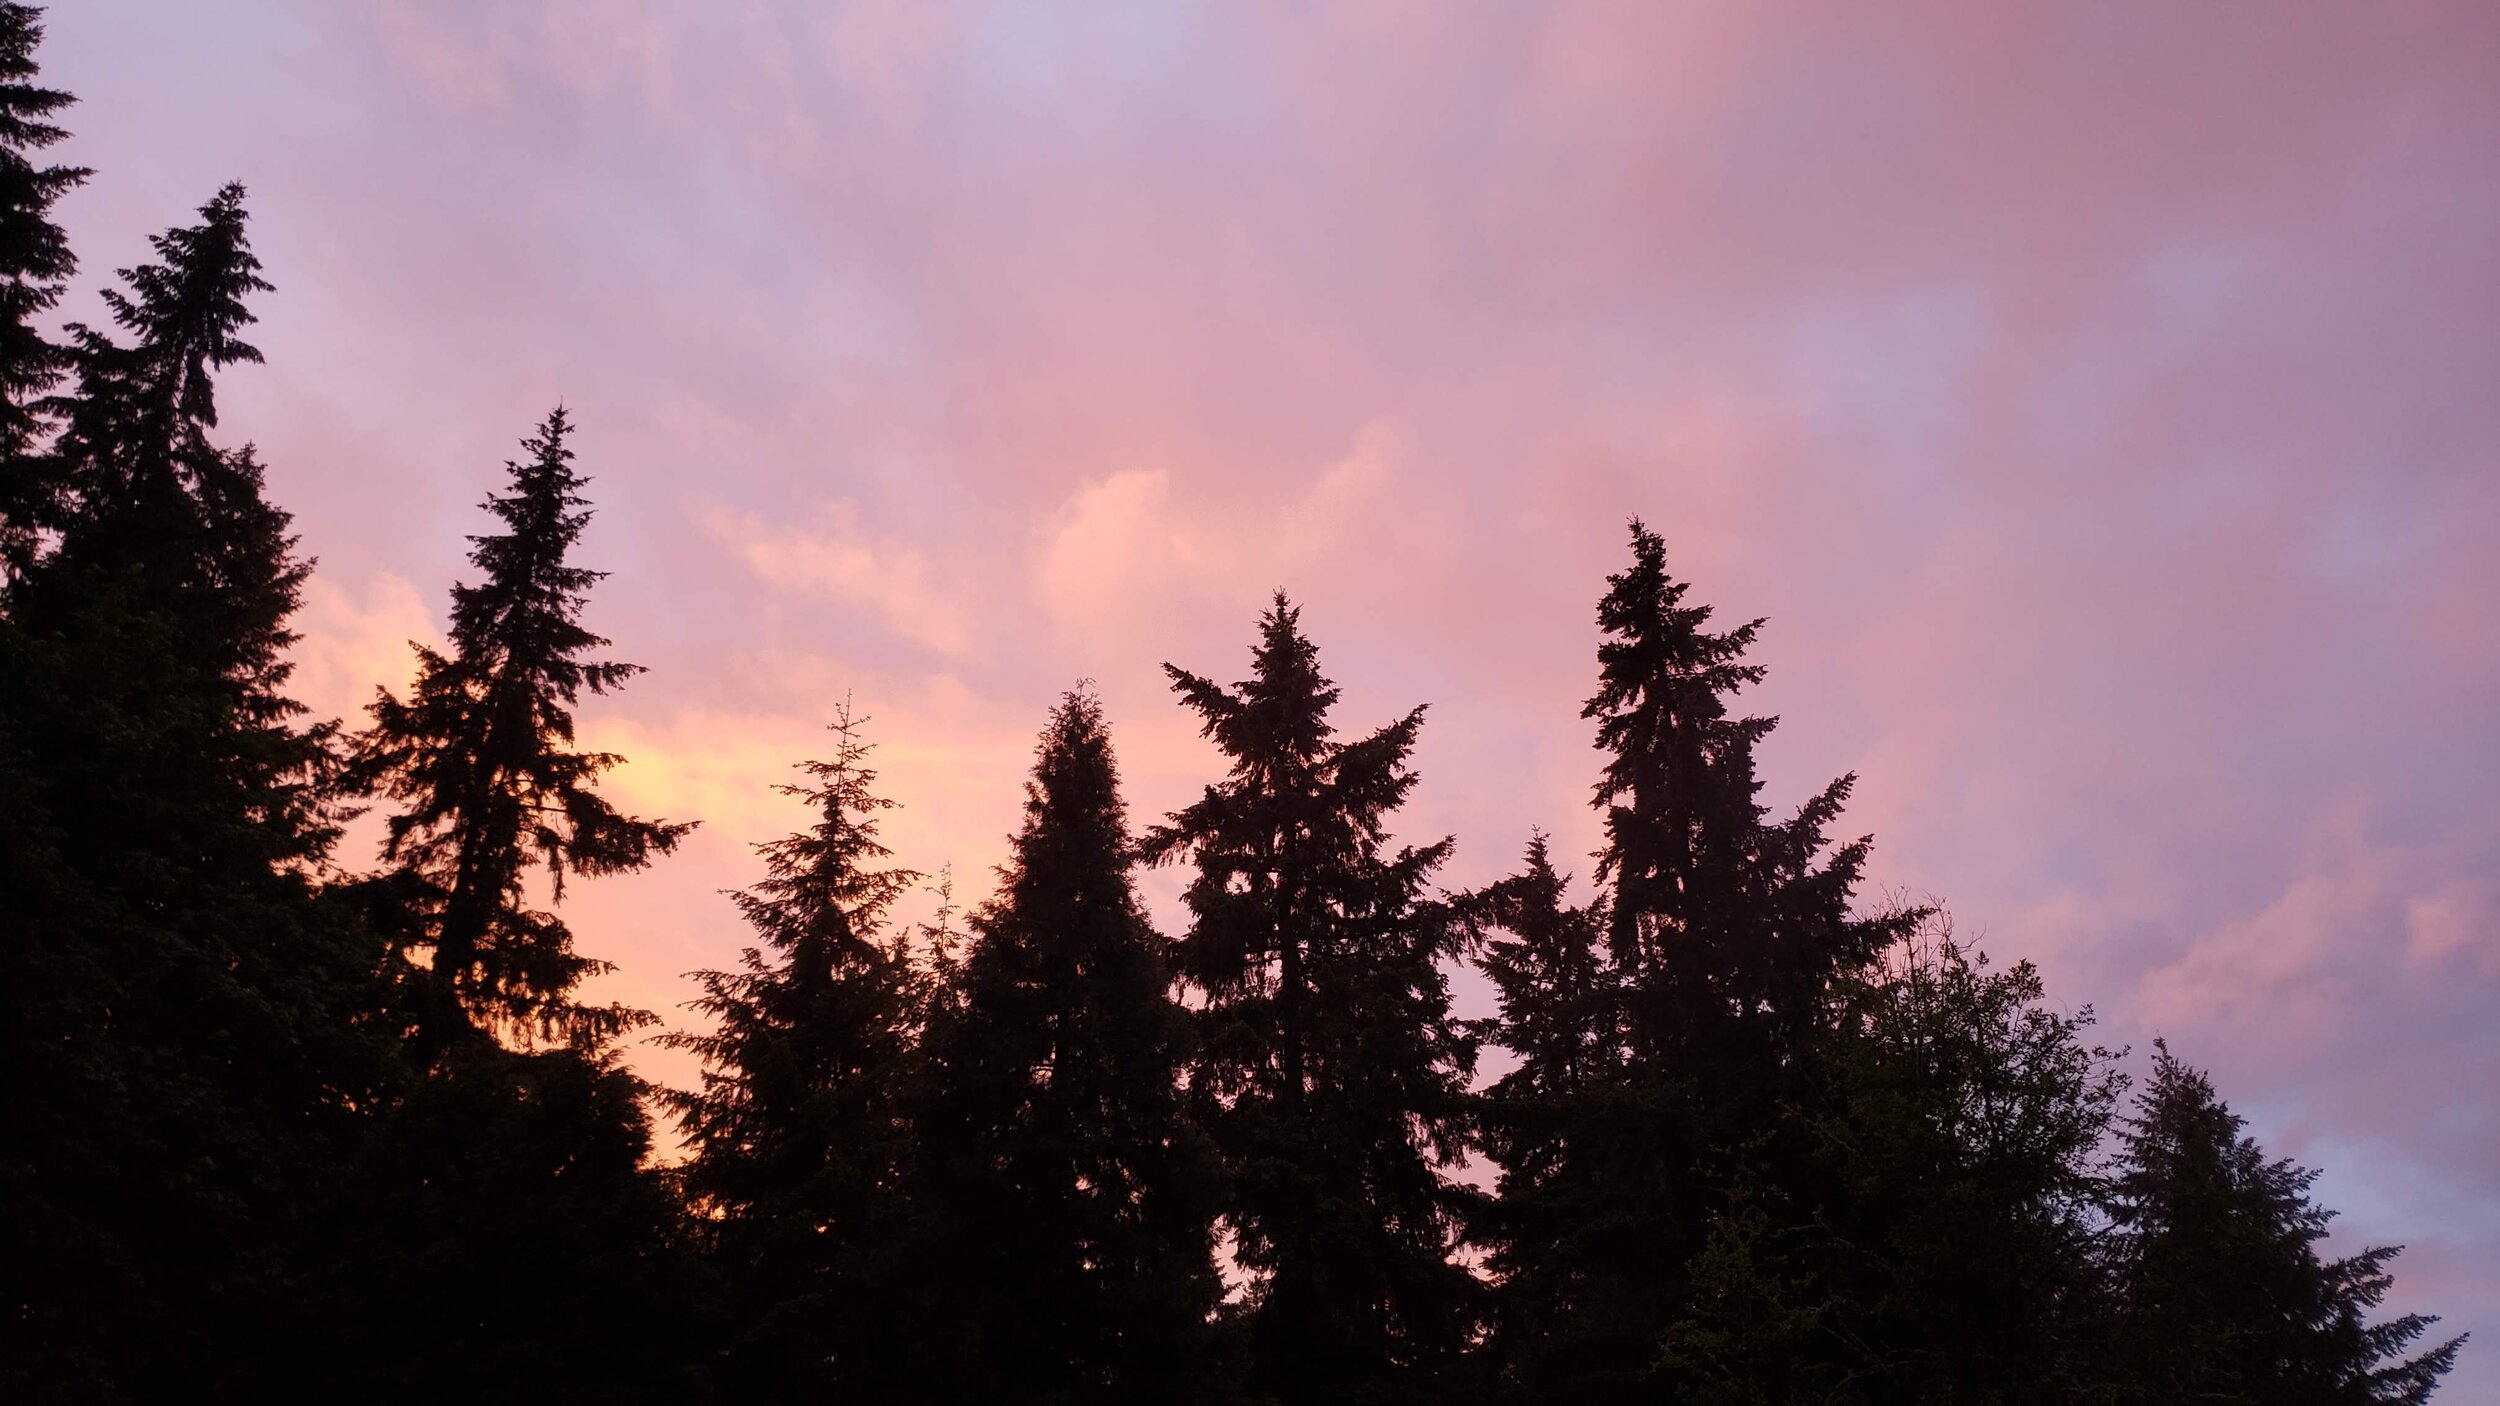
I’ll sign off this month with this picture of an indigo bunting waving in the wind. I sewed this from scraps of fabric dyed by summer campers in years past. It looks lovely against the backdrop of the snowy forest but hopefully next month’s photos will be full of sunshine, spring flowers, and more baby animals.

You can find all of our monthly Forest Path posts and more by clicking here!

And, as always, catch up with us throughout the month on social media.

The Forest Path - January 2021

Helloooo January! Our year started out with the sad news that one of our favorite rabbits had passed away. You can read about the life of our very special bunny, Bramble, in this post here. Thankfully, the rest of the month was not so unhappy as those first days. With the mild weather this winter, there are mushrooms everywhere and ferns and mosses, rosehips and other winter delights make the forest a wonderland of things to discover.

turkey tail mushrooms on a log
20210111_140345.jpg
chartreuse moss on a stump

We had only one afternoon of light snow this month - our only snow all winter! The animals seemed confused and there was hardly enough snow to make a couple of snowballs but it was a beautiful while it lasted. Honestly, this is just about the right amount of snow for me!

We added our own color to the winter woods with a day of indigo dyeing in the beautiful, but cold, January sun. I am hoping to host some small workshops and single-family programs very soon because I really miss sharing this fun process with others!

(The felt in the front of the drying rack was first dyed with other colors to get green and purple when combined with indigo. They will be soon be incorporated into some brand new products for the shop!)

indigo dyeing shibori prep.jpg
indigo dyed fabric drying
indigo dyed sheets

As you can see in the “before, during, and after” dye photos below, when indigo is in the right state for dyeing fiber, it is actually green colored! Only when removing the fabric from the green liquid does it turn blue. It’s like watching a science experiment happen every time.

20210115_134450.jpg
reduced indigo vat green color
indigo+dyed+silk+ribbon+and+lace.jpg
little mushrooms in the moss

We have really been enjoying spotting all the mushrooms in the forest this winter! These little mushrooms are growing out a mossy log that had fallen over a small ravine.

The red fungus below is called “scarlet elf cup” and these days they are the brightest color in the forest. They are small and grow on twigs and little sticks on the ground, so they’re sometimes hard to notice, even with their bright color.

The orange fungus was such a fun, squishy thing to find. It’s called witches’ butter and it’s not very common here in our woods. It feels like rubber. So weird!

scarlet elf cup Sarcoscypha coccinea
witches butter fungus

We also found a lot of cat’s tongue fungus in January! These funny little jelly fungi have a textured underside that looks a lot like the rough underside of a cat’s tongue. You can see that in the first photo. The fun thing about these is that they can be made into candy! A little simple syrup and dehydrating slightly, then dipping in sugar, turns them into sweet little treats with the texture of gummy bears. You can read about how we made these in more detail on this Instagram post.

cats tongue mushroom
Screen Shot 2021-02-04 at 3.13.01 PM.png

After the busy holiday ended, I had some time to put into developing a new kit. These patchwork hearts are hand stitched using naturally dyed fabrics and I’ve put together instructions and kits to sew your own! You can choose between pink and blue themed fabric packs and you can even choose to have organic lavender included to turn them into sachets.

This type of stitching is called boro stitching and is a style of stitching that was traditionally used in Japan to patch fabric. The best thing about it is that is uses simple stitches and there’s no wrong way to do it! No matter how it’s stitched together, the end result is beautiful.

boro stitched hearts
boro stitching
boro stitching lavender sachet
harvesting seeds Japanese indigo persicaria tinctoria
harvesting seeds from Japanese indigo plants

One way I’ve been getting ready for spring is by harvesting seeds from last season’s Japanese indigo plants. They didn’t set as many seeds as expected and some experts are hypothesizing that the smoke from the wildfires in September disrupted pollinator activity and many plants weren’t pollinated as usual.

The process of separating these small, shiny seeds from the dry flowers was a little tedious but very satisfying to end up with a handful of tiny seeds created by my own plants. It is plenty of seeds to sprout lots of new plants this year. I can’t wait to grow them!

The dye-related projects weren’t all indigo this month. I dyed up lots of pretty pink fabric using cochineal dye to test out my brand new natural dye kit. In the absence of teaching classes, offering these kits is the next best thing! I hope to create more as the seasons change and more local dye plants start growing.

cochineal dye macro
cochineal dye mortar and pestle
cochineal dyed pay silks
sword fern

January wasn’t without its storms. The temperature may have been mild but we’ve had a lot of wind and rain and many trees have fallen in the forest. This little tree fell right into the middle of a large sword fern. It flattened the poor fern plant but they are tough plants and this one will surely bounce back.

We had some big animal changes this month! We realized that as lovely as Spruce, our ram, was, we just didn’t have the capacity to keep him. With having a ram, we needed to keep our sheep in two separate groups, and that proved logistically difficult on our small property. We were sad to see him go but since he’s pretty much a perfect ram - great wool, nice horns, good conformation, perfect non-aggressive personality - he found a new home very quickly and we have photos of him looking pretty happy on his new farm on the coat in Washington.

We also re-homed our chickens. It was not an easy decision but we need to rebuild the chicken coop and create a permanent home on the property to keep chickens. We can’t do that while we also have them here so they went to live on a friend’s farm. We have visited them and they have lots of new chickens to get to know and they are very well cared for. We miss Tiny, Flopsy, Shellback, Storm, Mama, and all the others but we’ll get chickens again in the future.

shetland sheep ram
free range chickens barred rock
bigleaf%2Bmaple%2Bleaf%2Bbud

Despite our dusting of snow, we could feel a hint of spring at the end of the month. Lillies are starting push up from the ground and the leaf buds of the bigleaf maple are starting to swell. Indeed, the end of January marks the halfway point between winter solstice and spring equinox. Our sheep are enjoying the grass that’s still growing. Just look at their happy mouthfuls of grass in the photo below!

shetland sheep grazing in winter.jpg
20210119_110651.jpg

I’ll sign off this month with this picture of Peedie, taking his role as supervisor very seriously.

You can find all of our monthly Forest Path posts and more by clicking here!

And, as always, catch up with us throughout the month on social media.

Bramble's Memorial

2021 entered with sadness here on the farm as we discovered on New Year’s Day that our sweet French angora bunny, Bramble, had died during the night. He was only three years old so the reason for his death is a mystery to us. He had no sign of injury and in the days and weeks before. He did not appear sick and had been acting normally, as well as eating and drinking as usual. Just before Christmas I groomed him thoroughly and he was in great condition and didn’t even have a single mat in his fluffy angora wool. It is very frustrating to not have a reason for his death but we are comforted in knowing that he had the best 3 1/2 years that a bunny can have.

We got his as a baby from a 4H rabbit raiser. We chose Bramble because we were told that of all the bunnies in the litter, he was the one who hopped right to the open door of their cage, wanting to be picked up every time the door opened. He stayed that friendly for his whole life, making him the perfect bunny ambassador.

French angora rabbit eating leaf

He loved having so many visitors to love on him and feed him snacks. As I was going though photos of the last several years, I realized that 80% of my photos of Bramble are of him eating delicious piles of weeds and flowers fed to him by kids at our camps and homeschool programs. He sure loved to eat! He made friends with everyone - from our free range chickens to hundreds of strangers that he met as our “outreach bunny” at events. He enjoyed hopping around in the sunshine and flopping down in the house for a nap.

Rabbits have always been part of our lives and Bramble really was a one-in-a-million bunny. He was a gentle giant, with a friendly, curious personality. We are so thankful for all the kids who grew to love him alongside us and we know there are many who share our sadness. He is already so missed but we are glad to share memories of him with so many of you!

Here’s a short video with more photos of Bramble, including adorable baby photos!

Celebrating 3 1/2 years with our sweet French Angora rabbit.

The Forest Path - December 2020

Here we are in the final month of this tumultuous year. When I started creating these monthly photo blogs at the beginning of the year I imagined it filled with photos of summer camp fun and natural dye workshops. It was to be partly a record of the animals and seasonal changes in the forest, and part celebration of our relationships and shared experiences with the community. Instead, it’s been a record of our mostly solo journey through the seasons and I’m ever-so-grateful for the myriad ways we have to connect with you virtually.

bright clear winter day in the forest

December began clear and bright, looking more like autumn than winter but by the end of the month we were definitely feeling the winter season.

autumn leaves and boots
foliose lichen
evernia lichen

We moved some fencing around and gave our boys some forested spots to graze. Even our biggest, woolliest sheep look dwarfed by the forest. The love maple leaves and I though they’d eat the leaves from the ground but they were more interested in the other plants.

shetland sheep forest grazing
sheep grazing in the woods
winter woods dark and mossy.jpg

Wood, chopped and stacked for winter heat is a big deal around here. It felt great to fill the woodshed up but I really just want to take a minute to admire this old structure that we inherited and it's "living roof" of mosses and licorice ferns. I think the roof is more plants than wood at this point! Last year we said it was the last winter we'd have it but here it is, still hanging on. I love it so much and will be so sad to see it go but it really is falling down. The wood leaning up against the front is helping hold it together!

stacked wood for winter
rustic woodshed in the forest
cabin Christmas tree

A blessing of the pandemic was the slowing down of our usually frantic December schedule. With no events, holiday festivals, or travel, we put up our Christmas tree remarkably early, at least for us. This felt symbolic of so many things and I’m sharing it here as a reminder for myself in future years that having slow days at home and taking the time to enjoy holiday decorating (instead of our usual mad dash to decorate the tree the week before Christmas) is important and necessary. Kids and cat approved of the tree!

christmas tree
kids and cat by christmas tree

Despite the gray and brown colors that dominate the winter landscape, there is still bright green to be found, both outside and in. Look at how closely this silk thread, dyed with goldenrod and indigo, matches the bright grass! I love that even the brightest colors that I create in my natural dye work has a counterpart in nature. These beautiful colors of embroidery floss were dyed using madder root (the first two), dyer’s polypore mushroom, goldenrod + indigo, indigo, myrobalan, dyer’s polypore mushroom + indigo.

naturally dyed green yarn
rainbow naturally dyed embroidery floss

Other color to be found in December are the calendula flowers. I am so surprised that they are still blooming! I’ve been told by others that in the right weather, they bloom year round but I’ve never experienced that until this year.

The little flowers on the blue fabric are Japanese indigo flowers. If you look closely you can see shiny brown seeds inside some of the dry flowers. The plants don’t survive frost so they are done growing and blooming but I saved many of the flower stalks and will collect the seeds soon. I am excited to grow indigo from my own plant’s seeds next spring!

calendula+blooming+in+winter
japanese indigo seeds and flowers
dried+orange+slice+garland.jpg

We welcomed in the winter solstice with a sunshiney garland made from dried orange slices and cranberries. We strung it up across the deck where the sun coming though the trees made it glow like dozens of bright, shining suns. With the stark, winter forest behind, they served as a beautiful reminder of the lengthening days that are to come.

winter+solstice+celebration
shetland sheep moorit  ewe lamb

The kids got these fabulous “Fleece Navidad” shirts for Christmas and we attempted a photo shoot with our lamb, Coral. As you can see, she was not very cooperative because putting a harness on her causes her to forget how to walk. She needs some more practice in the spring! We did get a few cute pictures and let’s take a minute to look at how pretty her wool is! It’s just a few months until we’ll shear them and I can’t wait to see what her soft lambswool looks like when it’s washed clean.

Moorit+shetland+lambs+wool+crimp
broken+black+holland+lop

A new bunny joined us this month! This is Inky, named for her cute black splotches. Something about the spots on her face make her look like she has a bit of a grumpy expression but she’s actually a doll. She loves to sit snuggled up on blankets, getting petted, and eating carrots. She’s a Holland Lop and joins Squid, the male we got last summer. It’s possible that there will be Holland Lop babies in the future!

A beautiful, bright, full moon guided our exit of this crazy year. My most liked posts on instagram from 2020 also look different than past years (no pictures of kids in the forest or workshops here!) but they are reflective of a year that included more handstitched, naturally dyed little things, nature's beautiful colors, and our fluffy sheep. It was a quieter, more introspective year of forced change that we are still all in the midst of. Whatever happens there's goodness in making things, imperfect as they may be, and Nature has so many gifts that we only need to hold out our hands to receive. Thanks for being here.

December full moon Cold Moon
instagram best nine

You can find all of our monthly Forest Path posts and more by clicking here!

And, as always, catch up with us throughout the month on social media.

The Forest Path - November 2020

Autumn was in her full glory in November! We had so many days of sun, shining golden through autumn leaves. The sheep seemed to grow inches of wool a week and almost look like they’re floating through the grass because you can hardly see their legs!

bigleaf maple tree in autumn
sheep+grazing+on+the+edge+of+the+forest

Like so many months before, there was a bittersweet quality to November’s beauty because there were no homeschool classes here to share it with us. Around every turn of our paths through the forest were mushrooms, colorful leaves, blooming flowers, and other delights that we would usually be enthusiastically sharing with kids and families here. It will be so lovely when we can safely open up for programs again!

free+range+chicken+eggs

Even though the days are getting shorter every day, the chickens are still laying eggs. The only challenge is figuring out where! This is a cache we found nearly buried in the hay. It’s like an Easter egg hunt every day around here.

A more exciting bird experience is that we had a beautiful barred owl visit the bigleaf maple tree in front of our house. We hear these beautiful birds frequently but they are so camouflaged that unless we happen to see one fly, they stay hidden in the forest. This owl stayed in this same spot for several hours in the morning until deciding there was better luck finding something to eat elsewhere and he few away on his large, silent wings. Can you spot him in the first picture?

barred owl in bigleaf maple
barred owl through binoculars

We had our first frost this month. After having icy weather forcasted for a week, we finally woke one morning to a beautiful frost-covered landscape.

As pretty as it was, it meant the end of the Japanese indigo plants. They don’t survive frost so I cut an armful of the flowering stalks and brought them inside. Not many flowers set seeds but there are enough to save for next year. I can’t wait to grow more beautiful blue dye from my own saved seeds!

I spent a lot of time creating stitched indigo designs over the month and there are still some of the dishtowels that I dyed available in my shop.

frost on a maple leaf

A lot of gathering has been going on. We found the last hidden patch of elderberries in the forest. They are destined to become immune-boosting elderberry syrup. I’ve also been gathering up handfuls of leaves as they fall to the ground. I’ll store these and use them for botanical printing until there are new leaves next spring. The stacks of leaves look almost like little art pieces themselves!

blue elderberries
20201128_115456.jpg
alder+leaves+ecoprinting

Speaking of botanical printing, I dyed and printed a lot of scarves and other fabric for the first time since February. Because there haven’t been events all year I had no need to make a lot of new inventory but I sure did miss it! Using mushrooms, lichen, leaves, and all sorts of beautiful natural materials from this land to create colors and patterns on fabric is just a delightful, magical experience. I truly miss teaching workshops and can’t wait to get some scheduled in 2021. In the meantime, my work can always be found in my online shop.

This video shows leaf prints created on silk that was dyed with goldenrod that we grow here. Isn’t is amazing?

On the animal front, Mike put in a new gate so that our male sheep can have easier access to other grazing areas. Flint, ever the troublemaker, took his job as supervisor very seriously! He even taste-tested the new gate. Hahaha.

shetland ram wether
shetland sheep farm

Outside, the sun sits low in the sky as we are nearing the solstice and the golden leaves from the beginning of the month are nearly gone. Inside, it’s beginning to look pretty Christmasy with these wool gnomes whose stuffing and beards are made with our sheep’s wool. I like to think that each one I make is infused with a little of Flint’s playful, mischievous nature.

It’s hard to believe that we’re already approaching the final weeks of 2020! I don’t know what “back to normal” looks like anymore but I hope we start to travel that direction in the new year.

You can find all of our monthly Forest Path posts and more by clicking here!

And, as always, catch up with us throughout the month on social media.

The Forest Path - September 2020

colorful+lichen+covered+branch

September passed in a blur! It feels like we went from August straight to October due to wildfires and smoky air that kept us indoors for days and days this month. It started off beautifully enough but ferocious windstorms coupled with high temperatures and no rain made for a treacherous Labor Day weekend.

oregon forest sunshine
cherry+tomatoes

The wildfires that sprang up across Oregon following the windstorm devastated many communities. The closest fire was only a few miles away from us and our blue sky quickly became covered with thick smoke. We paid close attention to the fire’s movement and set up animal enclosures and processes to be able to evacuate them (and us!) if we needed to.

We thankfully never had to evacuate our farm but many nearby properties did. It was heartwarming to see people come together to transport, house, and care for thousands of displaced animals.

wildfire smoke oregon
oregon+wildfires+2020

The smoke in the air made it feel like dusk even in late afternoon and we kept our farm as well watered as we could. Eventually the air quality became so hazardous that it was recommended people stay indoors as much as possible.

We made brief forays into the outdoors into the eerie orange light to care for our animals but everyone who could stayed inside. That even included the rabbits who got to spend several days indoors. They weren’t too happy about the small cages since they’re used to their bunny condos but they got to hop around the house and breathe cleaner air. If we could have explained it to them, I think they would have understood.

cedar dell forest farm smoky light
sheep chickens and garden - oregon homestead
angora and dwarf rabbits in travel cages

With over a week of terrible air quality, we all felt a little stir-crazy. We are so accustomed to using this wide open space around us whenever we feel like we’ve been inside too long and it was really difficult to adjust to not being able to spend more than a few minutes outside. We’ll never take clean air for granted again!

hazy sky forest fire oregon
orange sky from wildfires oregon forest

I tried to take advantage of all the indoor time to organize my product listings and packaging. I love how these cards with information about my naturally dyed embroidery floss came out! I had fun arranging rainbow colors for photos and decided to offer gift sets that include a rainbow assortment of colors. At least one good thing came from the bad air days!

hand+dyed+peace+silk+embroidery+floss
rainbow+silk+embroidery+floss+plant+dyed

As soon as the smoke cleared we said good bye to Eamon, our ram lamb. He has really changed from the dark brown color he was when he was born! He’s a cute little guy and he seemed to be happy when we left him at his new home near the Oregon coast. His new owners are lovely people and there are lots of sheep and chickens to keep him company. His new owners make the most beautiful handmade, handpainted paper lights. Check out their work at Hiih Lights. A farm property that blends raising fiber animals with creating nature-based art and hosting workshops to connect with the community sounds a little familiar, doesn’t it? I think it’s the perfect home for a Cedar Dell lamb.

shetland+ram+lamb+musket+brown+ag+gene
shetland sheep oregon coast

We didn’t just drop off Eamon, but we made a trade! We came home with Spruce, this very handsome ram. He made some really nice looking babies for the folks at Hiih and we can’t wait to see what colors of cute lambs we get next spring!

horned ram
shetland+sheep+ram+curly+horns

Spruce isn’t the only new animal on the farm! This little Holland lop rabbit joined our farm family in September and came all the way from CKC Rogue Rabbitry in southern Oregon. His name is Squid and he’s only 5 months old. His new owner is smitten with him, as you can see in the photos, and there are hopes for 4-H ribbons in their future.

Aside from his 4-H career he will also join Bramble and Happy Waffle as an education bunnies for our visitors to care for and snuggle with. Squid is proving to have quite a big personality and we think he’ll love it when we can have programs here again.

holland+lop+baby+bunny
black+otter+junior+holland+lop

Once the air cleared and and the new animals settled into their new home, I went a little nuts with dyeing things. When the air quality was hazardous, it wasn’t safe to dye anything. Often I work outside and that wasn’t possible, and dyeing indoors would have meant simmering things inside without any ventilation. I certainly didn’t want to add anything unwanted into our indoor air so once the smoke cleared I had a lot to do. From playsilks for the Waldorf school community to cotton baskets for my online shop, indigo to goldenrod and dahlia flower dye, it was a colorful ending to the month.

plant dyed playsilks waldorf toys
goldenrod dyed fabric
naturally dyed cotton rope drying outside
cotton rope baskets indigo dye
flower petal dye dahlia goldenrod
shades of indigo oxidization
lake+oswego+one+day+open+show+cedar+dell+designs

And end-of-month highlight was participating in Lake Oswego’s Lakewood Center for the Arts' one day art show. It was so nice to participate in an actual, in-person event! Due to social distancing, artists weren’t permitted to stay, but it was so nice to browse during setup in the morning. I am very thankful for virtual events but saying a socially distant hello to artist friends and seeing art in person was so good for the soul.

It also felt really nice to have some of my work out in the real world, even for just a day!

sunbeam shining through the forest

With the passing of September, autumn is truly here. It feels like the wildfire haze shepherded us right from hot, sunny, summer weather to the crispness of the next season. I can’t say that we’re quite ready for the cooler weather but we are embracing the beauty of the forest as it constantly changes.

You can find all of our monthly Forest Path posts and more by clicking here!

And, as always, catch up with us throughout the month on social media.

The Forest Path - August 2020

forest wedding venue

August, the most golden month of summer!

We started the month with a beautiful celebration of love. In this summer of canceled programs, it was a breath of fresh air to host a tiny wedding here on the very first day of the month. Beauty, joy, and laughter filled the day. Even Flint joined in the celebration and made an appearance in the photos. Silly sheep - he kept trying to taste the beautiful flower bouquet. We made him his own leafy bouquet made of maple and dock leaves to distract him from the flowers and thankfully he was satisfied with that.

(Wedding photos below are courtesy of Lauren Reber Photography. Find her on Instagram or her website.)

wedding photo with ram
wedding photo autumn farm animals
shetland sheep lambs grazing.jpg

Aside from wedding bouquets, there is plenty for our flock of Shetland sheep to eat during these lush, summer months. The benefit to living in “rainy Oregon” is that the landscape is vibrant and green even well into late summer. This is our ram lamb, Eamon, next to his mom. They’re almost the same size and Eamon was just born at the end of March!

snap+peas+on+the+vine
cucumber garden
cherry tomatoes with raindrops

Our garden has really taken off this month and we can hardly keep up with eating peas and lettuce and cucumbers. The tomatoes are slow to ripen this year but we have been able to pick some and more and more every day are showing a blush of orange. I think we will have many ripe tomatoes soon!

August isn’t exempt from rain. The garden and forest plants alike benefited from August rain. It was nice to take a break from watering the garden and everything felt sparkling and clean.

swordfern frond water drops
dewdrops on spiderweb

Summer’s colors have shown up in my natural dye work this month. This latest palette of plant-dyed silk embroidery floss captures the colors of late summer. I hope some of my customers share photos of their work because I’d love to see what folks are making with it! Each color turns out so beautifully, even if it’s not exactly what I was planning on. There are often subtle variations that add depth to the colors and I love that no matter what, they always seem to coordinate with each other. Nature always matches itself.

pland+dyed+silk+embroidery+floss
naturally dyed embroidery floss

My FAVORITE late summer dye to use is goldenrod! It is native to our area and I grow some in the front garden. Its golden blooms are so beautiful that it’s always a little bittersweet to cut them. Goldenrod dyed fabric nearly the same shade of its flowers so the dyed pieces are a beautiful memento of golden August. I’ve written a tutorial on my natural dye blog so you can try dyeing with goldenrod yourself. The variety I grow is Solidago canadensis but there are many varieties of goldenrod that can be found across the country. There’s probably some near you!


Our lambs have been growing quickly while eating all these summer plants. We had a great idea this month of using our wall of blackberries as a side of our mobile fencing for the sheep. This lets them get right up next to the backberries, which they love to eat. Serena isn’t eating them at the moment in this picture, but they have been working hard at eating the blackberry leaves and the edge of the blackberries has already moved back several feet. It’s so great having sheep that browse too!

The second photo below shows how they look in the morning, eager to be let out into the field with the blackberries.

serena the shetland ewe eats blackberries
shetland sheep flock

There’s been plenty of time for relaxing this month too! The animals and we humans appreciate the shade of the big trees and the opportunity to rest in the heat of the day.

sheep and chickens together

Here are a few more animal photos from this month. Peedie the cat spends most of his time on the classroom porch. I think he misses having kids in that space! Someone decided Waffle the bunny needed a bath so got one in the sink! He actually didn’t seem to mind at all. Maybe he even liked it?

tuxedo cat in the forest
netherland dwarf rabbit getting a bath

We started the process of finding a new home for Eamon. We really like him but he’s related to 2 of our 3 ewes so he needs a new flock. His wool is so lovely! We’ll miss him but someone will be lucky to have him and his glorious wool.

shetland+ram+lamb
shetland wool fleece lambswool

Summer days are for line drying fabric in the forest-dappled sun. My indigo plants don’t look too different from last month. They had a rough start but I’m sure they will start to really grow soon. In the meantime, I have other indigo to dye with.

Sewing indigo dyed fabric with its varying patterns and shades of blue is so very satisfying. I’ve created some sewing kits this month, incorporating fabric dyed with indigo as well as other natural dyes. Kits include all supplies and instructions to hand stitch beautiful designs and create a functional needle book. You can see them all here.

indigo shibori fabrics

The forest has some beautiful blues too! These berries come from our state flower - the Oregon grape - and are very, very tart. We collected basketfulls to make Oregon grape jelly. Their tartness is tempered with the addition of some sugar. The resulting jelly tastes similar to grape but still has a little tartness.

While foraging for berries we also found lots of usnea lichen and a feather from a barred owl.

oregon grape berries mahonia owl feather

Other signs of the wild animals we share the forest with showed up this month. Snakes are active and growing all summer and we’ve been finding a lot of shed skins lately.

We happened upon another bird nest in the forest. It’s always a wonder to look at these intricately constructed nests.

snake shed skin
bird+nest+in+tree+oregon
hay+stored+for+winter

Even as we are enjoying this beautiful summer month, the approach of autumn can’t be ignored. We have a barn full of hay so the sheep can eat even when the grass and blackberries stop growing.

We are finding the first colorful leaves fluttering to the ground and the honeybees have fewer and fewer flowers to visit. Thank goodness the mint plants are late bloomers!

japanese maple leaves fall color
honeybee on mint flowers

Hopefully next year we’ll be able to share photos of summer camp and natural dye workshops again!

You can find all of our monthly Forest Path posts and more by clicking here!

And, as always, catch up with us throughout the month on social media.

oregon forest tall trees

The Forest Path - July 2020

I can’t believe we’re halfway through this year! It hasn’t looked much like I thought it would, but the plants and animals have been a source of grounding amidst the many changes to our schedule. At the beginning of the year, we thought July would welcome the first group of happy summer campers but these days we’re enjoying the simpler pleasure of new flowers blooming and vegetables growing in the garden.

These coreopsis flowers are like a brilliant sunburst! In addition to being beautiful to look at, they can be used to dye fabric. I printed this eye pillow with a yellow coreopsis flower last summer and look forward to seeing what this red-orange variety does.

coreopsis%252Bflower%252Bnatural%252Bdye
Screenshot_20200714-121014_Etsy.jpg
japanese+indigo+plant+persicaria+tinctoria

Then there’s this favorite dye plant - indigo! These precious plant babies had a rough start. In May I shared pictures of lush seedlings planted in the ground but shortly after that heavy rain beat them into the ground and then slugs discovered them. Many were lost but I dug up the survivors and put them back into pots, safely out of reach of any slug. I babied them along for 2 months and just planted them back in the ground in July.

They’re a lot smaller than they should be by this time in the summer but they’re starting to grow quickly now that they’re over the shock of being transplanted again. I can’t wait to make some blue dye with them! You can see what last year’s indigo crop looked like and the blues that I got from it on this post.

Another plant I’ve been watching closely is the goldenrod. These tiny flowers are native to this area and are a source of yellow dye. They came into full bloom at the very end of July and I’m ready to cut them and create some yellow fabric. Growing my own color is so rewarding!

goldenrod+dye+garden
goldenrod natural dye soledago canadensis
soledago canadensis flowers plant dye
shetland+sheep+flock+twin+lambs

On the sheep front, I finally captured a family portrait! Mama Hazel is in the back and you can see that Opal and Eamon aren’t so little any more. Eamon’s horns seem bigger every day and his wool has faded to almost the same shade as Hazel. Compare it to his newborn picture here. I’m glad that Opal has stayed chocolate brown. It’ll be fun to have a different fleece color when we shear them next spring.

I’ve been carding some of the wool from this year’s shearing and it’s now available as part of a wet felting kit. The brown, yellow and orange colors below are all from natural dyes. Next year the brown can be Opal’s natural color!

shetland sheep wool
carded+shetland+wool+waldorf+basket.jpg
wet+felted+naturally+dyed+pouch.jpg
bird+nest+in+fern+dark+eyed+junco+nest

In other animal news, we found this sweet little nest tucked into a swordfern. Our best guess is that is that it was made by a dark-eyed junco as they nest low to the ground and we have a lot of them here. It’s just amazing how intricate and sturdy bird nests are! Each is like a functional work of art.

swordfern in the sunlight

The July sun was so bright and beautiful shining through the forest! It also helped all our flowers explode into color. June was cold and rainy and it kind of felt like this bounty of summer growth would never come - but it did!

The calendula flowers are like a blanket of tiny suns in the garden. We’ve been collecting their petals as the flowers start to wilt and will use then to make a beeswax salve. Calendula is really soothing to the skin and has antibacterial properties that can help heal cuts and scrapes. It’s a staple in our medicine cabinet.

calendula flower bud
calendula flower
 
honeybee+on+lavender+flower
 

The bees love the lavender so much that we mostly leave it for them. Lemon balm is another story! Our lemon balm is growing so profusely that you can't even tell that this giant bunch was cut out of it. It dried quickly in the July heat dried and now we have plenty stored to use all year. We love mixing it with an equal amount of mint and a pinch of lavender. Steeped in the sun with a little honey makes it the perfect summer drink.

lemon balm herb
dry lemon balm herbalism

July was the month of salads! We could hardly keep up with all the lettuce and peas. I think August will be the month for tomatoes!

snow+peas+in+the+garden
gardening+fresh+salad
 
cherry+tomato+blossoms
 

A DIY weaving loom July’s addition to the craft tutorials on the blog. It’s another favorite camp activity and since we aren’t holding programs this spring and summer, I’m happy to be able to share activities with you here!

cardboard weaving loom
natural dye weaving

Some pretty, summery colors of naturally dyed embroidery floss went up on the shop in July. It’s exciting that they’ve been so popular! I’ve also been stitching some naturally dyed fabrics to make samples of new kits that I have in mind. August will bring some new things so stay tuned . . .

natural dye silk embroidery floss
boro stitching natural dye fabric

It’s been quite a full month and I hope that you too are enjoying these summer days!

california+white+hen
sun shining through the forest salmonberry leaves
oregon+forest+in+the+summer

You can find all of our monthly Forest Path posts and more by clicking here!

And, as always, catch up with us throughout the month on social media.

DIY Cardboard Weaving Loom

Weaving on simple cardboard looms was a favorite activity at our nature art themed summer camp last year. Making your owl loom is so simple and uses materials you probably have laying around your house. Even though it’s just cardboard, with a little care you can reuse it over and over to make all sorts of woven creations.

kid weaving loom tutorial

Supplies:

  • cardboard - the flap of a large mailing box is perfect

  • scissors or box cutter

  • glue

  • cotton string, twine, or yarn

  • weaving materials: Yarn, strips of fabric, and even flowers, grasses and other natural items can make beautiful weavings!

Step 1: Making the Base

You’ll need a rectangle of cardboard. If you don’t have a box with a large enough flap to use, cut a rectangle from the side of a box. This piece of cardboard needs to be fairly rigid so if you only have thinner boxes, like a cereal box, try cutting a couple pieces the same size and glue them together to make a stronger piece.

It’s important to know that your finished weaving will be about 3/4 of the width of your piece of cardboard. If you want your finished weaving to be a particular size be sure to cut a piece of cardboard a little wider than that measurement. The longest your weaving can be will be the length of your cardboard minus a few inches.

For example: If your cardboard rectangle measures 8 inches across and 12 inches long, you can expect your finished weaving to be approximately 6 inches wide and up to 9 or 10 inches long.

diy+weaving+loom+tutorial

Step 2:

Cut two thin strips of cardboard about 1/2 inch wide and the same length as the width as your large rectangle. Glue these strips to your large rectangle, approximately 1/2 inch from each end, as shown. Let them dry for before moving on the the next step.

cardboard+weaving+loom
kids weaving loom tutorial

Step 3:

Cut small slits into one end of the cardboard, 1/2 inch apart. You want them to be evenly spaced so that your weaving turns out nice and even. I find it easiest to measure and draw lines first, and then cut. For ease of removing and tying off your work at the end, make an even number of cuts.

Repeat on the other end, making sure that your cuts line up evenly with the first side.

diy+cardboard+weaving+loom

Step 4: Warping Your Loom

Your loom is done! Now you need to add the string that you will weave your materials through. In weaving lingo, this is called the warp string and the process is called warping your loom. To warp your new cardboard loom, it’s best to use string or yarn that is not stretchy. As you weave you will be pulling on the warp string and this can cause them to loosen, which can affect your weaving. Wool yarn usually has a little “bounce” to it so I recommend using cotton. The picture shows crochet cotton, which is usually one a couple dollars at any big box craft store. If you only have wool and want to use that, be sure to pull is as snug as you can when you warp the loom.

To start, tape the end of your string to the back of the loom. Bring the string up and slide it into the first slit at the top. Turn the loom so the front is facing, bring the string down and slide it into the matching slit at the bottom. Wrapping the string around the back again, repeat the process until the string is through all the slits.

making a cardboard loom
how to make a cardboard loom

As you warp your loom, tug on the string periodically to be sure it’s staying snug. When you’re done, the string on the front should make straight, vertical lines. Cut your string, leaving a small tail, and tape it to the back.

setting up cardboard weaving loom
cardboard loom warp thread.jpg
diy weaving loom

The skinny cardboard strips that are glued to the loom create a gap between the warp string and the base of the loom. This makes it easier to maneuver your weaving materials over and under the warp strings.

Step 5: Weaving

Start weaving! The materials you add now are called the weft and they go in the opposite direction as the warp. Start with the simple pattern of over, under, over, under each warp string. As you weave, the warp strings on the edges will naturally pull in a bit. To keep this narrowing from being too dramatic, pay extra attention to the tension of your weft materials as you turn the edges and go back the other way. Resist the urge to pull your material tightly over the last warp strings.

When you begin and end a new piece of yarn, or fabric strip, leave a few inches hanging off the side. When you’re done, they can be hidden on the back.

Weave as long as you’d like. Keep going until you reach the bottom of the loom, or stop sooner if you’d like a shorter piece!

childrens weaving craft
weaving naturally dyed yarn

Step 6: Removing Your Work From the Loom

Cut the warp threads several inches from the bottom of your finished weaving. (If your weaving reaches the bottom of your loom you will need to cut the strings on the back of the loom in order to get a few inches of warp threads below your final row of weaving.)

In pairs, tie the ends of your warp threads in knots. The ends can be left as fringe, or tucked up into the back of the weaving later.

taking weaving off of loom
tyeing off weaving

Step 7:

Turn your loom over and cut the warp threads about halfway down the back.

Turning your loom so that your weaving is facing you, remove 2 warp strings at t time from the slits and tie knots just as you did at the bottom.

taking weaving off of cardboard loom
weaving on a cardboard loom

Step 8: Add a Branch Hanger

(These next photos show a different weaving project. It incorporates strips of naturally dyed wool and silk fabric, as well as yarn.)

To add a branch across the top as a hanger, find a relatively straight branch that is a few inches longer than the width of your weaving. Lay it across the top of your weaving and tie each pair of warp strings around the branch to secure it.

 
attaching+weaving+to+branch+hanger.jpg
 

Step 9: Hiding Your Ends.

On the back of your weaving, tuck the ends of both weft and warp strings into exposed loops on the back. It will look messy but that’s okay! No one will see it once you hang up your work.

 
natural dye fabric weaving
 

Step 10: Hanging

Tie a piece of yarn, or a strip of fabric to the ends of the branch and hang your woven work of art!

 
natural+dye+weaving
 

The Forest Path - June 2020

June was the month of salmonberries! These bright orange berries pop like little jewels against the dark green of the leaves, especially after a rain, which we had a lot of last month. In classic northwest style, the first day of summer was cloudy and wet. The berries are beautiful and pretty tart. They’re a little plain tasting but make delicious jam. We’ve been picking handfulls as we find them and freezing them until there are enough to make a batch of jam. Of course, some windfall lichen usually makes it into the collection basket too. This usnea lichen is the variety that I sometimes use to dye silk and wool.

salmonberries color variation
salmonberries oregon usnea lichen

Did you know that blackberries are in the rose family? When I teach ecoprinting workshops, I share this with my students because most leaves in this large family of plants make reliable prints on fabric. Photos of their flowers clearly illustrate their relatedness! The pale pink is Himilayan blackberry - terribly invasive but such delicious berries - and the dark pink is our native nootka rose.

blackberry+flower+blossom
nootka+rose+and+flower bud

Amidst the beauty of berries and blossoms, June had some bittersweet moments. We canceled our summer camp programs for the year and the absence of happy children’s voices is strongly felt. Our forest paths are becoming overgrown without the footsteps of dozens of kids to keep the ferns in check. Last month we shared photos of little ferns unfurling their new growth and now they have expanded to fill in every space possible.

We have become so accustomed to sharing our forest beauty with visitors that it’s almost hard to pause and just enjoy this space ourselves. The silver lining is that we have so many fun ideas saved up for summer 2021!

 
oregon forest path swordferns
 
golden+hour+in+the+forest
forest mushroom macro

Another silver lining: Not spending hours planning summer camp activities leaves more time to tackle our chicken problem. They’re like ninja chickens and escape every type of fence we try to contain them with. Many have stopped going into their coop at all and four have taken to roosting in this tree near the house! For those of you who have been here, it’s the tree right next to our rabbit, Bramble’s, cage. Not only do they sleep there but they bounce around in the branches during the day. When I posted this picture on our Instagram account, someone called it “camping.” Haha! Maybe it’s their version of a staycation?

Whatever the reason, the main annoyance is we can’t figure out where they’re laying their eggs. We occasionally find some but having to buy eggs at the store when we have 12 happy, free range hens wandering around the yard is pretty frustrating.

chickens roosting in trees
free range chickens.jpg
ecoprint slow stitch

Nature continues to be not just the source of colors for the silk embroidery floss I’ve been dyeing, but an inspiration for the color palette as well. This embroidered piece is part of a series I’m making that is inspired by some of my favorite plants in the forest. (You can see the first piece here.) Some of these threads were dyed with mushrooms, while others, and the fabric, were dyed with onion skins.

I started out dyeing embroidery floss mostly for my own use but it’s been so popular in my shop that I am working on dyeing it in larger quantities. Even so, the color selection is always rotating.

naturally dyed silk embroidery floss
naturally+dyed+silk+thread

Surprisingly there aren’t any photos of our sheep this month. All my attempts from the last few weeks are blurry. They’re too busy foraging for fresh leaves to eat, or nosing my pockets to see if I brought them anything yummy, to hold still for a photo. This wool is from them, though! The colors were dyed with black walnut (brown) and lichen and onion skins (yellows) by kids in our homeschool class last fall. I’m working on carding it all into fluffy, woolly buns and it’s available as part of our newest craft kit!

shetland sheep wool
carded plant dyed wool

Peedie is the stoic project manager. He squeezes in to find every little patch of sunshine that he can.

cat wool carding
wet+felting+tutorial

After she sheep debaucle of May - our sheep, Flint, broke into the garden twice and chowed down on pea seedlings - the peas made an encouraging comeback! We’re thankful they’re resiliant, fast-growing plants.

pea shoot
pea flower.jpg

Good news and something to look forward to came in June as well! I had two workshop proposals accepted so I will be teaching at the Focus on Book Arts Festival in Forest Grove, Oregon next summer. My classes will be a two-day ecoprinting class focusing on printing paper the first day and creating a fabric and paper book on the second day. I’ll also teach a one-day indigo dyeing class that incorporates dyeing fabric as well as paper. Hopefully in 12 months the festival will be able to be held as planned! You can sign up for their newsletter to receive registration and class information when it’s available in the fall.

ecoprint handmade book
indigo dyed paper

This photo journal is as much for us to reflect and remember all that goes on here on the homestead as it to share our journey with you. We hope you enjoy this glimpse into our life and work during the pandemic, and that you are well and finding ways to connect with nature this summer! Throughout each month you can always see more of our forest, farm, and natural dye life and work on social media.

oregon+forest+meadow+view

The Forest Path - May 2020

Lovely May. This last month can be summed up by colorful textiles, the expanding greenness of the spring forest, and rapidly growing lambs. Outside, the sheep enjoyed sunny days of trimming our huge bigleaf maple tree. They LOVE the leaves and will eat anything they can reach, which helps us by keeping the low branches from covering the ground. One the other side of the window, the sunlight adds a warm glow to whatever is on my worktable.

shetland sheep eating maple tree
naturally dyed cotton fabric

The ferns always make such dramatic entrances. The unfurling frond is a swordfern and they are covering the forest in their bright green color. Maidenhair ferns are my favorite for their lacy look, striking black stems, and the crown-like shape their fronds create.

swordfern uncurling
maidenhair fern oregon

May feels like the best month for little Kelly Creek. It’s pretty and green, but not yet overgrown as it will be later in the summer. This month we spent many hours in its peaceful company and didn’t have to duck under leafy branches or arcs of tall salmonberry canes.

 
kelly creek oregon forest
 

Of course spring means rain in the Pacific Northwest, which means happy spring mushrooms. These pretty green turkey tails were found growing by the creek while clumps of big mushrooms tried to take over our garden beds.

green turkeytail mushroom trametes versicolor
spring mushrooms in the garden

Our sheep got lots of attention over the last month as we worked on getting the lambs used to our presence. As you can see, the older sheep appreciated the company too!

shetland sheep kisses
friendly shetland sheep

Our lambs are curious, friendly little ones. Opal, the dark brown lamb, is talkative and gets so eager for treats that she’ll try to put her front hooves up on one of the adults to get you our hand first. Eamon is the light brown lamb who keeps getting lighter. That’s him in both the middle photo and the third one! They were taken several weeks apart and you can see the growth on his horns as well as his lightening color. Compared to his birth color, he looks like a different sheep! With the light color around his eyes and mouth, we always knew his color would fade but it’s still been surprising and fun to watch how quickly his wool is changing.

shetland+ewe+lamb+moorit
shetland+ram+lamb+ag+musket
ag+brown+shetland+sheep
white+french+angora+rabbit

Not to leave out our other woolly pet - our angora bunny Bramble celebrated his third birthday in May! He celebrated by taking a nap in the middle of the kitchen floor and then hopping around in the sunshine eating his favorite wild plants.

We cleared an entire hillside of vinca and, with the whole family’s help, built terraces to plant my indigo plants. The fences that create the terracing are made from branches of laurel trees that we cut down from another part of the property. Laurel is an invasive species that can take over large areas pretty quickly so we’re trying to remove as much of it as we can. We’re happy to have cleared so much of two unwanted species to make room for growing more color!

natural terraces woven wood fence
japenese indigo seedlings

This jar of murky, green liquid is actually indigo that I grew last year and believe it or not, this green liquid created these beautiful blue colors! The leaf design is my take on creating an image of the indigo plant, dyed in indigo. You can learn how I created the design in this post. The other fabrics, along with the colorful cotton I dyed last month, are available in bundles of coordinated colors in my shop.

mini indigo vat
shibori+indigo+stitch+resist
indigo shibori

I can never get enough of the beautiful blues of inidigo. The first photo shows a detail of a larger piece I made that was inspired by the salmonberry plants that grow abundantly here. You can see more photos and the inspiration behind the elements here. The pouch was a gift I made using some of the same fabric available in my shop.

slow+stitch+ecoprint
indigo+fabric+boro+stitching

Aside from all the glorious green, colors in the forest were a little more subtle this last month. After the showy flowers of April, we had to look a little closer to see May’s blooms. The cups with the tiny pink petals are fringcup, and the little white flowers that bob on the end of their delicate stems have the whimsical name of inside-out-flower.

fringecup wildflower
inside out flower
forest garden vegetables

Gardening in the forest can be frustrating at times. Between the shade of the trees and the sheep that break in and eat the pea seedlings (twice! Naughty Flint!), our garden isn’t as robust as others in more sunny locales. It’s all worth it though, to harvest the perfect, colorful salad at dusk as owls hoot from the nearby trees. Kids in our homeschool program helped plant the seeds, thinking that they would be here to enjoy the harvest. We miss them terribly and not just because we are having a hard time eating all the lettuce ourselves!

We don’t see too many sunsets because of the way the trees block our view of the west, but this May sky was glorious. There is much beauty to be thankful for, even as we’re sad to have canceled all our programs this season.

forest sunset tree silhouette

Fir Needle Simple Syrup

Spring+Douglas+Fir+Tips
 

Have you noticed the bright green tips of the fir trees lately? I think they look like decorative tassels adorning these darn green trees. The bright tips are the new, spring growth and in addition to being a different color, they’re much softer than the older needles. They’re also delicious! We often add fir needles to tea when kids and families at our spring and winter programs need to warm up after playing outside in the chilly weather and it’s always a hit, especially with a little sweetener added. But this post is sharing a way to make a sweetener that’s infused with the unique flavor of the Douglas fir needles themselves. The taste is a little citrusy (the needles are packed with vitamin C!) and delightfully woodsy.

douglas fir soda.jpg

Simple syrup isn’t thick like pancake syrup but can be used to drizzle over fruit, as a glaze for cake, a unique topping for ice cream but is best known for its use as a sweetener for drinks. Adding fir needle simple syrup to a glass of carbonated water makes a delicious forest-inspired soda. Because it’s a syrup, it easily mixes with cold drinks. No more stirring granulated sugar around and around in your glass of iced tea before it dissolves. It’s great iced tea and lemonade. I’ve been enjoying it with my hot tea or coffee in the mornings and it lends a little forest flavor to my drink. You can also use it in place of regular simple syrup in your favorite cocktail recipe.

fir needle tips in waldorf basket

The Recipe

Ingredients:

  • young Douglas fir needles

  • water

  • sugar

Gather bright green fir tips in the spring. Be kind to the tree when you’re gathering them! Don’t take them all from the same part of the tree. This is the tree’s new growth and you want to leave some on the tree.

Rinse to remove any stray bugs or dirt.

Put needles in a large pot and cover with an inch or two of water. Bring to a boil then turn off the heat and leave the needles to steep. You can steep them for as long as 24 hours. The flavor will be stronger the longer they steep.

making fir needle syrup.jpg

Strain to remove the needles and measure the remaining liquid.

Return liquid to the pot and add an equal amount of sugar. (Example: If you measured 3 1/2 cups of liquid, add 3 1/2 cups of sugar.)

Bring to a boil and stir until sugar is dissolved. This usually only takes a few minutes.

Let cool and store in the refrigerator. It will keep for about a month.

fir needle simpe syrup recipe.jpg

Canning Simple Syrup

If you made more than you can use in a month, you can can it!

Fill half-pint jars with hot syrup, leaving 1/4 inch headspace. Process in a water bath canner for 10 minutes. Turn off heat, leave in the water bath for 5 additional minutes before removing. Store jars in your pantry for up to a year. This way you can enjoy this taste of the spring forest even in the middle of winter. Fir needle simple syrup also makes a great gift!

doug fir syrup.jpg
 

The Forest Path - April 2020

shetland sheep lambs

Where to start with April? This was the first month in a long time that we didn’t hold any classes or programs here at the forest farm. The forest exploded into an expanse of green, the lambs grew bigger and fluffier, flowers appeared everywhere and we really missed having visitors here to experience it with us. We started these monthly photo journals at the beginning of the year, as much for us to have a visual record of our life and work here as for you, the reader, but it has come to feel even more important during these months of social distancing. I hope you enjoy this glimpse into spring at Cedar Dell.

shetland sheep in the forest
shetland sheep lamb

Our babies were integrated into the pasture with the other big sheep. After a little bit of initial grumpiness, the older sheep are tolerating the babies bouncing around (and sometime on!) them. Eamon, shown above, is getting lighter in color and his horns are starting to grow, though you can’t really tell in this photo.

 
shetland sheep moorit
 

All of the sheep are really enjoying the spring greens! They are gobbling up all the fresh grass and tree leaves the they can get in their mouths. The lambs are eating grass now but still nursing as well. They’re so much bigger than when they were born!

 
ag gray shetland sheep eating
 

Spring greens aren’t just for the animals! We’ve been enjoying wild edibles that spring brings as well. This month’s favorites were maple blossom fritters and stinging nettle pesto. We shared both recipes here on the blog and don’t worry - the nettles don’t sting anymore once they’re cooked!

Flowers are everywhere! The bright pink salmonberry flowers are a beautiful pop of color against the new, spring green. Some are already starting to turn into berries but it will still be a while before they’re ripe for eating. Last month there were just a few yellow violets but now there are large clumps along the trail in the woods.

salmonberry flower.jpg
yellow wood violets.jpg
trillium flowers

Trillium flowers are the darlings of springtime around here and we never get tired of admiring them. These little candy flowers below don’t taste like candy but they are edible! We’ve been adding them to spring salads. The plant with the red-gold leaves is our smokebush plant. The leaves will be more green later in the season but right now their color is just gorgeous, especially in the morning sunlight.

candy+flower+miners+lettuce+edible+flower
smokebush cotinus.jpg

Inspired by the colors of spring flowers, I’ve been dyeing a lot of fabric and embroidery floss using a rainbow of natural dyes. While I greatly miss spending days with kids in the forest, this newfound time has led to more opportunities to create color.

I’ve dyed more than 15 colors of silk embroidery floss, all created with natural dyes. You can learn more about my dye process and what I used to create some of these vibrant colors in this blog post. If you’re interested in using some of these for your next stitching project, you can see all colors currently available by clicking here.

Plant dyes aren’t just for silk! I’ve been putting everything I can into the dyepots and these cotton fabrics show the range of colors that can be achieved through nature. it’s such a fun process and I’ve been using these scraps and small pieces for stitching projects as well as creating some colorful bundles to offer up in my online shop.

20200426_153037.jpg
plant+dyed+cotton+fabric

We’re busy growing things too. We have somewhere around 50 Japanese indigo seedlings to put into the ground and our vegetable garden is struggling a little since our pesky sheep Flint broke into it twice and ate the pea seedlings and trampled everything else. Most plants, like these cute radish seedlings seem to be bouncing back okay. The jury is still out on the peas though.

japanese+indigo
radish seedlings
sunny day oregon forest

Despite the drastic change of plans for this last month, we sure filled it with a lot! I hope you’re finding ways to enjoy nature and the spring sunshine wherever you may be. Until next month’s photo post, you can see what we’re up to on Facebook and Instagram.

Nettle Pesto

Stinging nettle (Urtica dioica) may hurt if you brush up against it but it’s a plant packed full of vitamins and minerals - vitamins A, C, K, iron, magnesium, calcium, potassium and more! It grows abundantly across North America and starts coming up in early spring so you likely have some growing near you! They like wet, rich soil and the largest patches here at Cedar Dell are near seasonal waterways and damp areas in the forest.

20200413_163945.jpg
fresh nettle leaves harvest

They have heart shaped, toothed leaves, that grow in alternating pairs along a tall stalk. In early spring the plants are only a few inches tall and I usually discover then when my ankle accidentally brushes against one. They grow to be over 6 feet tall and produce small flowers in the summer. Young leaves taste best so this is a great time of year to harvest them.

stinging nettle close up of hairs.jpg

The stinging nettle gets its name from the hairs that are on the stem and underside of the leaves. When you touch the hairs, they break and release a toxin that causes skin irritation. Some people experience just a mild irritation but others experience itching, stinging, and even blisters. The taste and health benefits of this plant are worth the effort! Wear long sleeves and gloves to harvest them and use tongs when cooking. Heat deactivates the stinging hairs, as does drying the leaves.

Ways to enjoy stinging nettles:

  • Dry leaves and steep in hot water to make an herbal infusion. Kids at our homeschool classes love it mixed with mint and lightly sweetened with honey. Drink it hot or iced.

  • Saute as you would any other tender green, such as spinach.

  • Add leaves to soup or stews.

  • Briefly heat leaves to wilt, then chop and add to your favorite biscuit, bread, or savory muffin recipe.

  • Make pesto to enjoy with pasta, as a sandwich spread, salad dressing, or vegetable dip. Our favorite recipe is listed below!

20200416_172605.jpg

Nettle Pesto Recipe

Ingredients:

  • fresh nettle leaves - approximately one cup, measured after they’ve been blanched*

  • 2 - 4 cloves of garlic

  • 1/4 - 1/2 cup of nuts - pine nuts, cashews, walnuts all work well (We use the higher amount of nuts because our kids love this pesto and the extra protein makes us feel a little better when this is all they eat for dinner.)

  • 1/4 cup parmesan cheese or nutritional yeast

  • Approx. 1/2 cup olive oil

    *it’s hard to estimate the amount of fresh nettle leaves used in this recipe. If, after blanching what you’ve collected, you find you have more or less than one cup , adjust other ingredients accordingly. Exact ratios of ingredients are not critical when making pesto.

Prepare the nettles: Blanching, or flash boiling the nettles will deactivate the stingers. Heat a pot of water to boiling. Using tongs, place one tong-full of leaves into the water and boil for 60 - 90 seconds. Remove and place leaves in a bowl of ice water. Repeat until all leaves have been blanched. Remove from ice water and press between towels to remove as much water as possible.

20200416_164541.jpg
stinging nettle pesto

To make the pesto:

  • Toast nuts in a hot, dry skillet, stirring often until golden. Remove and let cool.

  • Roast garlic by placing in hot skillet and heating until skin becomes charred. This mellows the sharp flavor of the garlic. Let cool, then remove cloves from the skins.

  • Add nettles, nuts, garlic, and parmesan (or nutritional yeast for dairy-free pesto) to blender or food processor.

  • Add oil a few tablespoons at a time and puree until you reach your desired consistency. For a dip or sandwich spread you may only need a few tablespoons of oil, while using closer to 1/2 cup will make a thinner pasta sauce.

  • Enjoy it right away or refrigerate in an airtight container.

nettle pesto recipe.jpg
 

Dutch Oven Bread - a quick and easy recipe!

This bread is a fan favorite when we bake it at summer camp. It doesn’t need a lot of attention so we can start it, go play in the forest for a while, and then come back to bake it. It only needs to rise once so we can finish it all, from measuring out the ingredients to polishing off the last slice, all within the three hour time frame of our family homeschool programs. It’s always a winner!

We bake it outside over coals but it works equally well in the oven. I’ve including our outdoor cooking method at the end of this post. Give it a try! It would be a great addition to your meals when you’re camping.

063_cedardell_180808.jpg

The Recipe

Ingredients:

  • 1 cup warm water (We use the hottest water we get from the faucet)

  • 2 1/4 teaspoon (or 1 packet) yeast

  • 1 tablespoon sugar

  • 3 cups flour

  • 1 teaspoon salt

  • 1 tablespoon oil - any kind

Combine warm water, yeast and sugar in a small bowl and set aside. Let it sit for 5 - 10 minutes. It should start to bubble ant look frothy - this is a sign that the yeast is working.

Measure flour and salt into a large bowl. Add yeast mixture and stir to combine.

Turn out onto a floured surface and knead until is it smooth and elastic. Form into a ball.

Coat a clean bowl with oil. Place dough in bowl and turn until all sides of the dough are coated with oil. This prevents it from drying and cracking as it rises.

Cover loosely with clean towel or plastic wrap and let rise in a warm place for 45 - 60 minutes. (The beautiful indigo-dyed dishtowels pictured in this post can be found in our shop!)

Place on lightly oiled baking sheet and score top with a knife if desired.

Bake at 400 for 20 - 25 minutes. (Alternative outdoor cooking method is described below.)

dutch oven bread recipe
20190815_132808.jpg

If you can wait, it’s best to let it cool a little before eating. We love it with butter and honey or jam but it’s delicious plain as well!

20190808_144826.jpg

Dutch Oven Outdoor Baking

Baking this bread outdoors in a dutch oven takes a little more time than indoors but it’s really not hard. To bake this bread outdoors you will need:

  • cast iron dutch oven cooking pot with a lid

  • charcoal

  • firepit, barbecue grill, or other safe space to heat up charcoal

  • fireproof cooking area - we use an area lined with cinder blocks and concrete pavers

  • metal tongs

  • charcoal chimney, optional

032_cedardell_180808.jpg

A note about the dutch oven you use: It needs to have feet on the bottom so that it is raised off of the ground an inch or so. It should also have a lip around the edge of the lid, as you can see in this photo. This will keep the hot coals (that you’ll place on top) where you want them and prevents ashes from spilling into the pot when you lift the lid.

20181011_131323.jpg

Using a charcoal chimney, if you have one, heat the charcoal. The chimney helps them heat up quickly. I usually start heating the coals 15 or 20 minutes before I expect the dough to finish rising. You want the coals to be nice and gray when you’re ready to bake the bread.

When the bread is ready to be baked, transfer it to the dutch oven.

Using metal tongs, place 10 - 12 coals under the dutch oven and 15 - 17 on the top.

In an indoor oven, heat cooks food from all sides, unlike a stovetop where the heat comes only from the bottom. By placing coals on the bottom and top of the dutch oven, it is truly turning the cast iron pot into an oven and the bread will bake evenly. I find the top cools faster since it has more exposure to the air so I always place more coals on the top than the bottom. Another thing to consider is that the dough is touching the bottom of the pot, while there is space between the dough and the coals on the lid.

20181011_131500.jpg
034_cedardell_180808.jpg

To check to see how the bread looks, carefully use tongs to lift the lid. Take care to keep lid level so ashes don’t fall onto your baking bread! It should start to look golden after about 20 minutes. I find it usually takes about 30 minutes to cook but the cook time is less consistent with this method than in an indoor oven. Check it periodically and once it’s developed a nice golden color and feels somewhat firm to the touch, it’s done!

This loaf would have been perfect with a few more minutes of cooking. Sometimes it’s hard to make the kids keep waiting so we eat it a little early but it’s still delicious.

20190808_144348.jpg

You can see that the crust is more developed on this loaf. This one is perfectly baked!

062_cedardell_180808.jpg
 
dutch oven bread.jpg
 

Pin this image to save it for later and let me know if you try baking it outside!

Maple Blossom Fritters

56611740_2403273373236455_4073590701445611520_o.jpg

Last year we started off our Spring Homeschool session with making these delicious maple blossom fritters. This week would have been our first spring class of the year and we are really missing having our students here! Since we can’t share this tasty snack together, perhaps you have a maple tree near you that’s in bloom.

Here in the Pacific Northwest, bigleaf maple trees are abundant and their flowers are appearing at just this time of year. They can be eaten straight off the tree (always check for insects first!), pickled, or sauteed, but my favorite way to enjoy them is to turn them into crispy fritters.

Tip: Last year our students’ taste testing determined that blossoms that have not fully opened up taste the best. The flowers in the photo above are beautiful, but a little past the prime eating stage. They’re still just fine to eat but if you find flowers like those in the basket below, choose them. See how the pistils and stamens are still mostly contained in the cup-like shape of the petals? That’s what you’re looking for.

56158094_2403984576498668_2741885780073906176_n.jpg

To make the fritters:

1. Mix the following ingredients together in a large bowl. It will make a thin batter.

  • 1 cup flour

  • 1 Tablespoon corn starch

  • 1 teaspoon baking powder

  • 1 cup water

2. Fill a pot with a few inches of the oil of your choice and heat to about 375 degrees. I don’t usually monitor the temperature but test to see when it’s hot enough by dropping a small about of batter in. If it sizzles and turns golden brown, your oil is ready!

3. Dip blossoms in batter. Use a spoon or fork to turn them so they’re fully coated.

4. Carefully place in the hot oil and fry until they’re golden brown.

5. Drain onto a paper towel or rack. Dust with sugar and enjoy them right away.

20190404_134705.jpg
20190404_143642.jpg

One thing the kids always agree on - more powdered sugar is always better!

20190404_143701.jpg
maple blossom fritters recipe(1).jpg
 

Hint: Want to save this recipe for another time? Pin this image so you can find it later! Hover over it (or any photo) and a PInterest button will appear.

The Forest Path - March 2020

What a month, right??! Like schools and businesses across the state, we had to cease our programs mid-month due to Covid-19. We had a ton of fun before that happened and are grateful for the beauty and everlasting wonder the forest provides even - maybe especially - when everything else feels so uncertain. I’m glad for the ability to share some of that with you!

20200305_104526.jpg

One exciting development this month was that Hazel, the little sheep we got in December finally was comfortable enough to come and eat treats from our hand! What finally worked was having a group of super sweet kids visit every week for our homeschool program. They were very patient and calm week after week so it’s no surprise that it’s them who she came to first. After that first show of bravery, it didn’t take long for Hazel to come as eagerly to us as the others. Now we have three fuzzy faces vying for front row access to snacks.

20200303_162948.jpg
20200303_162720.jpg

After a mild December and January I felt pretty confident saying that our little bit of February snow was all we’d have but Oregon keeps us on our toes and this happened in mid-March. It only lasted a day but sure was pretty.

20200314_112326.jpg
oregon forest in the snow
trillium flower in the snow
red tri australian shepherd pricked ears in the snow

Babies arrived! Six chicks came to join us on the farm. The pale yellow one below is a breed called California white. The gray and brown baby is an ameraucana and she may lay green eggs when she grows up. We’ll see! We were really looking forward to having our spring break campers help take care of them - or really just hold them a lot - but we’re hopeful that our summer campers will get to meet them.

california white chick
americauna chick

We spent our last spring homeschool class exploring the creek and it was a beautiful, sunny, splashy, wet day. We were all disappointed to have to say good-bye without our end-of-session party that was scheduled for the next week but it was a great last class nonetheless.

kids playing in a creek
turkey+tail+mushrooms+oregon
kids+forest+school

The forest is awakening from winter and every time we step into the woods there’s something new blooming. It’s such a beautiful time of year!

the first trillium flower

the first trillium flower

salmonberry flower

salmonberry flower

wood violet - they come in yellow too!

wood violet - they come in yellow too!

Bigleaf maple blossoms

Bigleaf maple blossoms

Oregon grape - our state flower!

Oregon grape - our state flower!

Japanese maple leaf buds

Japanese maple leaf buds

shetland ewe with twin lambs

I’ve saved the BEST for last! At the very end of the month, after weeks of thinking “any day now . . .” Hazel gave birth to two healthy lambs! I happened to go out to the barn what was probably just minutes after the first was born. I called the rest of the family and we watched the first take her first steps and the second be born. It was textbook perfect and Hazel is a great mom. She stomps her foot at us and glares when we get too close but we’ve gotten some lamb snuggles and they are curious, bouncing babies. The dark brown/nearly black lamb is a ewe and the brown baby with lighter face markings is a ram lamb. We call them Opal and Eamon and we’ve taken so many photos that I think they deserve their own blog post. I’ll get that up in a few days but for now, here are some cute ones. You can also see more photos and videos on our Facebook page.

shetland sheep ewe lamb
shetland sheep ram lamb

With so many canceled and rescheduled programs, April will be quieter than usual around here. We miss sharing our forest farm with visitors. We know it’s not the same but we’ll continue sharing the forest and the animals with you via Facebook, Instagram, and our newsletter. We are so glad to have ways to stay connected!

The Forest Path - February 2020

20200206_121421.jpg

Signs of spring started to make appearances in the forest this month. We had to have some stinging nettle identification lessons with the kids who come to our homeschool program when we noticed them popping up early in the month. The tiny hairs cause skin irritation and when the plants are so short it can be hard to notice them. Despite that, they are a welcome sight as it’s a sign that spring weather is just around the corner.

The other sign of spring that showed up this month is the indian plum, or osoberry, shrub. It’s always the first plant to put out its new leaves - often when it’s still cold and wintry. The bright green new leaves are such a welcome sight against the backdrop of dark green evergreens.

20200307_191451.jpg
20200213_121740.jpg
20200227_113653.jpg

Near the beginning of the month our little flock of Shetland sheep got their yearly haircut. This is Flint and Serena just before their beautiful woolly fleeces were clipped.

20200207_150743.jpg
20200207_151054.jpg

They seemed pretty happy with their new haircuts! It’s always fun to see their real colors once the dirty wool is off of them. Flint is white, Serena is light gray, and Hazel is a light brown color called moorit.

20200207_152701.jpg
20200208_145726.jpg
20200208_145903.jpg
20200208_145905.jpg

I’m so excited to wash and spin their beautiful wool into yarn! The crinkly french-fry-looking wool is from Hazel and the long lock is from Flint. He has the longest wool of any of our sheep. They all have some hay in their fleeces but it will come out when we wash and card it.

20200210_100423.jpg
20200207_152347.jpg

Another highlight of the month was holding an indigo dyeing workshop! It was a full day of creative fun and the participants made the most beautiful blue designs! The weather cooperated and it was sunny and beautiful - perfect for dyeing outside. It was a great first workshop of the year and I can’t wait for the upcoming workshops that are scheduled this spring!

New to the shop this month was a new batch of naturally dyed cotton baskets. Even the pom poms and wool tabs are dyed with plant dyes. They’re the perfect addition to any home and can be used for virtually anything - even as an Easter basket!

The Forest Path - January 2020

We had just a bit of snow this month. It has been the only snow all winter, which was a welcome change after last year’s snowstorms that lasted through March. A dusting of snow sure made the forest pretty, though. Our sheep weren’t too sure about the show and Serena, the one with the black face, didn’t even want to come out of the shelter.

20200114_100216.jpg
shetland+sheep+in+the+snow.jpg
ag gray shetland+sheep.jpg

Winter days make for the perfect time to spend time indoors in the studio, creating beautiful colors! This is cochineal dye (comes from insect shells!) that makes a range of pink colors. This is some cotton rope being dyed that will ultimately become baskets.

cochineal dye.jpg
cochineal dye on cotton.jpg

Indigo dye is a bubbling, living science experiment. By dipping fiber in the dye multiple times, beautiful variegated shades of blue appear.

indigo dye vat flower.jpg
sewing cotton rope basket.jpg

Nearly finished baskets headed to Cedar Dell’s online shop.

cotton rope baskets indigo dyed.jpg

The winter session of our Homeschool Program started up this month with a wet first week. A little rain doesn’t stop us from spending lots of time in the lush, green forest! The rain is what makes it so beautiful here all year long. Even though we had a bit of snow, the weather has overall been pretty mild this winter so the forest is still full of mushrooms. The kids love to find new shapes and colors in the forest, and mushrooms make fun additions to fairy houses and other make-believe play.

forest school oregon.jpg
winter mushrooms oregon
coral mushroom in the winter
conk+mushroom+oregon
little mushrooms oregon

A bird skull we discovered in the forest.

bird skull

Lichen is the lace of the woods.

parmelia lichen oregon forest

We can’t wait to see what February has in store for our farm and forest!

Naturally Dyed Easter Eggs

Naturally Dyed Easter Eggs

Natural Dyes aren’t just for fabric! Easter is the perfect time to create some beautiful colors and natural designs on eggs. We dyed leaf printed eggs at our weekly homeschool class yesterday and they turned out so beautifully! It was an easy process that boiled and dyed the eggs at the same time.

We used onion skins and turmeric with the kids and today I dyed a few more with beets. Here’s how we did it!

Read More